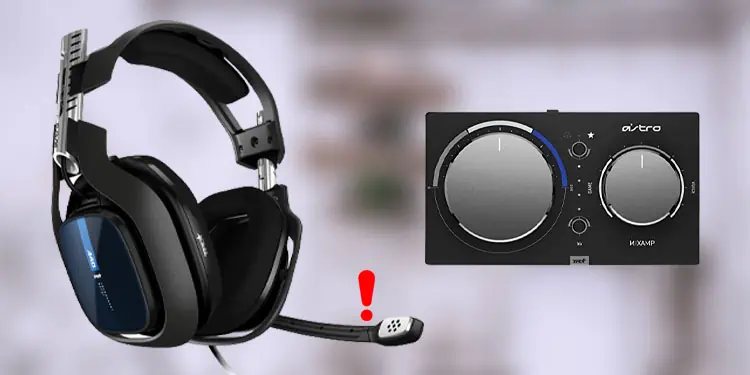
Astro A40, due to its sound quality and compatibility for both console and PCs, is becoming an ideal choice for both audiophiles and gamers. With popularity comes some of criticism — users across various forums have reported that it’s microphone has randomly stopped working or not work at all.
Usually, a microphone stops working if the system, does not detect it or uses a different microphone as an input source. We can also not rule out the possibility of a hardware failure. Despite various ranges of problems, a simple restart or enabling the device from the system console usually fixes the issue.
Why is My Astro A40 Mic Not Working?
Astro A40 comes with a MixAmp that you need to set according to the system it connects to. You must set the MixAmp to PC if you are using a PC. And you must set it to the respective console if you use XBOX or PlayStation. The headphone and microphone will not work if you have set the wrong system.
- Mic disabled from the companion application
- Faulty headphone components
- The microphone cable from the front panel is not connected to the right header
- PC using a different microphone
- Outdated audio driver
- Low mic input volume
- Faulty MixAmp
How to Fix Astro A40 Mic Not Working?
Before we jump into the solution, we recommend you perform generic solutions first. These solutions include reconnecting Astro A40 to the system or using the device on a different system. If the headphone does not work even when connected to a different system, the issue is likely with the device or its firmware.
However, if the device works on a different PC, There is a high chance that some system setting is causing the malfunction.
Check Astro Command Center
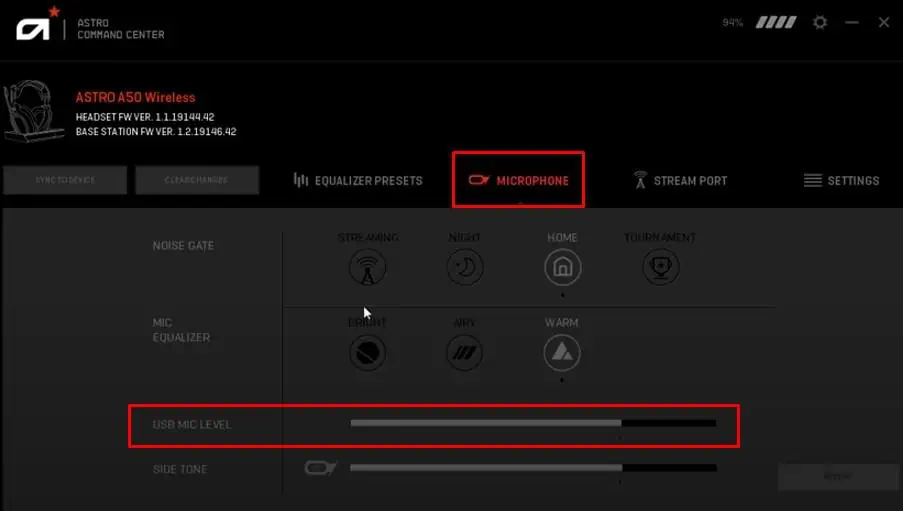
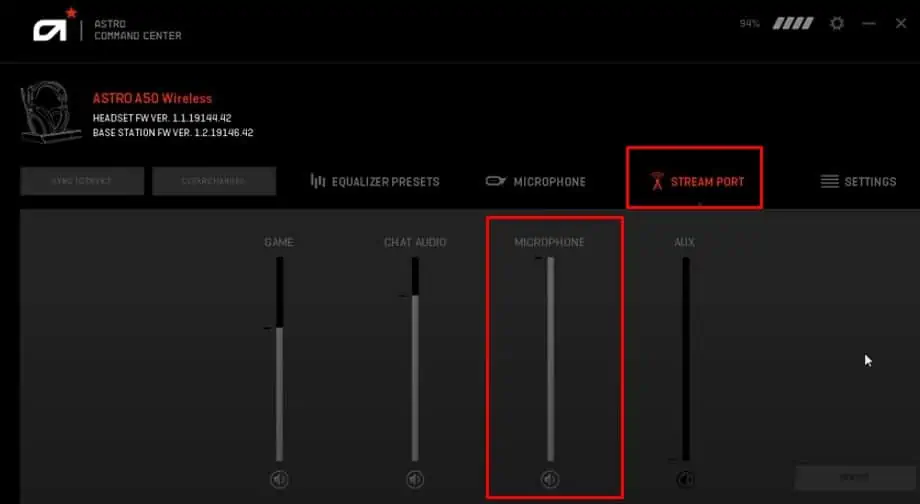
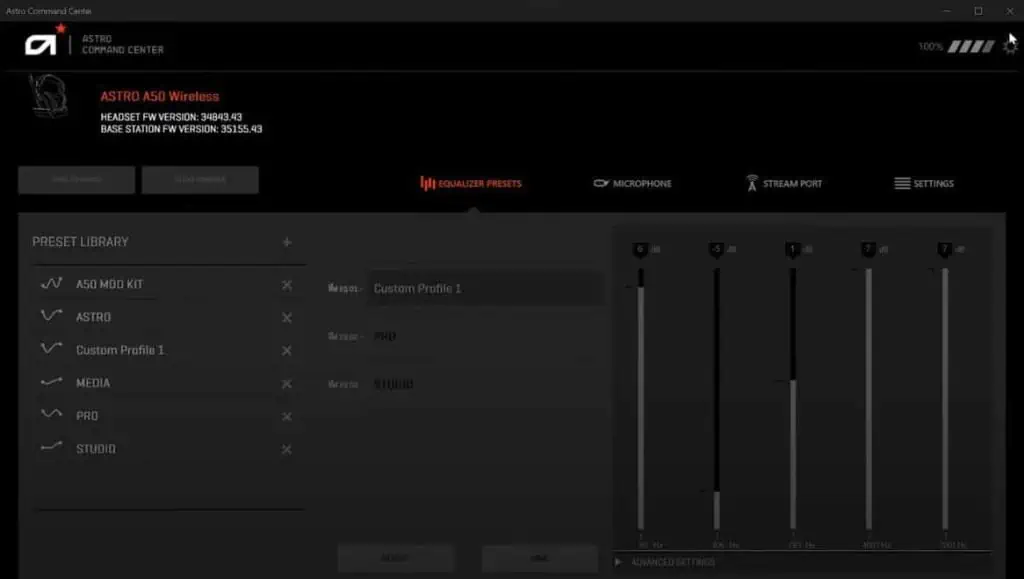
The companion application for Astro A40 is the Astro Command Center. This application allows you to set customizable equalization settings, create profiles, and set USB mic levels. You will not get voice input from the mic if the microphone’s USB mic level in Astro Command Center is low. In this case, you will need to set the mic level so that the mic starts taking input.
- Open Astro Command Center.
- Go to the Microphone tab.
- Make sure that the USB Mic Level is not low.

- Now, go to the Stream Port tab.
- Here, again make sure that the microphone scroll bar is not low.

- Save your settings and check if the microphone works.
Update Astro Command Center
Outdated Astro Command Center may be why you are getting the Astro A40 not working issue. Sometimes, errors and bugs in the application may be stopping the PC from detecting Astro A40. In that case, you can try updating the application. Updating Astro Command Center may fix errors, stopping the mic from working.
- Open Astro Command Center.

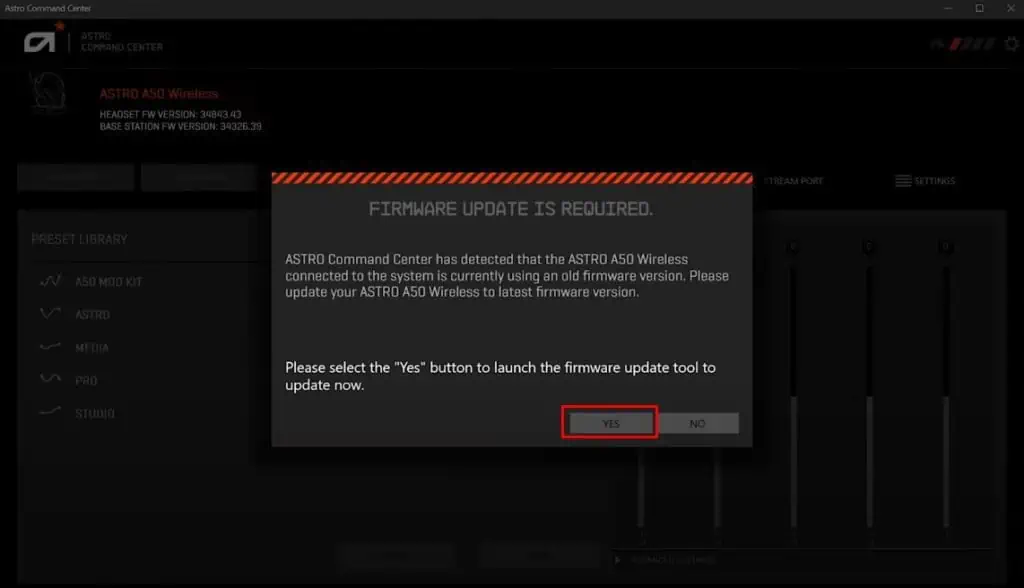
- The application will automatically detect a new version of Astro Command Center if available. In that case, you can simply click on Yes to update Astro Command Center.

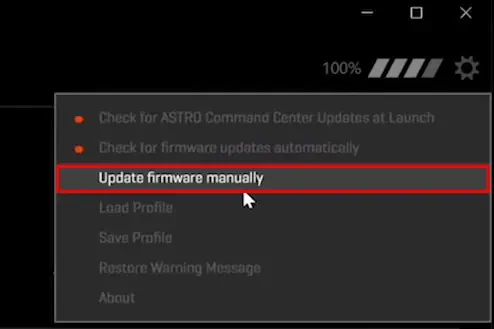
- If you want to check for updates manually, press the gear icon on the top right corner and select Update firmware manually.

Check the MixAmp
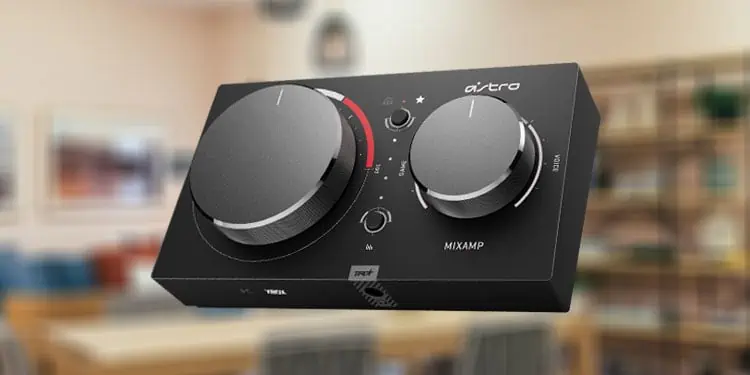
MixAmp is a separate device that comes with Astro A40 TR. You connect the headphone to the MixAmp and the MixAmp to the system, PC, XBOX, or PlayStation. It also offers manual volume control, a built-in preset equalization profile, a mixer etc to make your sound better. If these configurations are incorrect, the system may not detect any input.
You need to set settings correctly for device selection and voice volume. Make sure you select the correct device, PC, PS, or XBOX, on the MixAmp. You can also check if the microphone is muted on the A40 by checking the LED light on the volume adjuster. If muted, this LED will turn red.
Connect headphones Directly to the PC
The issue may also occur due to a faulty or damaged MixAmp. If you see that the LED on the MixAmp does not turn on, there is a chance that the controller itself is faulty. You can check if this is true by checking if the headphone works without MixAmp.
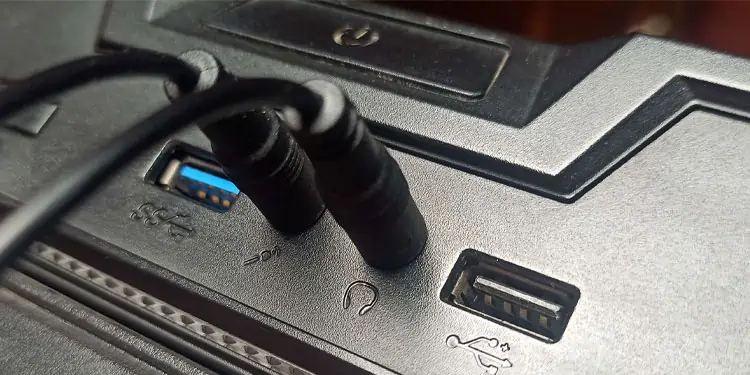
Connect your headphone directly to an audio port in your system. If you are on a PC, connect it to a 3.5 mm port on the front side of the case. If you are on an XBOX or PS, connect the headphone directly to the controller or console.
Connect Headphone to I/O port
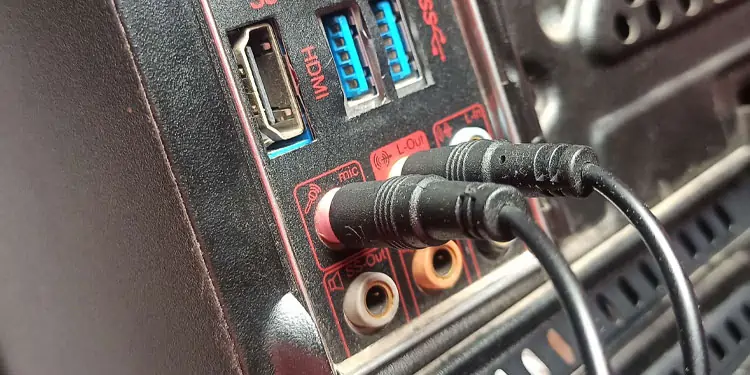
If you are using a PC and connecting the headphone on the front of the case does not work, try using the audio port on the I/O panel. The audio port on the front of the case needs to be connected to the motherboard’s front panel header. These connectors are easy to insert incorrectly. In that case, the audio port on the front of the PC case may not work.
To check this, connect the headphone directly to the I/O panel on your motherboard. The I/O panel is usually on the PC case’s backside. Connect the 3.5 mm male port to the 3.5 mm female port on the motherboard.
Use a Different Microphone Port
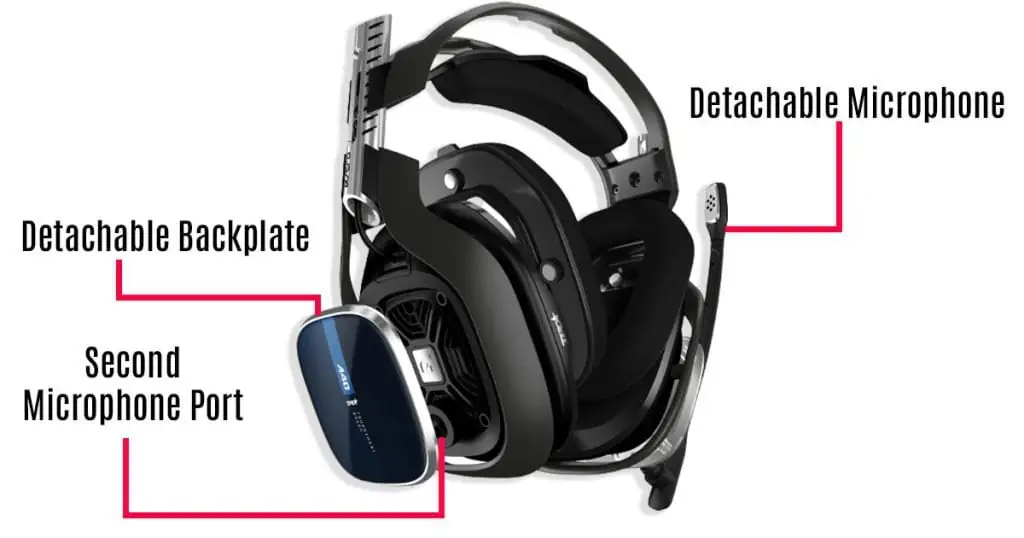
One special feature of the Astro A40 is the ability to switch the microphone position. You can remove the backplate on either cup of the headphone to access the two microphone ports. If one port does not work, you can switch the mic port to see if it fixes the issue.
- Remove the detachable mic from the headphone.
- Remove the backplate on both cups of the headphone. These backplates are magnetic, and hence you can remove them without applying much force.
- Switch the two backplates and reinsert them.
- Now, insert the detachable mic into the second mic port.
- Connect the headphone directly to the I/O port and check if the mic works.
Set Default Recording Device
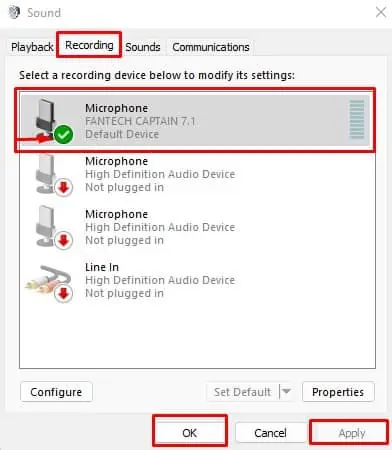
When your system is connected to multiple audio input devices, the OS uses the one device that is the default. If you have connected multiple microphones and you cannot record audio using one of the microphones, you need to set a default recording device to use the microphone you want.
- Press the Windows + R key, type
control mmsys.cpl sounds, and press Enter toopen Sound settings. - Go to the Recording tab. Here, you will see all the devices connected to the system.
- Select the mic you want to use and select Set Default. The default device will have a green tick on its icon.

- Click Apply, then OK.
Set Microphone Volume Level
The microphone sound level amplifies or attenuates the audio that the microphone receives. This might seem simple, microphone will not record anything if it’s volume is low or zero .
- Press the Windows + R key to open Run.
- Type
control mmsys.cpl sounds, and press Enter to open Sound. - Go to the Recording tab.
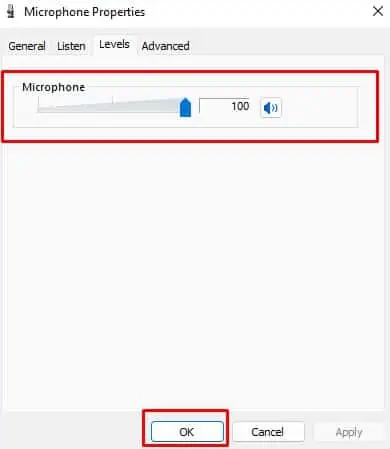
- Double-click on the default microphone. The default microphone will have a green tick on the icon.

- Go to the Levels tab and set the microphone volume to 100.

Update Microphone Driver
A device driver is responsible for smooth and fluent communication between the device and the Operating System. Having a corrupted driver or an out-of-date driver may cause a variety of bugs. And therefore, these components may not work properly.
In this case, your PC’s microphone driver should also be up-to-date so that the OS can access and use the microphone efficiently. To do this, we recommend that you update the necessary drivers.
- Press the Windows + X key and select Device Manager.
- Expand Audio input and outputs.
- Double click on Microphone.

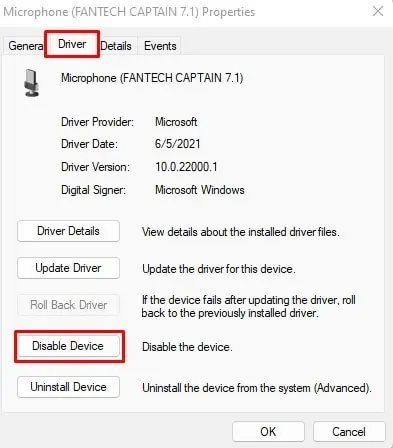
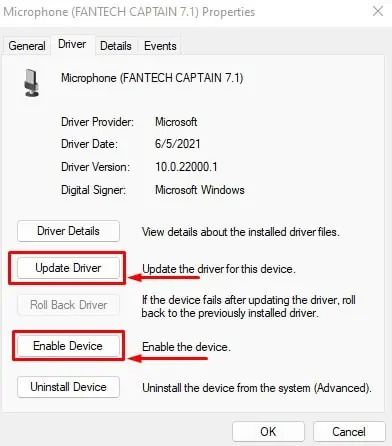
- Go to the Drivers tab and select Disable Device.

- Now, Enable the Device and select the Update driver option.

- Click on Search automatically for drivers.
- Restart your PC once the update process is complete.
Check for Hardware Issue
If none of the solutions work, the issue you face is probably with your model of Astro A40. Make sure that the headphone does not have any physical damage. If the headphone did recently suffer from damages, we recommend that you contact the official Astrogaming support page.

