
The CMOS (Complementary Metal Oxide Semiconductor) battery powers the CMOS chip when a PC turns off. This chip holds BIOS information and settings. So, if we ever need to reset the BIOS setting, we can remove the CMOS battery.
Removing the CMOS battery is quite simple. However, locating them can be quite difficult, especially for beginner PC builders.
In this article, we are here to show you how to identify and remove them.
But first, let us see why we need to remove a CMOS battery.
Why Do We Need to Remove the CMOS Battery?
Removing the CMOS battery will reset all the BIOS settings to default. So, if we have a PC that does not boot due to an error in the BIOS setting, we can try removing the CMOS battery to fix the issue.
Another reason we need to remove the CMOS battery is, that it is dead. The computer’s BIOS will keep resetting every time you turn off the computer when you have a dead CMOS battery.
How to Remove the CMOS Battery?
Removing the CMOS battery is fairly simple as you just need to press a small metallic lever that pops it out. However, novice PC builders may have issues locating the CMOS as its location in the motherboard will vary according to the manufacturer.
We have mentioned the following steps to make the process of removing the CMOS battery simple. Please follow them one after the other.
Before starting, follow these steps to discharge the motherboard.
- Turn off the system and remove the cable from the wall outlet that connects to the computer.
- Press the power button four to five times to discharge any capacitors on your motherboard.
Now, follow these processes to remove the CMOS battery.
Remove the Side Panel
We first need to access the motherboard by removing the side panel. Please follow these steps to remove the side panel.
- Remove all the screws on its back or side. Most motherboards have a removable side panel on the left side of the CPU case.

- Gently slide the panel out of the CPU case.
- Now you can also see the graphics card, processor, RAM, and PSU (Power Supply Unit).

Locating the CMOS Battery
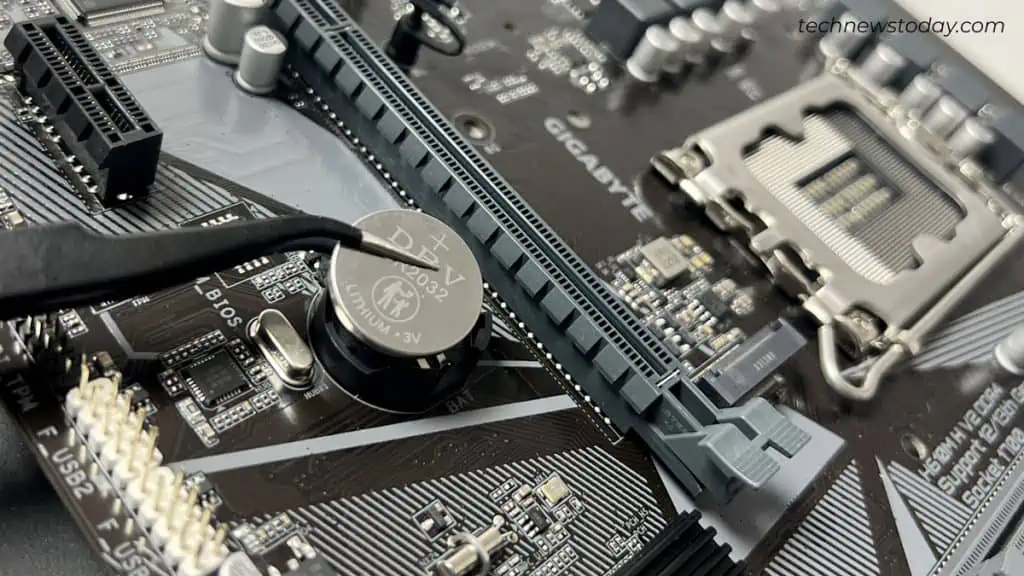
The physical structure of the CMOS battery is like a watch battery, flat and cylindrical, just like a coin.
To locate them, analyze the motherboard for a component that looks like a silver coin, to be specific.
For ATX Boards
For medium to large motherboards, check around the PCIe express or the DIMM slots (RAM slots), as these chips are generally located around these areas.

There is only one flat-circular component in the motherboard, so it is hard to miss.
Once located, check the sign on the top of the battery. It should have a + sign.
We should remember this, inserting the CMOS battery incorrectly will not work. Therefore, the BIOS will keep resetting every time you turn off the computer.
For Mini-ITX
For smaller motherboards such as the mini-ITX, check the board for colored insulating plastic wrap. This plastic wraps the CMOS battery.

This colored plastic can be black, yellow, red, blue or any insulating plastic.
If there are some issues with locating the CMOS battery, you can always refer to the motherboard’s user manual.
Removing the CMOS Battery
Depending on your motherboard size, follow the steps correspondingly.
For ATX motherboard
For larger motherboards that have a separate slot for the CMOS battery, follow these steps to remove the CMOS.
- Remove the CMOS battery by pressing the lock on the CMOS battery slot on the motherboard.
- The battery will easily pop out once you push it to the side.

If you have trouble using the lock, using a small thin pin to remove the CMOS battery is a viable option as well. However, make sure that this pin is non-conductive, like a toothpick.
For Mini-ITX

On a smaller motherboard, a wire is attached to the CMOS battery. Simply detach the cable that connects the CMOS battery to the motherboard.
However, before disconnecting this cable, check its header to see how it connects to the motherboard. This is done so that you can easily reinsert the CMOS back into the motherboard.
How to Reinsert CMOS Battery?
To reinsert the CMOS battery, make sure that the positive (+) sign on the battery faces up.

Now, insert the CMOS battery into the CMOS slot by gently pressing it. You will hear it click if it is secured.