
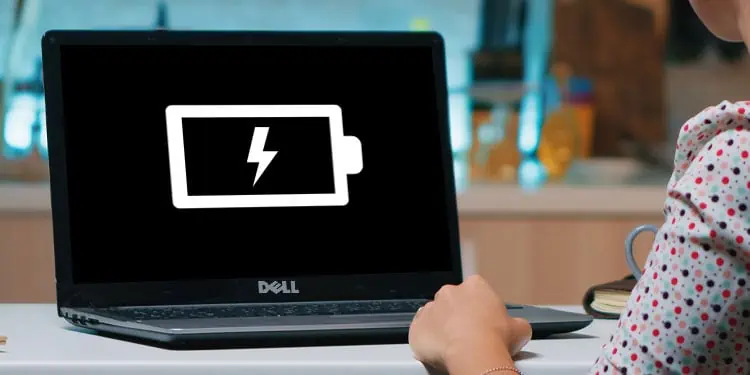
Even if you have one of the top-of-the-line laptops as the Dell XPS, they only function for a couple of hours without a charger. So it is definitely a cause for concern when your charger stops working.
Several components need to function simultaneously to charge the laptop when you plug it in. These components include the charger, the battery itself, and the charging port. Even if these components are functional, an outdated battery driver or the BIOS could stop the battery from charging.
Due to all possible components failure, it can get quite troublesome to find one particular solution to fix the charging issue on your Dell XPS.
Before We Begin
First, make sure that the charging port on both ends, the laptop and wall socket, are functional. Try disconnecting and reconnecting the charger from both laptop’s charging port and the wall outlet.
The charger brick or the adapter may also be at fault. Some laptop chargers will have an LED on the charger’s brick. Check if it light ups. If it does not light up, the brick is likely causing the charging issue.

The LED located on the side of the charging port should also light up when the laptop starts to charge. If your OS does not indicate battery level on the action bar you can also check the charging LED.
Check if the charger has any noticeable physical damage. Physical damages may include broken or exposed wires. We also recommend that you check the laptop’s charging port to ensure that the port does not have any visible damage to it.
The laptop’s AC charger also needs to have the correct voltage for it to charge the laptop. To make sure that the AC adapter you are using supplies the correct amount of voltage, you can check the recommended laptop’s voltage.
- Check the base of the laptop for stickers from the manufacturer.
- Here, you should see the recommended voltage for the laptop.

- If your laptop does not have a voltage recommendation, we recommend that you check the laptop’s user manual.
- The recommended voltage should match the voltage supplied by the AC adapter.

Once you are certain that the issue is not with a loose cable, damage to the component, or the charging port, you can try to power cycle the laptop to see if it fixes the issue.
Power Cycle the Laptop
The motherboard on your laptop has multiple capacitors that store charge. When you turn off the laptop the capacitors may still hold a charge. To make sure there is no residual charge on the capacitor, you need to power cycle the laptop to give the charging component a fresh start.
To discharge the capacitors, you first need to remove any power source from the laptop. This includes the charger and the battery.

If you are using an older XPS model, the laptop should have a detachable battery. In that case, you can simply slide the battery out of the laptop.
For the newer XPS mode, you need to remove the back panel to access the batteries.
- Disconnect the charger from the laptop.
- Remove all the screws on the back side of your Dell XPS.
- Insert one end of the pry tool between the laptop and the backplate.
- Slightly turn the tool until you hear a click to unclip the backplate from the laptop. Repeat this process all around the backplate.
- Once you unclip the laptop’s backplate, gently remove it.
- Now, you will have access to the entire laptop battery.
- Check for a cable that connects the battery to the laptop’s motherboard and disconnect it.


Once you have removed the battery, it is now time to discharge the capacitors.
- Gently open the laptop’s lid.
- Press and hold the power button for one minute to discharge the laptop.
- Connect the battery cable back to the laptop’s motherboard.
- Clip all sides of the backplate back to the laptop and screw it in.
- Connect the charger to the laptop and see if it starts charging.

Turn On the Laptop Without Batteries
Discharging the capacitors may not fix the issue at hand if you have a dead battery or a broken charger. To determine the exact cause of the problem, you can try turning on the system without the battery.
- Remove the AC source from the laptop.
- Disconnect the battery connected to the laptop.
- Discharge the capacitors on the laptop.
- Plug the charger directly into a wall outlet and connect the charger to your laptop.

If the XPS turns on, the problem is likely with the batteries, and replacing it would be the best course of action.
Run Power Troubleshooter
The Power troubleshooter checks the power issues on your laptop and changes settings that could result in lowering power consumption. It also helps identify and fix any problem with the laptop’s battery.
Try running the power troubleshooter to see if it fixes the charging issue on your laptop.
- Open Windows Settings by pressing the Windows + I key simultaneously.
- Navigate to System > Troubleshoot.
- Select Other troubleshooters.
- Run the Power Troubleshooter.


Change Dell Power Manager Configurations
Dell power manager allows Dell laptop users to access several power management settings. These include battery health, charge status, and battery settings. It also allows you to schedule when the laptop charges.
Besides this, you can also start and stop the AC supply to the laptop depending on the amount of charge left on your laptop. When enabled, the laptop only starts to charge after it falls below a certain percentage. If you have these settings enabled, the laptop will not charge unless certain criteria are met.
To ensure that this is not the case, disable Dell Power Manager.
- Press the Windows key and click on All apps.
- Select Dell Power Manager.
- On the left panel click on Advanced Charge and disable it.
- Similarly, select Peak shift and disable it.
- Check the action bar to see if the laptop starts charging.


Check Laptop Batteries Health
Dell computer allows you to check your laptop battery health using BIOS. A healthy battery should have a Health indication that says Excellent or OK. If the Health says Poor, you should consider replacing the batteries and it could be why the laptop is not charging.
- Repeatedly press the F2 key during boot to enter BIOS on Dell computers.
- Under Settings, click on the + icon on General.
- Click on Battery Information.
- On the right panel, check the battery’s health.

Alternatively, you can also check the battery’s health using the command prompt.
- Simultaneously press Windows + R to open Run.
- Type
cmdand press Enter. - Type
powercfg /batteryreportand hit enter to save the battery life report to a certain file. - Copy the file path from the command prompt and paste it into the file path in File Explorer.
- Open the
.htmlfile using any browser to see your battery’s health.


Here, check Full Charge Capacity and Designed Capacity. If the current full charge capacity is lower than the laptop’s designed capacity, the battery on your Dell XPS is failing. In that case, you should replace the battery to fix the issue.
Update/Reinstall Battery Driver
The battery connected to the laptop may not function properly if the battery driver has issues. Furthermore, an outdated driver may face multiple complications when communicating with the OS. The battery driver is also responsible for the battery icon you see on the action menu.
Any issues with the battery driver could be why your Dell XPS is not charging. To fix this, try updating the driver.
- Press the Windows icon and the X key simultaneously.
- Select Device manager.
- Expand Batteries and double-click on Microsoft ACPI-Compliant Control Method Battery.
- Go to the Driver tab and select Update driver.
- Click on Search for drivers automatically.

If updating the Microsoft ACPI-Compliant Control Method Battery driver does not work try reinstalling the driver entirely.
- In Device Manager, expand Batteries and open Microsoft ACPI-Compliant Control Method Battery.
- Go to the Driver tab and press Uninstall Device. Once the process completes, the battery indicator will disappear.
- Restart your PC to install the battery driver.
