If the Wi-Fi is not working on your Surface laptop, it could either mean that the Wi-Fi does not have internet access or the laptop is not connected to any Wi-Fi networks. Windows displays a no-internet or globe icon on the system tray when the Wi-Fi on the Surface laptop does not work.
In order for your system to connect to a router and access the internet, several networking components must function—it includes the router, the network adapter, and all its respective drivers. However, even if all these component works, the network settings must be configured correctly. As such, we will discuss all the possible ways to get Wi-Fi up and running on your Surface laptop.
Some Basic Fixes
- Power cycle both the Surface laptop and router.
- You can start by checking if the Wi-Fi works on another device. If you can access the internet on the second device, the issue is with your Surface Laptop. If not, the issue is likely with the router.
- If your laptop connects to the Wi-Fi, but cannot access the internet it is possible that you have a loose connection on the WAN port or issues on the ISP end. To confirm that check the LED lights on the router, especially the WAN(or Internet) LED. If it is blinking properly, you have an internet connection.
- You can also try moving closer to the router. Physical obstacles such as walls and furniture could cause network interference and restrict you from connecting to Wi-Fi.
Run Network Troubleshooter
Running the Troubleshooter utility in Windows scans your system for possible errors. Once the system finds the problem, it suggests you change specific windows settings which should fix the issue you are currently facing.
- Press the Windows and I key simultaneously to open Windows Settings.
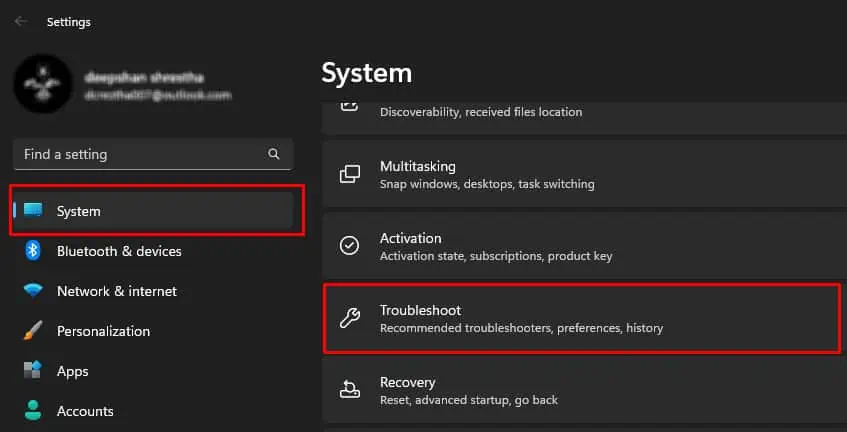
- On the left panel of Settings, go to System.
- Now on the right panel, scroll down and click on Troubleshoot.

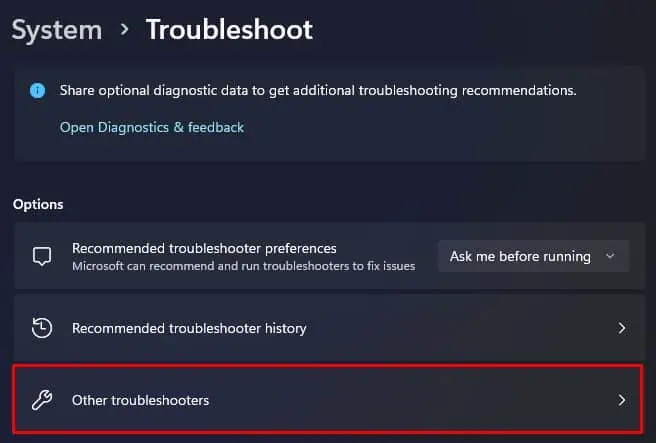
- Select Other troubleshooters.

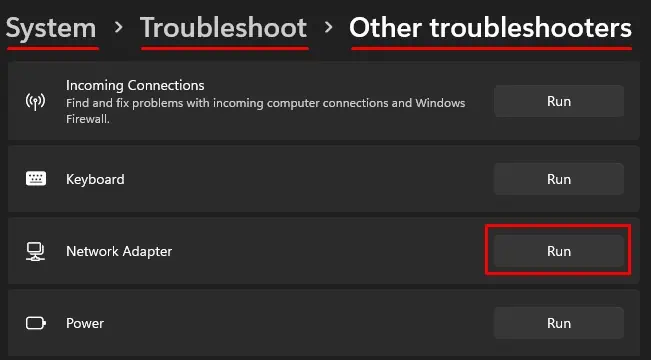
- Now, run the Network Adapter Troubleshooter and wait for the troubleshooting process to complete.

- The troubleshooter will scan the system for possible issues with the Network Adapter and recommend some settings to fix said issues.
Enable/Disable Wireless Adapter
Sometimes, the wireless adapter in your motherboard may not work properly. Insufficient physical memory, a laggy system, or a network driver unable to initialize functions could stop the adapter from functioning.
Disabling and re-enabling the wireless adapter will restart the component which should fix the issue with your Wi-Fi.
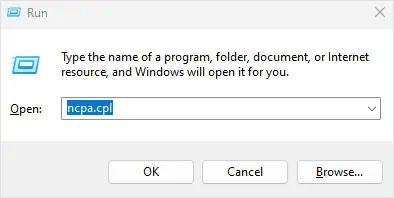
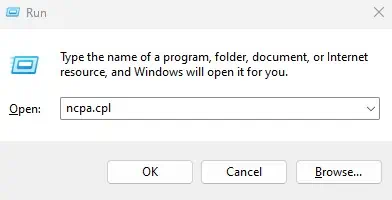
- Open Run by pressing the Windows + R key simultaneously.
- Type
ncpa.cpland press Enter.
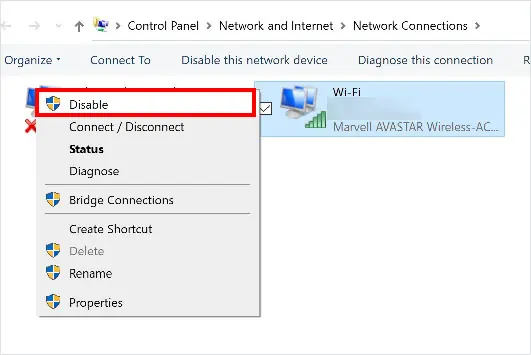
- Right-click on Wi-Fi and select Disable.

- Wait a few minutes, then enable the device again.
Alternatively, you can also use the Device Manager to disable the Wi-Fi Adapter.
- Right-click on the Windows icon and open Device Manager.
- Double-click on Network adapters to expand it.
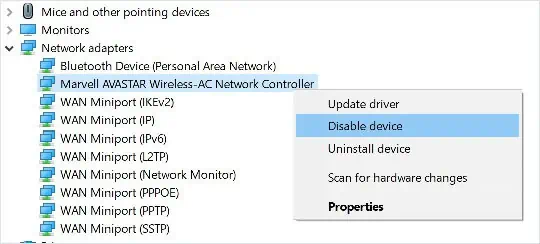
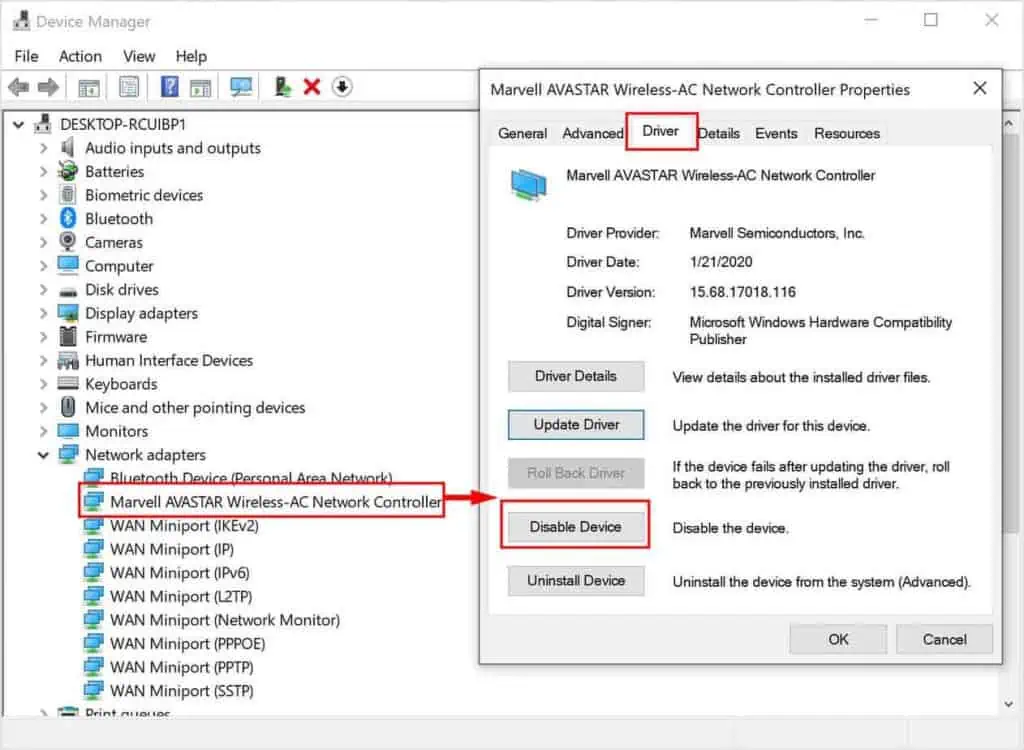
- Right-click on the Wireless Network Controller.
- Select Disable device.

- Wait a few minutes and then enable the device again.
Whitelist MAC Address
If restarting the wireless adapter does not work, you can check router settings to see if your Network Interface Controller’s (NIC) MAC address is blacklisted. Checking the MAC address filter in the router can be a lengthy process. You can refer to our article on MAC address filtering for a step-by-step guide on whitelisting a MAC address.
Check Network Services
Several network-related services need to be running for you to access the internet. You can check if all the services are running.
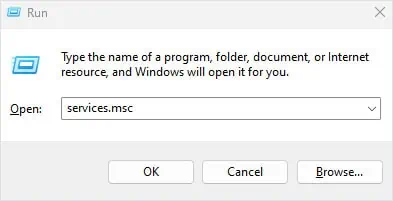
- Open Run.
- Type
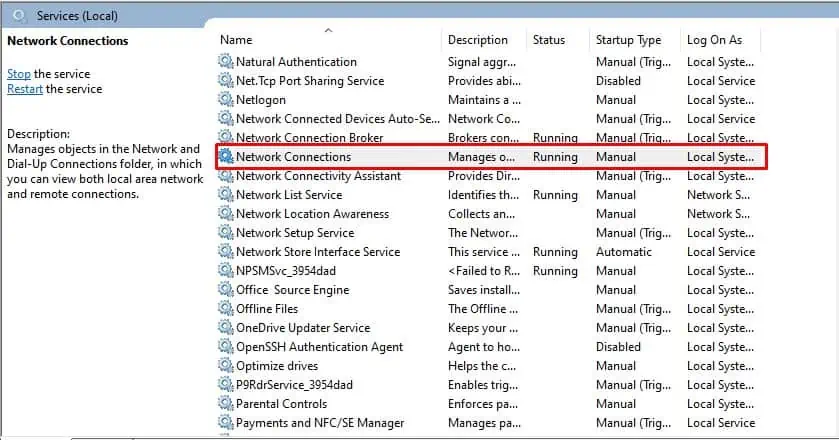
services.mscand press Enter. Here, you will see all Windows Services.
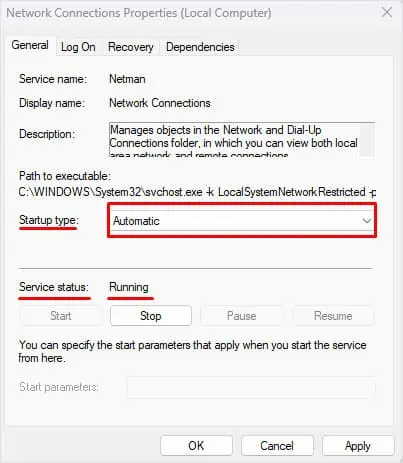
- Double-click on the Network Connections.

- Make sure that the Startup type is not Disabled and the Service status is Running.

- If it is not running, click on Start.
- Click Apply and then OK.
Similarly, check if all the services mentioned below are running.
- DHCP Client
- COM+ Event System
- DNS Client
- Remote Procedure Call (RPC)
- WLAN AutoConfig
- Workstation
Reset TCP/IP Stack
Resetting the TCP/IP (Transmission Control Protocol/Internet Protocol) stack clears the resources allocated to the connection and all the network configurations will be set to default. If incorrect network configuration is stopping the Wi-Fi from working, you can try resetting the TCP/IP stack.
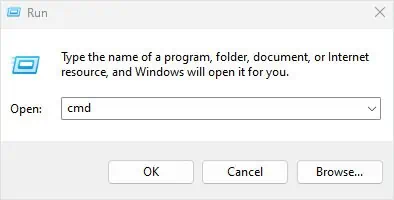
- Open Run, and type
cmd.
- Now, press Ctrl + Shift + Enter. This will open the Command prompt as an Administrator.
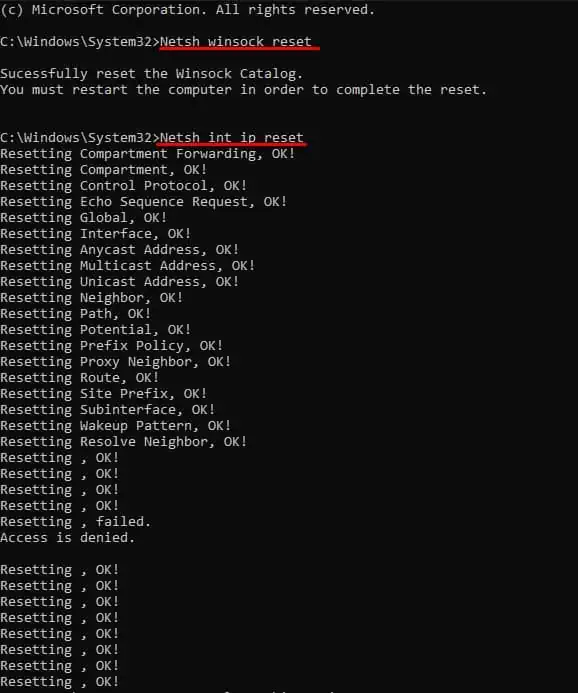
- Now type the following command and press Enter after each command.
Netsh winsock reset: Resets network request handling componentNetsh int ip reset: Resets registry values related to TCP service
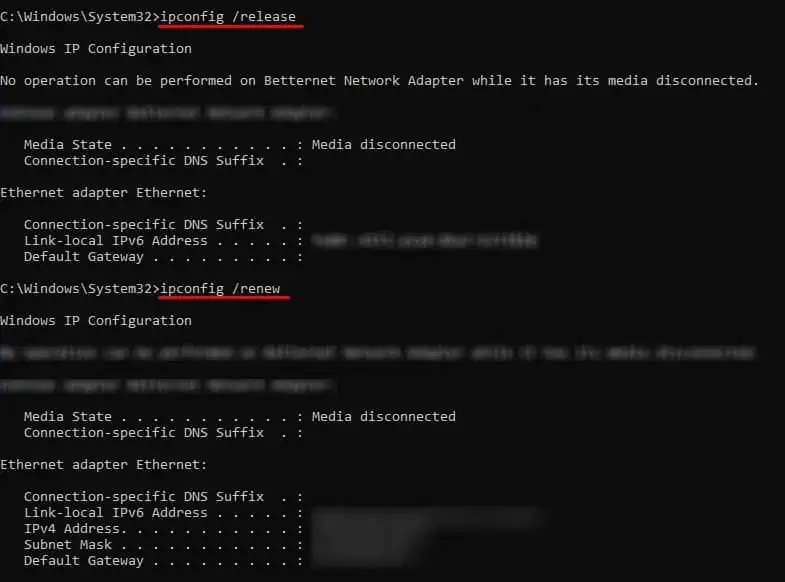
ipconfig /release: it clears all network adapter configurationsipconfig /renew: renews networking configuration
- Restart your system.
Use Static IP Address
When a device connects to the router, the DHCP server provides an IP address. The device then uses this address to communicate with the router and access the internet. However, network connection issues or errors in the DHCP server could result in the router assigning an incorrect IP address. In such cases, you need to assign an IP address manually.
- Open Run and type
cmd.
- Press Ctrl + Shift + Enter to open Command Prompt as Admin.
- Type
ipconfigand then press Enter. - Here, note the Default Gateway, IPv4 Address and Subnet mask.

- Now, open Run, type
ncpa.cpland press Enter.
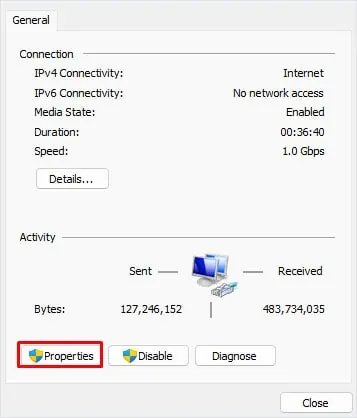
- Double-click on Wi-Fi. This will open its properties.
- Click on Properties.

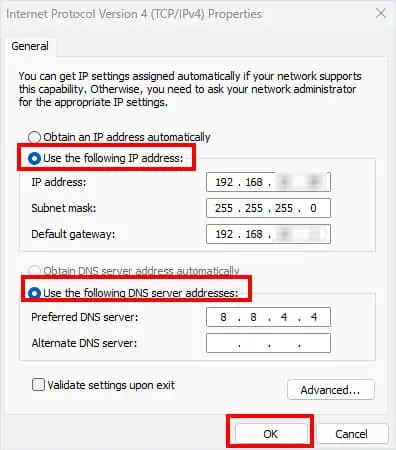
- Under This connection uses the following items:, double click on Internet Protocol Version 4.

- Check Use the following IP address.
- Here, use the Default Gateway and Subnet mask from step 4.
- The IP address depends on your router’s address or the Default Gateway. For example, if the default gateway is 192.168.1.49, you can use the IPv4 address 192.168.1.X Replace X with any number between 1 and 253 except 49 (router’s address).

- Finally set the Preferred DNS Server as 8.8.8.8 and the Alternate DNS server as 8.8.4.4.
- Click on OK and try using the Wi-Fi.
Enable Wi-Fi from UEFI
In a Surface laptop, you can also access the UEFI firmware settings to enable and disable the entire component. If the Wi-Fi is disabled from the UEFI settings, you cannot access Wi-Fi in Windows.
To enable Wi-Fi in surface UEFI,
- Turn off the Laptop.
- Press and hold the volume-up key.
- Now, press and release the power button.
- Once you see the Surface or the Microsoft icon, release the volume-up key. You should boot into UEFI. If that does not work, you need to release the volume-up key after you are in the UEFI firmware settings.
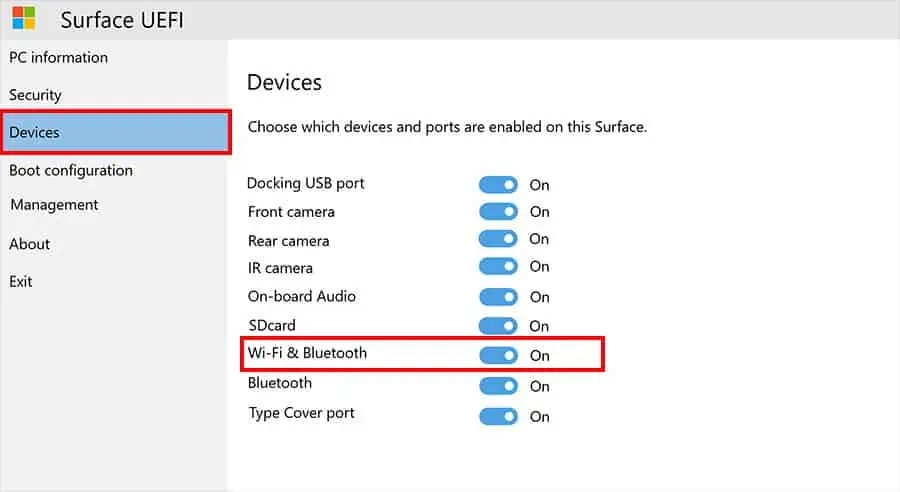
- On the left panel, go to Devices.
- Now, on the right panel, make sure that Wi-Fi & Bluetooth is On.

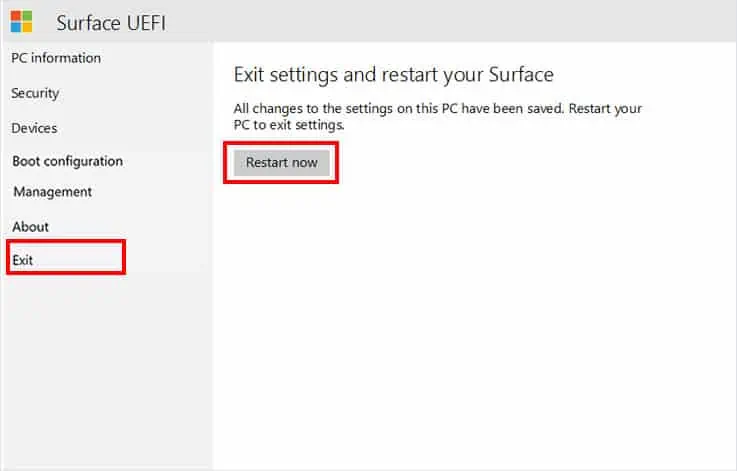
- Go to Exit on the left panel and select Restart now.

- Once the system restarts, check if the Wi-Fi works.
Update/Re-install Network Drivers
Corrupted drivers or outdated network adapter drivers may run into several issues with the Operating system. This might result in issues such as the one you are currently facing. If you do not see any optional updates, you can try updating the Network driver manually from Device Manager.
- On the desktop, right-click on the Windows icon and select Device Manager.
- Expand Network Adapter.
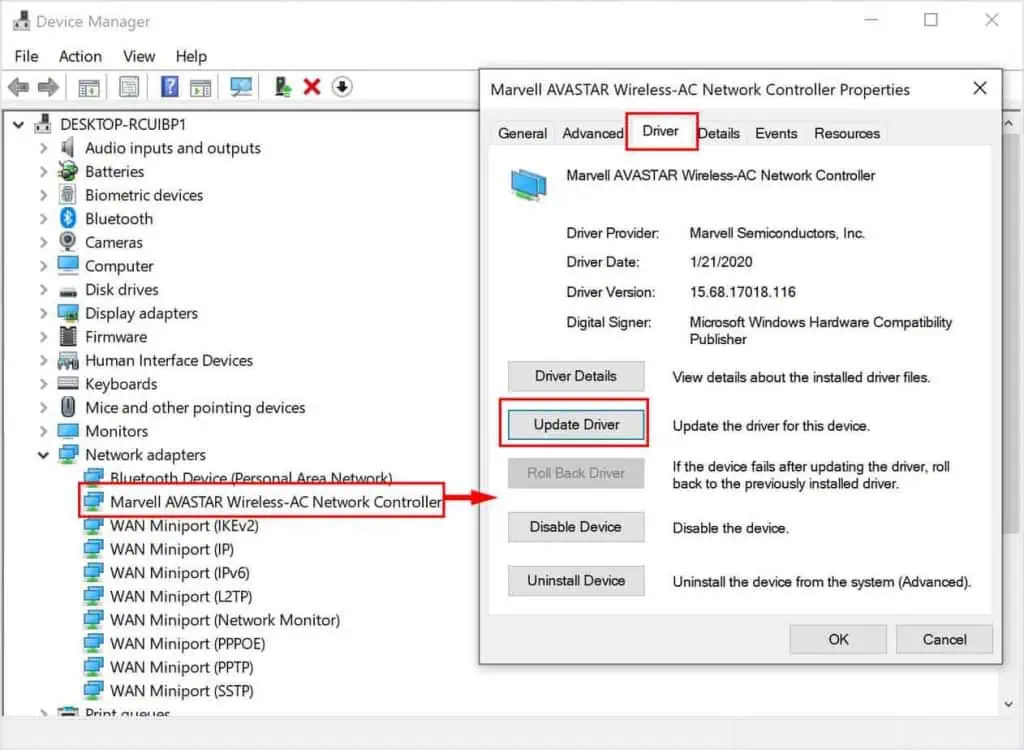
- Double-click on Wireless Network Controller to open its Properties.
- Go to the Driver tab and select the Update driver.

- Click on Search automatically for drivers.
- Restart your computer once the driver update is complete.
If updating the driver does not work, it could be that a corrupted driver is causing the issue. You need to uninstall and reinstall network drivers.
- Open the Wireless Network Controller properties in Device Manager.
- Go to the Driver tab and click on Uninstall Device.

- Click on Uninstall.
- To reinstall, restart your system. The OS will automatically reinstall the necessary drivers.
Update Windows
Microsoft brings several updates to your current version of Windows. These updates might bring new features, security upgrades, or simple bug fixes. If the issue is due to bugs in Windows, updating your versions of Windows to the latest version should fix the Wi-Fi.
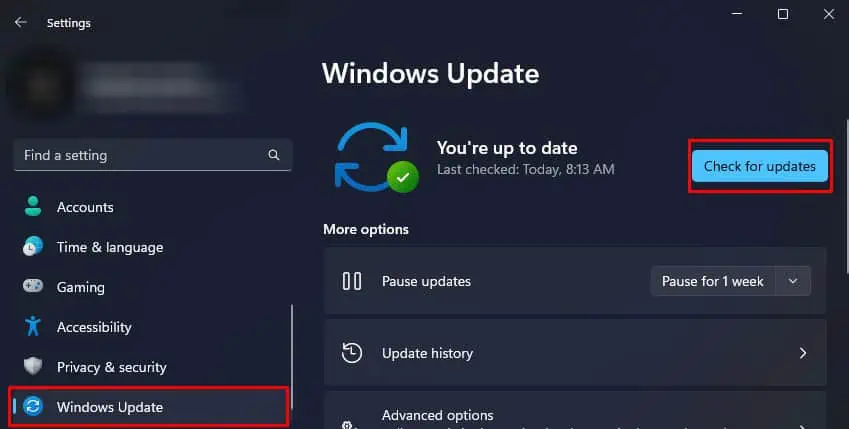
- Open Windows Settings.
- Go to Windows Update.
- Click on Download and install Updates or Check for updates.

- Once the download is complete, restart your system to install pending updates
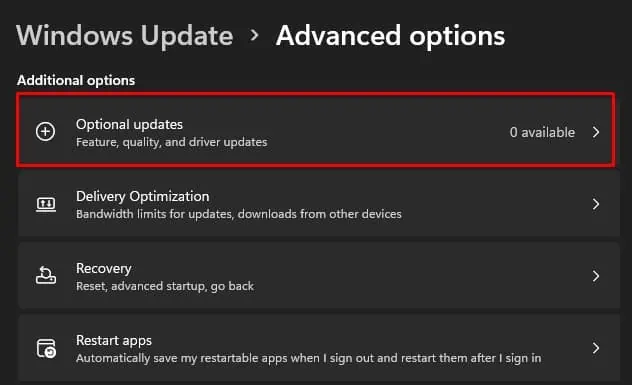
Besides adding new features to Windows, Microsoft also provides driver updates through optional updates.
- In Windows Settings, go to Windows update > Advanced Options.
- Here, select Optional Updates.

- Under Driver updates, check if there are any pending Wi-Fi driver Updates. If so, check the driver and click on Download and Install.

