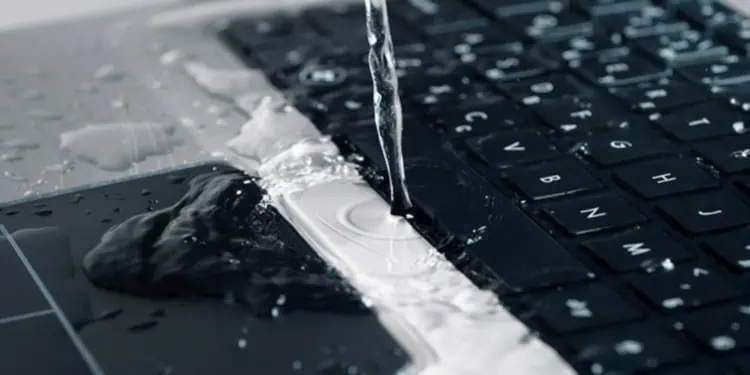
A laptop’s internal components can suffer from severe hardware damage due intrusion of water or similar liquids. Such water damage can cause problems like short circuits, corrosion in the internal components, display issues, and so on.
It is always advisable to never place any sort of liquid near the laptop. Even if you want to have water while working, you should place it slightly far or below the level of the laptop surface.
Nevertheless, here are a few things you need to do immediately to prevent any further damage. Apart from that, you also need to mitigate the damage already done to the hardware components.
Power Off the Laptop and Flip It
The very first thing to do is to remove the charger from your laptop. After that, You should press the power button for a few seconds to force turn off the system. Even if the laptop is still functioning, we recommend you follow this way instead of shutting it down from the desktop.
Then flip it upside down in a wide V-shape to prevent the water from going inside the laptop or the screen.

Right after you flip the laptop, you should remove the battery if it’s external and removable. Then, press the power button again for around 10 seconds to drain any stored energy from the capacitors as well. If the laptop has an internal battery, it may contain a reset pin on the back, which you need to press instead of the power button.

Remove All the Peripherals
You should start unplugging all peripherals and cables like the keyboard, mouse, USB drives, external display cables, etc. This is to prevent peripherals from any further damage due to water and save yourself from electric shock.
Soak Water from Surface
Now, while keeping the laptop in the inverted position, use a lint-free towel to dab the wet areas on the surface. Gently press the areas and let the towel absorb the water. Don’t wipe the towel around as it may push the water inside the laptop.

Also, make sure to place the laptop in a clean and dry place without direct sunlight. You need to let the device dry out naturally without any application of external heat.
Remove Internal Components
If you spilled a lot of water on the laptop, the water likely leaks inside the device before you can drain or soak it out. In such cases, you need to open the laptop and dry the internal hardware.
Note: A few laptop manufacturers include additional add-ons to the warranty, such as Accidental Damage coverage. These add-ons also come with additional costs but are useful in this situation.
If your warranty is valid and you have purchased such provisions, you need to take the laptop to the support center to have them repair any damage to the internal components.
Depending on the severity of the water damage, opening the laptop can cause even more harm if done improperly. So, we highly recommend taking the laptop to the service center even if you don’t have accidental damage coverage. But, if you know what you are doing proceed to the steps below.
- Unscrew the back panel on the laptop. You should also look under the rubber feet and stickers for additional screws.
- Use a card or pick-shaped prying tool to pry out the back panel from all sides. Be gentle so that you won’t damage the locks.

- Before you remove the internal devices, keep in mind that you need to use tools such as plastic spudgers or plastic-tip tweezers to touch them. You can’t use your hands unless you ground yourself as it can damage these components due to electrostatic discharge (ESD).
- First, make sure to remove the internal battery if it’s there. Disconnect the battery connector from the motherboard. Some ports have clips to lock the cable and you need to unlock it by pulling it up. For others, you can just pull out the connector.
- Now, remove the RAM. Pull the side clips on the RAM slot outwards so that the device pops out. Then, take it out. Dab it with the lint-free towel if it’s wet and place it in an antistatic bag or its cardboard packaging without keeping it airtight. Let the air flow properly so that all remaining moisture can dry out.
- For your HDD or SSD, you need to disconnect all screws connecting it first. If it is connected using a cable, unlock the cable and pull it out. Otherwise, you should be able to slide out the storage drive.
- Then, remove the Wi-Fi card after disconnecting its connector and unscrewing it.


Let Laptop Dry
After removing the internal hardware, keep the laptop with its motherboard exposed in a clean and dry area for about 20-24 hours. Any amount of moisture can cause component corrosion if left unattended, so don’t reassemble the components.

Also, avoid drying the motherboard by manually wiping it as it contains many electronic components which are easy to damage due to ESD or physical pressure.
The water or liquid usually seeps into the keyboard or the touchpad before any other parts. Also, if it’s another liquid like tea, milk, juice, etc., they will cake on the key hinges and the touchpad’s circuit after the liquid dries which can damage these devices.
Apart from that, if the water seeps inside the display, it can damage the display ribbon cable’s connectors (ZIF connector). Or it can get embedded inside the display panel with no way of getting out.
So, you need to be ready to replace all such damaged components. For newer models, replacing these components needs high dexterity and experience, so you need to seek professional assistance.
Replace Damaged Components
After leaving the laptop to dry for 24 hours, check the motherboard as well as the components you stored earlier for any corrosion. If some parts are corroded or discolored, you can try cleaning them with Isopropyl alcohol and a microfiber cloth.

Then, reassemble all the components by reversing the disassembling steps. After that, open the laptop and check if it works. If it doesn’t you’ll likely get a POST beep or led-sequence, which points to the damaged devices or connection issues.
Open the laptop and check if you forgot to connect those devices properly. If not, the hardware component is damaged and you need to replace it.