
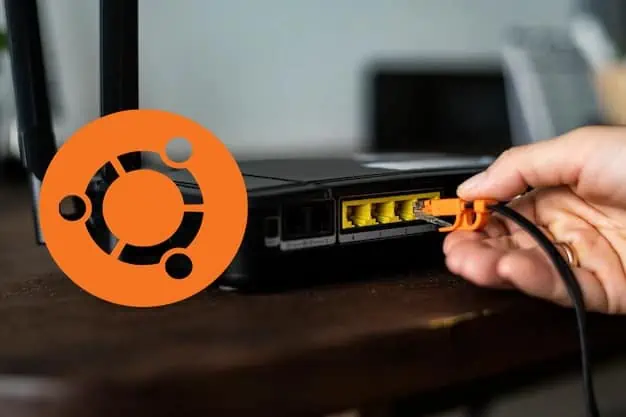
When it comes to uninterrupted and fast internet access, Ethernet still remains our favorite. And when the Ethernet fails, it is a struggle to get a comparable internet experience.
If you run Ubuntu on your computer and your Ethernet appears to be malfunctioning, there might be several reasons for it. The most probable reason for the issue is the Kernel not supporting the Ethernet adapter. Or, if you have recently installed Ubuntu or updated to a recent version, this is very common.
We will further discuss this issue and suggest some fixes that might help you resolve the issue.
What Causes the Ethernet to Not Work?
The Ethernet can stop working in Ubuntu after a major Kernel update. It appears that some versions of the kernel have the interrupt management issue. This causes the system to not recognize the Ethernet interface. Some other reasons that might disrupt the Ethernet are:
- Damaged Ethernet port or cable
- Issues with the Ethernet package
- Network configurations
Fixes for Ethernet Not Working on Ubuntu
We have already discussed that Kernel issues are the most evident reason the Ethernet not working in Ubuntu. We will suggest the fixes for this problem in the later part of this article. However, we cannot sideline some minor reasons that can bring issues of Ethernet.
Therefore, the first obvious thing to do is to connect the cable to a different Ethernet port on your router and see if that helps. Also, there might be some temporary glitches in the system that get fixed with a normal system restart.
Moreover, verify that the internet works using the Wi-Fi network. If everything appears to be in check, the Ethernet cable might be the culprit. If you have a spare cable, you might test that as well.
If none of these solves the problem, try these fixes and check if it brings back your internet.
Enable Ethernet Connection
If the Ethernet is not functioning, it can also be that the port has been disabled. Ubuntu users can easily enable the Ethernet through the terminal. First of all, you have to determine the Ethernet interface using the terminal.
Here’re the steps:
- Open the Terminal and run the command
ip addr - You will see all the information regarding your network Adapter. Note down the Adapter’s ID. It must be something like eth0, eth1, eno1, etc.
- Now to enable the Ethernet using this command. Replace the eno1 in the command with the Adapter’s ID you noted earlier.
sudo ip link set eno1 up
- When asked for, enter the system password. This will enable the first Ethernet port (for instance eno1) if it had been disabled earlier.
- For those users whose Ethernet interface is already enabled, try disabling it at first and re-enabling it again. To disable it use this command.
sudo ip link set eno1 down - Replace the eno1 if your adapter’s id is different and hit enter. After this, use the Ethernet enable command mentioned above to re-enable it.

Restart Network Manager Service
This is a system that manages the network interfaces on Ubuntu. If the Ethernet is not working, it might also have something to do with the Network manager service. Therefore, restarting the service can give you results.
Here’s how you can do it:
- First of all, run this command to flush the DNS.
resolvectl flush-caches - Use this command line to restart the Network manager service.
sudo service network-manager restart

Restart the computer at the end of the process. Finally, check the internet to see if the Ethernet works now.
Reset the Network Settings to default
Linux users are frequently toying with their system configurations and this might also involve the network settings. Reset the network settings to default in case any modified settings have hindered the internet.
Here are the steps you can follow to reset the network settings.
- Open the Terminal and Run
ip addr - Note down the adapter’s ID. It must be something like eth0 or eno1.
- Again run this command:
sudo nano /etc/network/interfaces - A file with some information will open. Delete all of it and paste this inside the file.

# This file describes the network interfaces available on your system
# and how to activate them. For more information, see interfaces(5).

source /etc/network/interfaces.d/*

# The loopback network interface
auto lo
iface lo inet loopback

# The primary network interface
auto eno1
iface eno1 inet dhcp
- Change the adapter’s name to the one you found through the ip addr and replace it in place of eno1.
- At last save the file by pressing Ctrl+O on your keyboard.
Restart the computer at the end of the process. This reverts the network settings to their default. Finally, check the internet to see if the Ethernet works now.
Install Network Packages
The Ethernet might not work if the network drivers are not installed on the computer. To resolve the issue in this case, use this method to identify the network adapter and install the right driver for it.
Follow these steps:
- Go to the terminal and use this command.
sudo lshw -C network - You will get a bunch of information about the network adapters after using the above command. Most users have Realtek’s Ethernet interface and to install the drivers for it run this update command.
sudo apt-get update -y - Now use this to install the package and depositories.
sudo apt-get install -y r8168-dkms - Restart the computer after the installation.

Install New Kernels
As reported by most Ubuntu users, installing stable kernels solved the issue for them. For your convenience, we have given the links to the kernels below. Version 5.9 is found to be more stable and also fixes the Ethernet issues. You can even download the latest updates from the website if you want.
Follow these steps to download and install the kernel:
- First of all download the kernel files from these links:
- Copy the downloaded files to the USB drive inside a folder name kernel.
- Make a new directory to mount the USB drive using this command. Make sure you have the terminal with superuser privileges. Here, in this command the mount point is usb.
mkdir /media/usb - Now type
lsblkand hit Enter. This command gives information about the devices like the USB that are connected to the computer. Note down the USB drive’s address (Eg: sdb1, sdb2) - Then use this command to mount the USB in a folder. In the command-line change the sbd1 to the USB address you found in step 4.
sudo mount /dev/sdb1 /media/usb - Now change the directory.
cd /media/usb/kernel - Finally, run the package manager to install the kernel.
sudo dpkg -i *.deb - Restart the computer. This should solve the ethernet issues for you.


Update the OS
If you are still unable to fix the Ethernet, try performing system updates. The regular updates of Ubuntu give tons of bug fixes and performance improvements. Follow these steps to perform a system update.
You can use the simple GUI update application in Ubuntu or use command lines as well for performing an update.
For using the software updater follow these steps:
- In the Application, search for Software Updater and launch it. It checks for the available updates and downloads them.
- A window will open that will give a general overview of all the available updates.
- You can choose the updates you want to install. However, it is recommended that you select all of the available updates.
- Click on Install Now.
- Wait for some time for the installation process to finish and then restart the computer.


In order to Update using the Terminal, run this command, sudo apt update && sudo apt upgrade -y
When the update completes it might get your Ethernet issue fixed and make the internet up and running.
Change the DNS
The Ethernet problem is most likely to take the blame for the internet outage. However, DNS is also essential for the internet to function correctly. Setting a good DNS server address can make a whole lot of difference in this.
Furthermore, you can use Google’s or Cloud fare’s DNS instead of the ISPs to make the internet more stable and secure. If you want a secure one go for Cloudfare’s DNS while you could choose Google’s for reliability. This might even solve the Ethernet issue for you.
Here’s how to set a new DNS on your Ubuntu device:
- Go to Settings.
- On the left panel of the settings window, click on Network.
- In the Network menu, click on the gear icon on the right side of the Wired section.
- In the new window click on IPv4 tab.
- Toggle the Automatic button to off for the DNS. This will let you add a new DNS server address.
- Enter the new DNS server address:
- Google’s DNS Server IP address: 8.8.8.8, 8.8.4.4
- Cloudfare’s DNS Server IP address: 1.1.1.1, 1.0.0.1
- Save to apply the changes by clicking on the Apply button at the top of the window.
