Tech News Today
  • Hardware
    • Motherboards
    • CPUs
    • Graphic Cards
    • RAM
    • SSDs
    • Computer Cases
    • Monitors
    • Peripherals
    • Power Supply Unit
    • PC Builds
    • Computer Tips
  • Software
  • Operating System
    • Windows
    • Mac
    • Linux
  • Gaming
  • Mobile
  • Console
  • More
    • Internet
    • Networking
    • Security
    • Buyer’s Guide
    • Gadgets
    • Laptops
    • Reviews
    • How To
    • News
Facebook Twitter Instagram
Tech News Today
  • Hardware
    • Motherboards
    • CPUs
    • Graphic Cards
    • RAM
    • SSDs
    • Computer Cases
    • Monitors
    • Peripherals
    • Power Supply Unit
    • PC Builds
    • Computer Tips
  • Software
  • Operating System
    • Windows
    • Mac
    • Linux
  • Gaming
  • Mobile
  • Console
  • More
    • Internet
    • Networking
    • Security
    • Buyer’s Guide
    • Gadgets
    • Laptops
    • Reviews
    • How To
    • News
Tech News Today
Home»Windows»How To Fix “Access Is Denied” When Executing Bootrec /Fixboot

How To Fix “Access Is Denied” When Executing Bootrec /Fixboot

Anup ThapaBy Anup ThapaDecember 17, 2022
bootrec fixboot access is denied

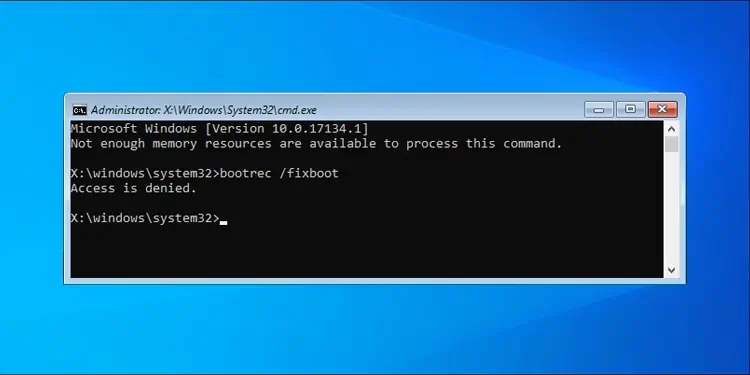
The Bootrec /FixBoot Access Is Denied error occurs when you try to repair a UEFI boot loader with this command.

The function of the FixBoot switch is to write a new boot sector to the system partition. But in UEFI systems, the EFI System Partition (ESP) is unmounted by default. As FixBoot can’t access the system partition, it fails and returns the Access Is Denied error.

You can use diskpart to manually assign a mount point to the EFI System Partition. After doing so, you should be able to use FixBoot without any issues. Alternatively, you can instead use BCDBoot to repair the EFI Boot Loader.

One more thing to note is that this error is very common in Windows versions 1707, 1709, and 1803. If your PC is running any of these versions, then we recommend that you use Windows Version 1703’s image to create a bootable media and copy the BCD.

Table of Contents

  • Mount ESP with Diskpart and Repair
  • Delete ESP and Use Automatic Repair Tool
  • Uninstall Latest Updates
  • Clean Install OS

Mount ESP with Diskpart and Repair

You can use diskpart to assign a drive letter to the EFI System Partition, then use FixBoot or BCDBoot to perform the repair. Here are the steps to do so:

  1. In winRE, select Troubleshoot > Advanced options > Command Prompt.
  2. Execute the following commands:
    diskpart
    list disk
  3. Determine the disk Windows is installed on and check if it has an asterisk (*) or not in the Gpt column. If it’s present, you can continue with the steps below. But if there is no asterisk, you should instead check the Repair Boot Sector on MBR Disk section at the end.
    diskpart-list-disk-sel-disk-list-vol
  4. Replace 0 with the Windows disk if different and execute the following commands:
    sel disk 0
    list vol
  5. From the list of volumes, find the UEFI volume. You can recognize it by its usual size (100MB), FAT32 in Fs section, Boot in the Label section, or System in the Info section.
  6. The EFI System Partition is Volume 2 on my PC, so we’ll use that for tutorial purposes. Change it accordingly if yours is different in the steps below. Also, replace R: with a drive letter that’s not in use if necessary.
  7. Execute the following commands:
    sel vol 2
    assign letter=R:

    sel-vol-assign-letter-diskpart
  8. Type exit and press Enter.
  9. Execute the following commands:
    bootrec /FixMBR
    bootrec /FixBoot
    bootrec /ScanOs
    bootrec /RebuildBcd

    bootrec-fixmbr-fixboot-scanos-rebuildbcd
  10. If you’re able to run FixBoot now, you can stop here. But if you’re still encountering the same error, use the commands listed below instead.
  11. Type the following command and replace R: with the EFI partition’s letter if different.
    cd /d R:\EFI\Microsoft\Boot\
  12. If you receive a The system cannot find the path specified error message, run the same command on alternative paths:
    cd /d R:\Boot\
    cd /d R:\ESD\Windows\EFI\Microsoft\Boot\
  13. Type bcdboot C:\Windows /s R: /f UEFI and press Enter.
  14. Rename the Boot Configuration Data (BCD) for backup purposes with the following command:
    ren BCD BCD.bak
  15. Recreate the BCD with the following command:
    Bcdboot C:\Windows /s x: /f ALL
  16. Type exit and press Enter.
  17. Restart your computer and check if you can boot properly now.

Delete ESP and Use Automatic Repair Tool

The Automatic Repair tool is the go-to option to combat any kind of startup issue. But before using it, you should delete the system partition to ensure that a corrupt EFI system partition (ESP) isn’t the issue. Here are the steps to do so:

  1. First, use Windows Version 1703’s ISO to create a bootable disk or USB.
  2. Boot from the media and select Repair your computer.
    repair-your-computer
  3. Select Command Prompt and use diskpart to delete the system partition.
    diskpart-delete-volume
  4. Now, exit cmd and use the Startup Repair tool.
  5. Login to your account when prompted to proceed with the repair.
  6. Wait for the automatic repair tool to do its job. This will typically take 5 – 15 minutes on most systems.
    startup-repair

If the repair tool resolves the issue, great. If not, you’ll see a message along the lines of Startup Repair couldn’t repair your PC. In this case, select Advanced Options and try out the other solutions from our guide.

Uninstall Latest Updates

A common issue that users often report is that Windows won’t boot after an update. In cases like this, uninstalling the latest update is generally enough to resolve the issue. Here are the exact steps to do so:

  1. In winRE, select Troubleshoot > Advanced Options > Uninstall Updates.
    uninstall-updates-winre-advanced-options
  2. Select Uninstall Latest Quality Update and follow the on-screen instructions.
  3. Repeat the same steps to uninstall the feature update as well.
    uninstall-latest-quality-feature-update
  4. Restart your PC and check if you can boot properly.

Clean Install OS

If the issue is still not resolved, a clean reinstall of the OS is likely the final option. Keep in mind that this will remove everything from your PC. So, if you don’t want to lose your files, you may want to hold off on this temporarily. Here are the steps to clean install Windows:

  1. Insert a Windows Installation Disk or USB.
  2. In the setup wizard, select Next > Install Now.
  3. When prompted for the product key, select the Do this later or I don’t have a product key option.
    no-product-key-windows
  4. Select the OS Edition, accept the license terms, and select Custom: Install Windows Only (Advanced).
  5. Select a drive and press Delete. Repeat this until there is only one unallocated drive left.
    drive-0-unallocated-space
  6. Select the unallocated drive and press New > Apply > OK.
  7. Select the newly created Primary Partition and press Next.
    primary-partition-install-windows
  8. Windows will now install and your PC may reboot a few times during the process.
fix
Anup Thapa
  • LinkedIn

Anup Thapa is a tech writer at TechNewsToday. He mostly writes informative articles, tutorials, and troubleshooting guides related to Windows systems, networking, and computer hardware. Anup has been writing professionally for almost 5 years, and tinkering with PCs for much longer. His love for all things tech started when he got his first PC over 15 years ago. It was a Pentium IV system running Windows XP on a single 256 MB stick. He spent his formative years glued to this PC, troubleshooting any hardware or software problems he encountered by himself. Professionally, Anup has had brief forays into a variety of fields like coding, hardware installation, writing, etc. In doing so, he's worked with people of different backgrounds and skill levels, from average joes to industry leaders and experts. This has given him not just a versatile skillset, but also a unique perspective for writing that enables him to concisely communicate complex information and solve his reader's problems efficiently. You can contact him at anup@technewstoday.com

Related Posts

antimalware service executable high memory

Fix: Antimalware Service Executable High Memory

May 18, 2023
windows event logs

How to Check Event Logs on Windows

May 17, 2023
the rpc server is unavailable

Fix: The RPC Server is Unavailable

May 15, 2023
DirectStorage Windows 11

How to Enable DirectStorage on Windows 11

May 15, 2023
audio keeps cutting out

5 Ways to Fix Audio Keeps Cutting Out on Windows 11

May 12, 2023
MBR Error 1 2 3

What is MBR Error 1, 2, 3? 7 Ways to Fix It

May 11, 2023
View 4 Comments

4 Comments

  1. ThankfulMAN! on January 6, 2023 8:59 am

    THANK YOU! This was the command I needed: “bcdboot C:\Windows /s R: /f UEFI”. After searching all over the internet and trying all kinds of commands (including the bootrec commands including but not limited to bootrec /fixboot) nothing was working. I am on a GPT system so bootrec /fixMBR didn’t make sense to use either, but the /fixboot option gave me Access Denied errors, the /RebuildBcd gave me a “The requested system device cannot be found” error despite identifying my Windows installation, and the bcdboot command kept saying “Failure when attempting to copy boot files.”

    That command: “bcdboot C:\Windows /s R: /f UEFI” (adjusting R: for the drive letter I assigned to my EFI partition, the first partition on the drive) is what finally got me the golden ticket: “Boot files successfully created.” THANK YOU! I hope this can help someone else too.

    Reply
    • Anup on January 9, 2023 11:18 am

      Glad we could help!

      Reply
  2. ThankfulMAN! on January 6, 2023 9:04 am

    Also, I had formatted my EFI partition (not recommending this, but I already had). I manually created (using command mkdir) R:\EFI, R:\EFI\Boot, R:\EFI\Microsoft, and R:\EFI\Microsoft\Boot before running that bcdboot C:\Windows /s R: /f UEFI command. Not sure I had to for that command to work, but there’s that in case someone else needs it. Thank you so much again!

    Reply
  3. ThanksMAN! on January 6, 2023 12:11 pm

    Also for anyone it can help, don’t forget to re-sign the EFI Partition as an EFI Partition by setting its “type” to c12a7328-f81f-11d2-ba4b-00a0c93ec93b if it isn’t already that type (look up “sign existing partition to EFI” and there’s a post on TenForums about it). Otherwise Windows can glitch. Also make sure you unmount the EFI partition from the letter you mounted it to (in this site, “R:”).

    Reply

Leave A Reply Cancel Reply

Latest Posts
Best-1200W-PSU

8 Best 1200W PSUs for Extreme PC Builds in 2023

May 16, 2023
Best-1000W-PSU

10 Best 1000W PSUs in 2023

May 16, 2023
best-700w-psu

10 Best 700W PSUs for Gaming in 2023

May 14, 2023
You may also like
antimalware service executable high memory

Fix: Antimalware Service Executable High Memory

May 18, 2023
printer-printing-pink

Why is My Printer Printing Pink? 6 Ways to Fix It

May 18, 2023
how to clean usb c port

How to Clean USB-C Port Safely

May 17, 2023
Recommended
Cookie Clicker Garden Guide

Cookie Clicker Garden Guide to Unlocking Every Seed

September 26, 2021
monitor no signal

Computer Turns On But Monitor Says No Signal (9 Ways To Fix)

November 10, 2022
Facebook Twitter Pinterest
  • Home
  • About Us
  • Our Team
  • Editorial Guidelines
  • Privacy Policy
  • Affiliate Disclosure
© 2023 TechNewsToday, editor@technewstoday.com | Tech Central Pvt. Ltd.

Type above and press Enter to search. Press Esc to cancel.