
DISM Host Servicing Process High Disk, CPU, and Memory usage mainly happen when your PC is infected by malware. Viruses could disguise as this system process and replicate themselves while consuming a large amount of resources.
Dismhost.exe folders sometimes keep appearing in large numbers in the temp folder. Aside from malware, this can also happen because of errors with Windows maintenance tasks like scheduled Disk Cleanups or Windows Defender scans.
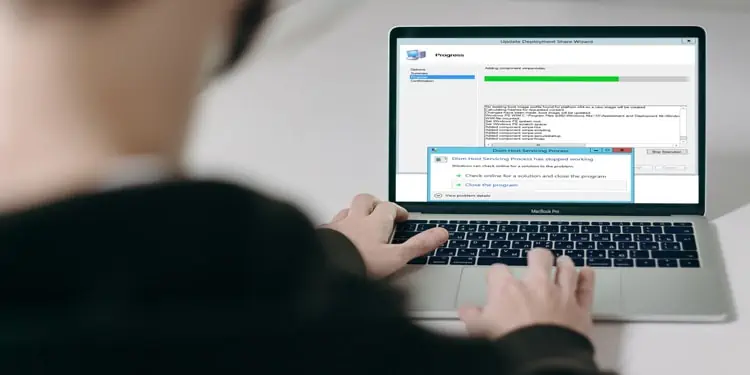
What is DISM Host Servicing Process?
DISM (Deployment Image Servicing and Management) is a command-line tool for configuring Windows image (.wim) files, Full-flash utility (FFU) files, or virtual hard disks (VHD). Dismhost.exe is the executable file while it’s called DISM Host Servicing Process when it runs as a background process.
Its most commonly used to prepare images for Windows PE (Preinstallation Environment), WinRE (Windows Recovery Environment), and Windows Setup. In English, this means it’s used to enable/disable Windows Services and repair system errors.
DISM has been built-in with Windows since Vista. It is available through the command line or from Windows PowerShell. DISM commands can be used on offline images, while some can also be used on a running operating system.
Can I Force Quit DISM Host Servicing Process?
If DISM Host Servicing Process is using high CPU, Memory, or Disk usage, it’s either malfunctioning or infected with malware. In such cases, you can force quit this process via Task Manager.
Select the process named Dismhost.exe or Dism Host Servicing Process and click End Task. The process may also be nested within Servicehost.
In the case of malware, it’s likely Dism will keep returning no matter how many times you quit or delete it. Read our guide to figure out how to fix Dism Host Servicing Process issues at their root.
How to Fix DISM Host Servicing Process Issues?
The first step to fixing DISM Host Servicing Process issues is to use an Antivirus or Windows Defender and scan for malware. High CPU, Memory, and Disk usage by this process are usually caused because of viruses.
If no malware is detected, you should scan and repair system files and perform a clean boot. You can see detailed steps for these and other solutions below.
Check Dismhost.exe and PC for Malware
Malware often disguises itself as system or application files by taking their name and replicating itself. Navigate to C:\Windows\Temp and C:\Users\YourUsernameHere\appdata\local\temp and look for files named DismHost.exe.
Large numbers of DismHost.exe files in these locations suggest that your PC may be infected. You should scan your PC for viruses using an Antivirus or Windows Defender. The exact steps will slightly differ for every antivirus. The steps for Windows Defender are as follows:
- Press Windows + I to launch Settings.
- Open Update and Security.
- Go to Windows Security > Virus and Threat Protection.
- Click on Scan Options and select Full Scan.

- Press Scan Now.

Scan and Repair Corrupt System Files
The System File Checker is a built-in utility that scans for and repairs any corrupt or missing system files. It’s normally used with DISM and CHKDSK to find and repair system errors. But it can also help fix DismHost issues. To use it:
- Press Windows + R to launch Run.
- Type cmd and press CTRL + Shift + Enter to launch Elevated Command Prompt.
- Type
sfc /scannowand press Enter. - The scan typically takes 5-10 minutes. Once it’s complete, check if the issue is resolved.

Perform a Clean Boot
A clean boot is similar to Safe Mode, except you can handpick which services and programs to run. This can be useful to figure out the cause of any problem. Log in as an admin before using the following steps to perform a clean boot.
- Press Windows + R to launch Run.
- Type msconfig and press Enter to launch System Configuration.
- Switch to the Services tab and turn on Hide all Microsoft Services.
- Press Disable All.
- Switch to the Startup tab and open Task Manager.
- Disable all of your startup programs and press OK in the System Configuration Startup window.

When you restart your PC, it will perform a clean boot. Once you’re done troubleshooting, launch System Configuration again and follow the steps below to reset your PC to normal functionality.
- Select Normal Startup in the General tab.
- Switch to the Services tab and uncheck Hide all Microsoft services, then press Enable all.
- Switch to the Startup tab and open Task Manager.
- Enable all of your startup programs and press OK.
Disable Superfetch and Background Intelligent Transfer (BIT) services
Superfetch, or SysMain, is a Windows feature that pre-loads boot files and frequently used applications into the RAM to make them launch faster. BITS transfers files in the background using idle network bandwidth. It’s necessary for services like Windows Update. The steps to disable/re-enable Superfetch and BIT services are the same, so just repeat them.
- Press Windows + R to launch Run.
- Type services.msc and press Enter.
- Locate SysMain or Background Intelligent Transfer Service and double click to open Properties.
- Select Disabled in the startup type section.
- Press OK and reboot your PC.
- To re-enable the service later, follow the same steps and change Disabled to Automatic.

If required, you can also disable Superfetch from Windows Registry by modifying the EnableSuperfetch value. To do so,
- Press Windows + R to launch Run.
- Type regedit and press Enter to launch the Windows Registry Editor.
- Navigate to:
Computer\HKEY_LOCAL_MACHINE\SYSTEM\CurrentControlSet\Control\Session Manager\Memory Management\PrefetchParameters - Double-click EnableSuperfetch and change the value to 0. To re-enable Superfetch later, change this value back to 3.
- Press OK and close the Registry Editor.

Perform System Update
Keeping your system up-to-date is always a good practice. It can also help fix the DISM Host Servicing Process issues. To update windows,
- Press Windows + I to launch Settings.
- Open Update and Security.
- Click on the Check for Updates button.
- Download and install any available updates.
- Restart your PC and check for changes.

Disable/Delete DISM Host
You can disable or remove DISM Host Servicing Process from your PC as a last resort. To disable DISM Host Servicing Process at startup,
- Press CTRL + Shift + Esc to launch Task Manager.
- Switch to the Startup tab.
- Select dismhost.exe and press Disable.

To remove DISM Host Servicing Process,
- Navigate to
C:\Windows\System32and delete the DISM folder located there. - Press Windows + R to launch Run.
- Type regedit and press Enter.
- In the registry editor, go to:
Computer\HKEY_LOCAL_MACHINE\SOFTWARE - Look for the DISM folder and delete that as well.
If your temp folder is still occupying a lot of space, follow these steps to use the Disk Cleanup tool.
- Type disk cleanup into the search bar and press Enter.
- Select C: drive and click OK. If different replace C: with whatever drive your OS is installed on.
- Select the File Types you want to clean up and press OK. Check the description section if you’re confused about any of those.
- Press Clean up System Files if you also want to remove unnecessary system files such as Windows Update copies.
- Finally, navigate to:
C:\Users\YourUsernameHere\AppData\Roaming\Microsoft\Windows\Start Menu\Programs\Startup - Create a Notepad file there named
cleantemp.batand copy the following into it:rd %temp% /s /q
md %temp% - This will auto-clean your temp folder at boot from now on so it won’t occupy tons of space anymore.


User Reported Fixes
One user reported that Windows Defender Scheduled Scan being interrupted was causing the DismHost problem. He fixed it by manually performing the scan. To do so:
- Type Task Scheduler into the search bar and press Enter.
- In the Task Scheduler Library, navigate to Microsoft > Windows > Windows Defender.
- Select Windows Defender Scheduled Scan and switch to the settings tab.
- Make sure Allow task to be run on demand is ON.
- Press Run to run the scan manually.

A few users found that disabling SilentCleanup Scheduled Task stopped the problem completely for them. To do the same:
- Navigate to Microsoft > Windows > Disk Cleanup in the Task Scheduler Library.
- Select SilentCleanup and press Disable.

Another user fixed the Dismhost.exe files building up on his home theater PC (HTPC) by removing the admin rights from the local HTPC account and using another account (Outlook e.g.) to log in. Thus, using a different account to log in may be helpful.