LastPass is a password manager that comes as a browser extension, app, and also includes plugins. This freemium tool comes in very handy when it comes to keeping all your essential passwords safe.
But, there’s a common question – if this tool is sufficient on its own, why export our passwords?
That’s because ever since March 2021, you can only use the password manager tool on one device if you’re on the free plan. This means that you can’t store and sync your passwords on both two devices, like your phone and your PC. So, this is where exporting passwords comes into the picture.
You can find detailed steps on how to export passwords from LastPass in our article below. These methods are helpful when you want a record of your password data, or you want to switch to another platform to save passwords.
How to Export Passwords from LastPass?
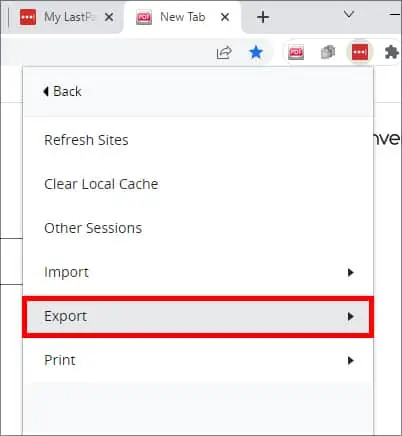
One easy way to export passwords from LastPass is to export your passwords from the browser extension in a CSV file. You can follow these steps to do so:
- Open the LastPass browser extension by clicking on the toolbar button.
- Now, go to Account Options.
- Then, click on Advanced and then click Export.

- You’ll see three options that are LastPass CSV File, LastPass Encrypted File, and Form Fills. Click on the CSV file.
- Your file will now start downloading.
You can now take your exported file and import it to another password manager.
Import Passwords from LastPass to Chrome
If you want to try a free LastPass password manager alternative, Chrome Password Manager is a decent option. Chrome keeps all your passwords generally safe and auto-fills them whenever you need to log in to any website. Since you now have the exported CSV file, you can easily import it to Chrome in the following quick steps:
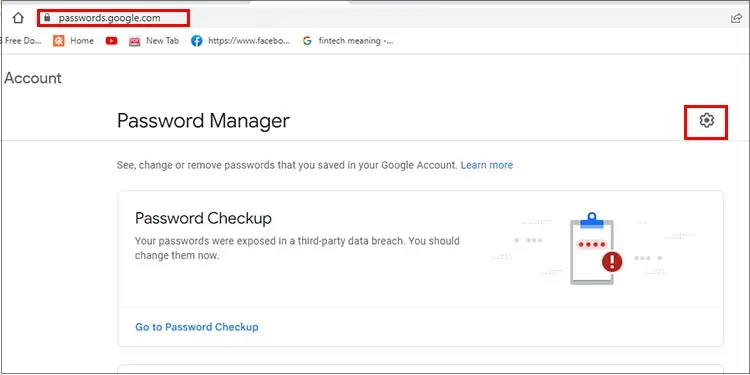
- Visit Google Password Manager.
- Next to the Password Manager, click on the gear icon to open Settings.

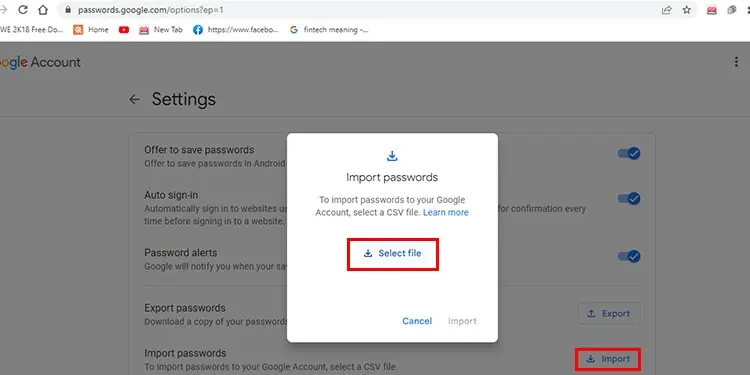
- You’ll now see the Import Passwords option; click on Import.
- Click on Select File from the pop-up option.

- Locate and select your CSV file with the password data.
- Click on OK.
Unlike LastPass, Chrome will sync the changes to the Chrome app for mobile as well. So, you can access your passwords on your phone as well.
Move Passwords from LastPass to iCloud Keychain
If you’re a Mac user, you can move your passwords from LastPass to a relatively robust password manager, like the iCloud Keychain. Since iCloud Keychain syncs your passwords across your Apple devices, you can simply import passwords to Safari.
But first, it’s important to enable iCloud Keychain on both your Mac and iPhone. Here’s how you can do it:
On Mac
- Click on the Apple logo and go to System Preferences.
- If your macOS is Catalina or later, go to Apple ID and then click on iCloud. But if your Mac is Mojave or older, click on iCloud.
- From the list of apps, tick the box next to Keychain.
On iPhone
- Go to Settings and tap on your Apple profile.
- Select iCloud and then tap on Keychain.
- Slide the toggle to turn it on.
Now, you can move on to import the same CSV file to Safari by following these steps:
- Open Safari and go to File.
- Click on Import From and then click on Passwords CSV file.
- Locate and import your CSV file. Your Mac might ask you for your login password to proceed.
Another way you can import your passwords to Safari easily is by importing data from another browser, like Chrome or Firefox. Especially if you’ve already imported passwords to Chrome following the methods above, you can now import them to Safari in these ways:
- Launch Safari and then click on File from the menu bar.
- Click on Import From and select either Chrome or Firefox.
- You can select the type of data you’d like to import, like Passwords, History, and such. Make sure to select Passwords.
- Click on Import.
To check your passwords on Safari, go to Safari and then click on Preferences. Next, click on Passwords. To check your passwords in the iCloud Keychain, search for Keychain Access on your Mac. Within the app, click on iCloud and then go to Passwords.
Import Passwords to Another Password Manager
If you want to try out other third-party apps to manage your passwords, you can try apps, like 1Password or Bitwarden. It’s helpful to remember that these apps can charge different fees. If you’re willing to invest to keep your passwords safe, here’s an example on importing passwords from LastPass to 1Password:
- Log in to 1Password and click on your info in the top-right corner.

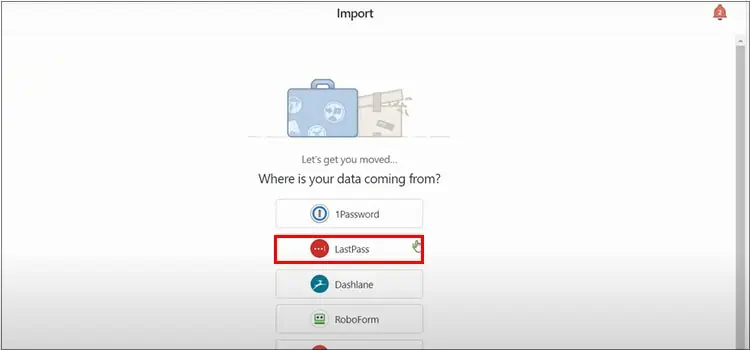
- Click on Choose Import and then select LastPass.

- Select your CSV file and then upload it. You can now find all your imported passwords in 1Password.
Now, we recommend deleting the LastPass CSV export file quickly to prevent anyone from accessing it. Along with that, it’s best to also delete it again from the Recycle bin or Trash.
Export LastPass Vault Data for My Identities
You can seamlessly export your LastPass vault data for all identities in these steps.
- Log in to your LastPass account and click on the LastPass icon.
- Now, click on Open My Vault.
- Visit Account Settings page and then enter your email ID along with the master password.
- Click on the User Account menu and then click on All to select all identities. LastPass might require you to enter your master password again.
- Now, click on Advanced Options and then go to Export.
- Click on Continue.
Your LastPass identity data will now start downloading as a CSV file.
How to Keep Your Passwords More Secure?

Regardless of how many password manager tools there are, there’s no guarantee that your passwords will always remain 100% safe. So, it’s a good idea to utilize some tricks from your end to keep your passwords more secure.
- Use a strong password with different characters.
- Don’t re-use the same password for another website.
- Don’t write down your passwords in a file that’s not protected.
- Don’t email your passwords.
- Keep changing your passwords regularly.
- Create a two-factor authentication process.
- Log out from devices that you don’t use anymore.

