
For gamers, hardware enthusiasts, and even regular users, CPU performance matters the most. To help users push their CPU’s clock speed beyond its factory specifications, ASUS has introduced a plethora of features, which are accessible from both the UEFI Utility and the AI Suite application.
You can auto-tune the processor’s frequency using EZ System Tuning, EZ Tuning Wizard, or advanced settings like TPU, Core Performance Boost, and OC Tuner.
Likewise, it’s possible to manually overclock by finding the right balance between voltage, frequency, and temperature. Also, it’s worth trying their latest AiOC (AI Overclocking) if you rock a compatible ASUS motherboard.
Our TNT Hardware team recently overclocked AMD’s Pinnacle Ridge and Cezanne processors installed on PRIME and ROG B450 boards. We were able to boost nearly 200 MHz beyond what the ASUS automatic tuning offered when testing on both CPUs. Even though we were the clear winners, we definitely can’t underestimate the work of EZ System Tuning.
Caution: Boosting the clock speeds of your system components beyond the specified maximum frequency might lead to system instabilities and even impacts their overall lifespan. In case any damage occurs, your manufacturer won’t cover the warranties. So, only proceed at your own risk!
Getting Started
Before proceeding to boost your CPU’s frequency, it’s essential to know whether your ASUS system supports overclocking in the first place. Along with that, there are some other things to keep in mind, which I will discuss ahead.
- First, confirm whether you’re using a locked or unlocked CPU. While most newer AMD Ryzen processors (excluding Ryzen 7 5800x3d) are overclockable, not all from Intel follow the same pattern. Only those with ‘K’, ‘KF’, and ‘X’ suffixes have unlocked cores.
However, there are still exceptions. So, it’s better to consult the Specifications page of your processor.
- Additionally, you need to check whether your motherboard can handle overclocking. Since all AMD CPUs/APUs are unlocked, most of their boards support it (except the ones with A chipsets). On the flip side, Team Blue should see whether they have a board from the Z or X series.
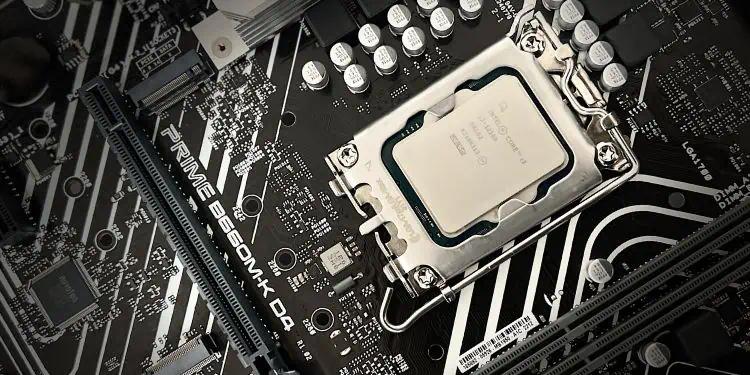
- There are a few techniques to boost the clock frequency even if you’re using a processor/mainboard with locked multipliers. I will discuss how our TNT team was able to overclock PRIME B660M-K D4 with the locked Alder Lake CPU in the proceeding sections.
- After checking compatibility, it’s a good idea to note your processor’s maximum rated frequency as well as the base clock speed. You can compare later to know whether you were able to meet the maximum tested speed or even go higher.
- What I like to do is run a CPU stress test to see how well the current frequency works under heavy CPU load. Also, every dedicated application provides a score after the test is successful. So, take note of it so that you can compare this with other stable OC configurations later.
- If your system crashes in the first test itself, you might want to improve your cooling. For that change the thermal paste and ensure you have maintained good airflow. You can even consider getting a high-wattage PSU with good efficiency.
- Note that you’ll need to perform a stress test each time after boosting the clock speed (mainly during manual overclocking). So, use an effective utility, like Cinebench, Geekbench, Novabench, PRIME95, AIDA64 Extreme, Intel Extreme Utility, etc.
- Also, ASUS recommends upgrading your BIOS to the latest version. This ensures better compatibility and such updates may also bring significant improvements in comparison to the prior ones.
- Along with that, make sure you load the optimized defaults (use the F5 shortcut). You definitely wouldn’t want unnecessary settings to conflict with the applied OC settings.


Auto-Tuning Methods in ASUS BIOS
Depending on your motherboard chipset, you can find different related options that automatically overclock your CPU and DRAM from the ASUS UEFI Utility.
You do not have to worry about balancing the frequency and voltage. These can be done from both the EZ and Advanced Modes.
EZ System Tuning
If you’re on EZ mode and want to quickly boost your system performance, find EZ System Tuning from the top-right:
- Click on the icon to change the system settings to ASUS Optimal (by default, it should be Normal).
- Save and exit BIOS (use the F10 shortcut).
- You’ll notice in the prompt that a certain setting gets enabled. This is different based on models.
In our PRIME B450-PLUS, the ‘OC Tuner’ was set to Ratio Tuning Mode while in our ROG STRIX B450-F Gaming, TPU (TurboV Processing Unit) got set to the first profile. - Once your PC restarts, your CPU’s clock speed will be pushed a little further than the base clock frequency. You might even notice ‘Overclocking X%’ in the startup screen, as shown below.


EZ Tuning Wizard
Some ASUS models even support an auto-tuning feature that works by adjusting the clock speed based on your current system configuration, PC scenario (gaming/regular use), and installed cooling. In the end, it estimates the tuning result on how much CPU and DRAM performance is best for your system.
- Select EZ Tuning Wizard from the menu bar (whether you’re on EZ or Advanced mode). Directly press F11 for quick navigation.
- In the new window, confirm your system configuration.
- Next, choose either one of the PC scenarios–Daily Computing or Gaming/Media Editing.
- Then, select your current cooling system. The better the cooling, the higher will be the evaluated CPU performance.
- Hit Next and your ASUS PC should reboot, achieving the applied settings.


After completing comprehensive testing, we were able to achieve different DRAM and CPU performance boost on our Pinnacle Ridge installed in the ROG STRIX B450-F Gaming motherboard. Here are the results:
- Stock cooler: 2% CPU (for Daily Computing) and 5% CPU (for Gaming)
- Heatsink and Fan (Air cooler): 8% CPU (for Daily Computing) and 6% CPU/3% DRAM (for Gaming)
- AIO: 9% CPU/3% DRAM (for Daily Computing) and 12% CPU/3% DRAM (for Gaming)
Advanced Mode Settings

Along with EZ System Tuning and EZ Tuning Wizard, you can utilize a variety of options available in the Ai Tweaker tab under Advanced Mode for automatic overclocking. However, the configuration is going to be different based on ASUS models, motherboard chipsets, and the processor installed.
Here are some of the common options that we have encountered on different tested boards at the TNT office. The ‘options’ that I have italicized are the recommended settings for OC:
| OC Setting | Options | Description | Results (on ASUS boards at TNT) |
| OC Tuner | Keep Current Settings / OC Tuner | When set to OC Tuner/Ratio Tuning mode, Ai Tweaker will automatically adjust the core frequency. | With Ryzen 5 5600G on PRIME B450-PLUS, we achieved 4.2 GHz (even with an AMD stock cooler with the max temperature not exceeding 75°C). |
| TPU | Keep Current Settings / TPU I / TPU II | Available on the ASUS motherboards that include a dedicated TPU option automatically fine-tunes the voltage settings to enhance performance. Set to TPU I when you’re using an air cooler and TPU II for water-cooling systems. | With Ryzen 5 2600 on ROG STRIX B450-F Gaming, we achieved 3.85 GHz (didn’t pass the stress test as it crashed after the temperature exceeded 110°C). |
| Core Performance Boost | Auto / Enabled / Disabled | When enabled, the ASUS Ai Tweaker automatically boosts the CPU and DRAM frequency. | With Ryzen 5 2600 on ROG STRIX B450-F Gaming, we achieved 3.6 GHz (passed the stress test). |
Intel Turbo Boost/AMD Precision Boost
While I’ve only mentioned about unlocked processors above, what about the locked ones? If your processor and mobo both support Intel Turbo Boost Technology, you’re already good to go.
For instance, with my i3-12100 (locked Alder Lake processor with a base clock speed of 3.3 GHz) installed on PRIME B660M-K D4, I was able to boost the CPU clock speed to a whopping 4.1 GHz!
Although I wasn’t able to get to the maximum rated Turbo frequency (4.3 GHz), it’s still a high value, especially for a locked CPU. In fact, during stress testing, the temperature was quite stable (not exceeding 70°C at 1.28 V).

The feature should be enabled by default. If not, you can find this on the Advanced tab. Navigate to CPU Configuration > CPU – Power Management Control, and set the Turbo Mode option to Enabled. Save the settings, and monitor the CPU frequency–it should definitely be boosted!
While AMD boards do not offer a dedicated feature to tweak within the UEFI settings, the latest Precision Boost 2 is enabled by default on all AMD Ryzen and Ryzen Threadripper 2000 Series (and above). It is entirely an automatic performance enhancement feature.
Although you might find ‘Precision Boost Overdrive’ (PBO) in the BIOS settings, do not confuse this with the Precision Boost algorithm. It emphasizes setting higher voltage limits for your CPU which makes the Precision Boost push for more clock speeds.

Usually, the option is set to Auto and I prefer setting it that way. But if you’re really seeking to overvolt the processor, set it to Enabled. Then, you’ll require defining respective values for PPT Limit, VDD_CPU TDC Limit, VDD_SOC, EDC Limit, and other parameters.
Manual Overclocking in ASUS BIOS
Automatic tuning is a great choice for beginners. But if you’re a hardware enthusiast like me, you definitely would want to go beyond the limits.
Keep in mind that manual overclocking can take several hours to find the best settings for your setup. It’s not about copying the values from professional guides or tutorial videos even if you share the same build. You need to put in your own efforts and invest time–so patience is the key here!
You require manually tweaking the CPU core ratio, BCLK frequency, core CPU voltage, VDDCR Voltage, Load-Line Calibration, etc. All these parameters differ for every ASUS model, also depending on the chipset and processor installed.
I’ve always preferred this formula when overclocking on any processor and motherboard:
CPU Frequency = BCLK * CPU Core RatioOur TNT Hardware Department team members were curious to find out how much we can manually push the CPU clock speed with just a stock cooler. We got surprising results although the temperature did exceed too much, making it a little unstable for playing high-end games. Here are the results on two of the ASUS AMD boards with two different Ryzen processors:
| Motherboard Model | Processor Used | Max Frequency | Max Temperature Recorded (Core Voltage set to Auto) | Max Voltage Reached | System Boot Check | Stress Test Using Cinebench |
| PRIME B450-PLUS | Ryzen 5 5600G | 4.6 GHz | 118°C | 1.48 V | OS Booted | Failed |
| PRIME B450-PLUS | Ryzen 5 5600G | 4.5 GHz | 113°C | 1.44 V | OS Booted | Passed |
| PRIME B450-PLUS | Ryzen 5 5600G | 4.4 GHz | 89°C | 1.38 V | OS Booted | Passed |
| ROG STRIX B450-F GAMING | Ryzen 5 2600 | 3.91 GHz | 112°C | 1.4 V | OS Didn’t Boot | – |
| ROG STRIX B450-F GAMING | Ryzen 5 2600 | 3.84 GHz | 112°C | 1.35 V | OS Booted | Failed |
| ROG STRIX B450-F GAMING | Ryzen 5 2600 | 3.71 GHz | 90°C | 1.24 V | OS Booted | Passed |
BCLK Frequency

By default, the BCLK (Base CLocK) value on all motherboards is 100, and is generally recommended to keep it that way. If you tweak this, it doesn’t just affect the CPU, but also your RAM and PCIe lanes.
So, you might experience reduced system stability or make you feel like the overclocking isn’t working. This is what exactly happened in our case when dialing up the BCLK value to 104 and CPU multiplier to 37 (aiming for 3.8 GHz) on Ryzen 5 2600 processor on ROG STRIX B450-F Gaming mobo. We weren’t even able to boot into Windows!
When we retested keeping BCLK = 100 and Multiplier = 38, it didn’t just boot up but we were even able to run and perform regular web-based tasks (with max CPU temperature reaching 65°C). However, the stress test failed after 5 minutes (as the temperature reached 113°C).
In most ASUS boards, you’ll have to set Manual in the Ai Overclock Tuner option. The other option you see–XMP (eXtreme Memory Profile) or DOCP (Direct OverClock Profile) is for memory overclocking. They help you automatically reach the advertised DDR frequency.
CPU Core Ratio

Even though BCLK only affects the CPU and RAM on modern motherboards, it shouldn’t still be the primary choice when pushing the clock speed. Instead, I highly recommend going for CPU Ratio/Multiplier.
For instance, the Ryzen 5 5600G processor has a 3900 MHz base clock speed. This means that its default CPU Core Ratio and BCLK values are 39 and 100 respectively. To push 100 MHz, you’ll have to increase the multiplier by 1. It’s always best to dial up the value by a small amount (1 is my recommended choice).
Saving, Stress Testing, and Readjusting
Now, you can save the applied settings, reboot your PC, and check if you’re able to boot into Windows. If yes, examine the current CPU frequency to ensure you’re getting what you had originally planned for.
Next, perform a stress test to check how the processor performs under heavy load. While I’ve used Cinebench in the demonstration below, you can use any tool of your choice.

I also like to open a hardware monitoring tool (here, CPUID HWMonitor is used) to keep tabs on the different parameters (temperature, voltage, and frequency).
In case your system fails or the CPU overheats (as pictured above in my case, it reached 113°C), it’s better to revert back and readjust the values for stability purposes.
While it’s normal to reach high temperatures during stress tests, I advise you to underclock and undervolt immediately so that you don’t encounter any issues in the future.
Tweaking CPU Core Voltage

By default, the core voltage setting is set to Auto in most modern ASUS boards. Nonetheless, you can change it in an increment of 0.05 for gaining more system stability and achieving even higher clock speeds. Look for CPU VCore, VDDCR CPU voltage, or related settings.
You might want to reapply the values by incrementing the voltages by 0.01 if you encounter issues during the first phase of the 0.05 increment. Even 1.4V is overkill for most systems. So, I do not recommend going higher than that, especially if you’re looking to overclock for longer periods.
During manual overvolting, the gist here is to gradually increase the voltage alongside the multiplier. Keep playing with all the values and stress-testing each of them (don’t forget to monitor the CPU temperature during the process) to find the one that’s going to be stable for your ASUS system.
Adjusting Other Parameters
Most users are equally interested in pushing their memory frequency to achieve the rated speed. While XMP and DOCP are great ways to do so, you can even opt for manual overclocking. This involves finding the right balance between frequency, timing, and voltage.
All the other OC parameters are set to Auto and can be tweaked manually as well. You may navigate to the respective section and find a similar setting here (I’ve only a few essential ones here):
- FCLK Frequency: Use this parameter when overclocking your memory. The best idea is to keep this to half of your current RAM speed.
- CPU Load-Line Calibration: You can set different LLC levels to compensate for large VDroop when the CPU is under heavy load. In ASUS BIOS, you can select anyone from the seven levels (Level 1 being the maximum and 7 the minimum).
This setting is for extreme overclocking enthusiasts (usually found under DIGI+VRM). If you’re only seeking mild overclocking, consider setting it to Auto. - GPU Boost: This is for users who wish to improve the performance of their integrated graphics. If you want to overclock your add-on graphics card, it’s better to use the GPU Tweak II application, which we shall discuss some other day.
- DRAM Timing Control: You can tinker with the different parameters in this section to achieve stable and more powerful RAM overclocking. These include DRAM CAS# Latency, RAS# Pre Time, RAS# ACT Time, Trc, TrrdS, TrrdL, etc.
- Performance Enhancement/ Performance Enahancer: In most ASUS boards, Levels 3 and 4 are considered best for OC settings. This lets your processor maintain the overclocked frequency for longer periods.


If you’re not planning to upgrade your cooling system, it’s also a good idea to set a custom aggressive speed fan curve. Follow my detailed guide on how to control the fan speed on ASUS to get a general idea.
Note: While most users like to boost the clock speeds of all the CPU cores at once, you can even experiment with manually overclocking each core. This offers more overclocking headroom, providing better performance, and can reduce heat production as well.
Using AI Suite Application
If you’re looking for a Windows utility to overclock your components, nothing could be better than the ASUS-recommended AI Suite application. You can download the utility for your model from the official Download Center webpage.
Auto-Tuning
This is similar to the EZ System Tuning utility which automatically finds the best clock speed for your system. All you need to do is click the dedicated button and your system should level up.
- Start the application and expand the menu bar from the right.
- Choose TurboV EVO.
- Switch to the Auto Tuning tab.
- Hit the Start button and your PC should restart.
- The next time your OS boots up, check the current CPU speed from the monitoring section at the bottom.


Manual Overclocking
As I explained earlier, manual overclocking is all about trying out different ratios and voltages. Without getting into much more technical details, let me walk you through the step-by-step guide on how to do this easily using the AI Suite 3 application:
- Start by getting to the TurboV EVO section.
- Move to the left column (in the CPU Frequency tab), and start by incrementing the ratio by 1 each time.
- Hit the Apply button and check the current speed in the monitoring window. While you’re at it, note the temperature and voltage as well.
- Since AI Suite doesn’t support a built-in stress testing utility, you can utilize any other reliable tool of your choice for this purpose.
- Repeat the above steps until you encounter any instability (like, temperature exceeding 90 degrees or system crashes).
- Once you get a general idea of how much your CPU can take the load, start increasing the CPU VCore Voltage. Start by incrementing it by 0.05.
- Keep increasing it alongside the ratio to get the maximum frequency at an optimal temperature.
- If you’re not satisfied with your current OC configuration, you may move to the DIGI+VRM section.
- Here, you can set the VDDCR Power Phase Control to Extreme (by default, it should be set to Optimized). Now, your CPU’s clock speed should run at full phase mode.
- You can even tweak the CPU Load Line Calibration and VDDCR SOC Load Line Calibration. Both these options can help improve overclocking stability.
- Once you’ve confirmed the final value, create and save the profile.


Additional Tip: If you’re planning to keep the configuration for longer periods, it’s best to keep tabs on the voltage, speed, and temperature occasionally (even after you were successful). In case you find any instabilities, immediately disable overclocking and readjust the values from scratch.
Introducing AI Overclocking (AiOC)
While there already exists auto-adjustment OC settings on ASUS BIOS and AI Suite, their new AI Overclocking (AiOC) has now gone mainstream. Unfortunately, only a few Intel boards from Z and X series support it. Here’s a list of all those that support ASUS AiOC.
The feature is engraved within both UEFI Utility and AI Suite 3 and it’s even more simple to use than the ones that I have described previously. It’s meant for both tech-savvy and novices.
With the use of advanced algorithms, this technology determines the best voltage and frequency settings for your processor. Besides, it continuously tracks your tasks and CPU usage and adjusts the clock speed that’s optimal for your changing system temperature.
In BIOS Advanced Mode, you just have to set the AI Overclock Tuner option to Manual and CPU Core Ratio to AI Optimized. On the other hand, you can choose AI Optimized in the System Tuning section in EZ Mode.
If you’re using the ASUS AI Suite utility, all you have to click is the AI Overclocking tab and a warning prompt should pop up. Hit Ok and this should automatically adjust the frequency and voltage for you.
Using Processor OEM Software

Now that I have covered all the ASUS methods, here’s an extra tip–you can even overclock your CPU using Intel’s Extreme Utility and AMD’s Ryzen Master.
As demonstrated in the Ryzen Master’s demonstrated figure above, you can select a profile, choose Core Speed (MHz), and manually enter the value of your choice. No need to set a core ratio/multiplier. Nonetheless, you can definitely control the voltage settings from the dedicated section.
The steps for Intel processors are also similar. However, the Extreme utility will only work for the unlocked ones. So, make sure you check the supported processors before proceeding to overclock/overvolt the CPU.
Additional Tip: Along with the OEM software, you can even use trusted third-party applications, like CPU Tweaker, SetFSB, ClockTuner for Ryzen, Intel Performance Maximizer, etc.