
Whether you want to protect your online privacy or access restricted content, VPN is the ideal choice. However, it’s frustrating when you can’t set it up properly, or the connection can’t be established leading to different error messages.
While incorrect credentials are a common cause, the VPN may also not work due to server or internet-related problems. Additionally, IPv6 incompatibility, failing Remote services or network protocols, corrupted WAN Miniport drivers, and blocked ports can also cause this issue.
Before moving on with the hard fixes, let’s start with basic troubleshooting.
General Troubleshooting Tips
- Sometimes, an internet problem could be the reason. First, disconnect the VPN to check if the regular connection is working fine or switch to another VPN server.
- Ensure you’re using the correct login credentials. Also, confirm that your VPN provider hasn’t changed the password.
- Ensure your computer’s date and time are accurate.
- Ensure your Windows is updated to the latest version.
- In case you’re using a third-party VPN application, try updating/reinstalling it.
- If you’re getting an error message, check out these guides that should help you out:
- If you’re using a premium VPN service, it’s best to contact the provider to know what might have gone wrong. But if you’re using a free VPN and none of the listed solutions worked out, one of the methods from below should fix it.
Try Disabling IPv6
Whether you’re unable to connect to the VPN at all or can’t use the internet while being able to establish the connection, simply disabling IPv6 can sometimes do this trick.
Some VPN servers only utilize IPv4 addresses and headers and might not be compatible with IPv6.
- Open Run and execute the following command to launch the Network Connections window:
ncpa.cpl
- Right-click on the connected network adapter (Ethernet or Wi-Fi).
- From the list of items, find and deselect Internet Protocol Version 6 (TCP/IPv6).
- Press Ok to save the changes and reboot your computer.
- Finally, reconnect to your VPN and it should start working.


Adjust MTU Size
If your VPN server supports IPv6, but you’re using large data payloads (watching live streams/broadcasts, transferring/downloading large files, etc.), this might add more space to the IPv6 header. This might be the reason your VPN keeps disconnecting.
A simple workaround to this problem is to lower the Maximum Transmission Unit (MTU) size. This way, the header space is well-managed, and there will be less packet loss and potentially no packet fragmentation. So, you can make the VPN start working without disabling the IPv6 address.
- Open Command Prompt as an administrator.
- First, run the following command to list the IPv6 subinterfaces and check the MTU sizes:
netsh interface ipv6 show subinterface - Now, execute the following command to lower the MTU size than the present value:
netsh interface ipv6 set subinterface <your network as listed under Interface> mtu=<value> store=persistent - Reboot your PC and reconnect to the VPN to see if this helps.
- If it doesn’t, lower the value again and recheck until the VPN works.


Note: Since the recommended lowest MTU size for IPv6 is 1280, I won’t advise you to adjust yours to less than that. If your VPN is still not working, reset the MTU size and know that IPv6 is probably not causing the problem.
Check for Network Adapter Issues
WAN Miniport device drivers provide alternative connection methods, including the VPN. If outdated or corrupted, your VPN might stop working or throw different errors.
To solve this, you can either update (if possible) or simply reinstall them following the below instructions:
- In the Run dialogue box, execute the below command to open Device Manager:
devmgmt.msc - Expand Network Adapters.
- If you have set the VPN type to Automatic, right-click on each of the WAN Miniport adapters in succession and pick Update driver.
In case you’ve chosen a dedicated protocol, you may only update the specific adapter. - Select Search automatically for drivers.
- If the best drivers are installed, return to the Device Manager utility. This time, uninstall all or the required WAN Miniport adapters.
- Restart your device to reinstall those drivers and try connecting to the VPN to see if this has resolved your problem.
- Along with the WAN Miniport adapters, I also suggest updating/reinstalling your primary network driver. This should fix any network connectivity issues which could in turn be affecting the VPN.


Open Blocked Ports
Based on the tunneling protocol used for establishing a VPN connection, it’s essential that the necessary ports remain open.
Here’s a chart that should help you out on which TCP/UDP ports your firewall shouldn’t block:
| Tunneling Protocol | Port | Security |
| OpenVPN | UDP 1194 and TCP 443 | Fast speed with excellent encryption |
| IKEv2 | UDP 500 and UDP 4500 | Fast speed with good encryption |
| SSTP | TCP 443 | Medium speed with good encryption |
| L2TP/IPSec | UDP 1701 | Medium speed with medium encryption |
| PPTP | TCP 1723 | Fast speed with poor encryption |
- In the Run dialogue box, type
wf.mscand hit Enter. This should launch the Windows Defender Firewall with the Advanced Security program. - From the left pane, choose Inbound Rules.
- Move to the right pane and click on New Rule.
- Once the New Inbound Rule Wizard pops up, set the rule type to Port and hit Next.
- In the next screen, pick TCP or UDP (based on the tunneling protocol you’re using).
- Also, in the Specific local ports field, enter the port number and press Next.
- Leave the Action to Allow the Connection and hit Next.
- Based on your choice, you can apply the rule for Domain, Private, or Public. Then, click Next.
- Provide the name and description for the inbound rule. Once done, hit Finish.
- Finally, in the center pane, make sure there’s a green tick or the Enabled column says ‘Yes’ to the rule you just created.


Setup Exception for UDP
If your VPN software utilizes User Datagram Protocol (UDP) instead of TCP, know that this is used for establishing low-latency and loss-tolerating connections. In case there are security problems, your VPN might stop working. If that’s the case, you can set up a UDP exception by introducing the AssumeUDPEncapsulationContextOnSendRule DWORD in Windows Registry Editor.
Caution: Incorrect changes in the Windows registry can cause serious issues and you might even have to reinstall the operating system. To be on the safe side, I suggest keeping a backup so you can restore it if anything goes wrong.
- Use the
regeditcommand in Run to open Registry Editor. - Hit Yes to provide elevated privilege.
- In the address field, paste the below path and hit Enter:
Computer\HKEY_LOCAL_MACHINE\SYSTEM\CurrentControlSet\Services\PolicyAgent - Move to the right section and right-click anywhere on the blank space.
- Choose New > DWORD (32-bit) Value.
- Name the created DWORD
AssumeUDPEncapsulationContextOnSendRule. - Double-click on it and set the value to
2. Don’t forget to press Ok to save the changes. - Now, reboot your device and check if the VPN problem is now solved.


Check Issues with the Remote Services
Remote Access Connection Manager (RDCMan) is a Windows service responsible for VPN connections from your computer to the Internet or other remote networks. If the service is not running or having issues, you might encounter VPN connection troubles. Here’s what you can do:
- Open Run and use the
services.msccommand to launch the Services utility. - Look for Remote Access Connection Manager and make sure it’s running. If not, right-click and select Start.
- In case the Windows service is already running, right-click on it and pick Refresh.
- If that didn’t help, navigate back and this time, select Restart.
- Even if restarting the service didn’t work out for you, double-click on it to launch Properties.
- Now, switch to the Dependencies tab and identify the services that it depends on. As you can see below, these services include Secure Socket Tunneling Protocol Service, Telephony, Remote Procedure Call (RPC), DCOM Server Proces Launcher, and RPC Endpoint Mapper.
- Navigate back to the Services application and restart all of these services.


Try Flushing the DNS Cache
If none of the aforementioned steps worked out, there could be certain faults with the DNS Resolver Cache that could be responsible. Certainly, it’s a good idea to add new DNS entries by clearing the old ones. This way, your computer can send new DNS queries to the VPN server, possibly fixing the problem:
- From the Start Menu, open Command Prompt as an administrator.
- Now, start executing each of the commands mentioned below:
ipconfig /flushdnsipconfig /releaseipconfig /renew - Reconnect to the VPN and check if it’s working again.
- If the problem persists, run the following command to reinstall the TCP/IP stack:
netsh int ip reset - Finally, reboot your PC and reestablish the VPN connection.


Disable Proxy Server
Generally, proxy servers are not needed for VPN connections. I do not think you have set it up yourself. But if you have unknowingly configured this, it’s better to disable it. Since most Windows users have fixed the problem this way, it’s worth a try:
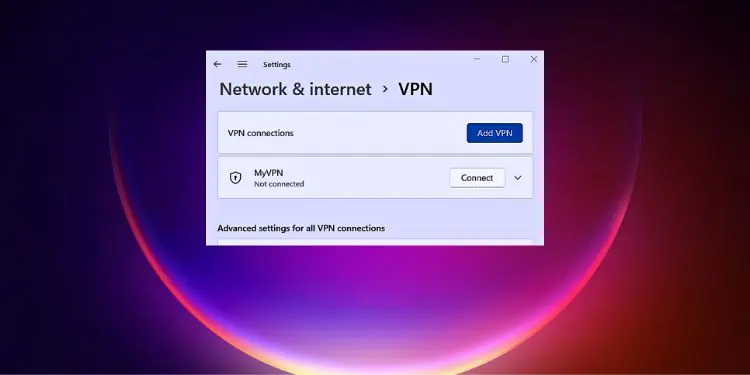
- Press Windows and I keys together to launch Settings.
- Go to Network & Internet > VPN.
- Select your VPN and click on Advanced Options.
- Next, hit the Edit button next to the Proxy settings for this VPN connection field.
- Once the Proxy Settings window pops up, ensure that it is set to None.
- Then, press the Apply button.
- If the VPN is still not working, get to the Network & Internet section again.
- This time, pick the Proxy option.
- Now, make sure both the automatic and manual proxy setups are turned off.


Allow Your VPN App to Pass Through the Firewall
As mentioned earlier, it’s better to adopt the Windows in-built VPN rather than relying on third-party applications. But if you have decided to stick with it, I suggest you check whether the Windows Defender Firewall (or a third-party firewall) is blocking the VPN connectivity.
If that’s the case, you need to allow the application to pass through the firewall, and here’s how:
- Open Windows Defender Firewall from the Start Menu, as shown below.
- From the left pane, click on Allow an app or feature through Windows Defender Firewall.
- Press the Change Settings button to provide elevated privilege.
- Now, find your VPN application from the list and check both the Private and Public options.
- Press Ok and check if this has solved your VPN connection problem.


Perform System Restore
If you have made any vital system changes intentionally or unintentionally, this might be another reason for your VPN to not work. Some users have complained about facing a similar issue after a recent Windows update. Whatever the case, you can try performing a system restore to see if this solves your problem:
- Launch Run and execute the
sysdm.cplcommand to open the System Properties dialogue box. - Get to the System Protection tab and click on the System Restore button.
- Now, press Next.
- Check the Date and Type field and select the appropriate restoration point. You should have at least one Automatic Restore Point like the one shown below. Select the option and press Next.
- Click on Finish and wait for your computer to restart.
- Follow the on-screen instructions to complete the system restoration.
- Once you’ve reverted to the older Windows version, reconnect to your VPN and confirm if the issue was caused by a recent update/change.


If your VPN is still not working after trying out all the steps I’ve mentioned, do not hesitate to post your exact problem in the comment section below.