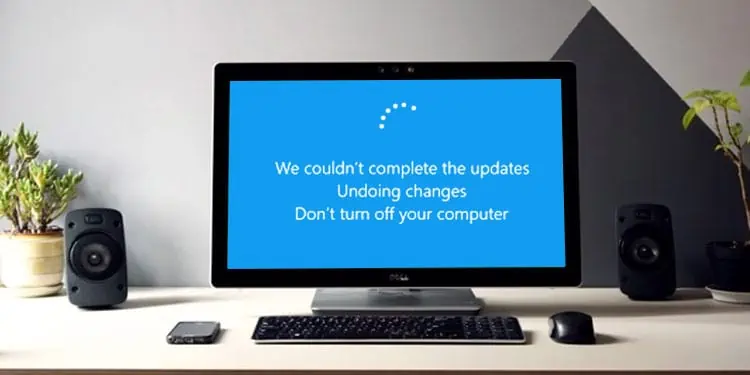
While installing system updates and restarting your computer to complete the installation, you may sometimes get the “We couldn’t complete the updates. Undoing changes” error. After logging in to your account, you will also likely see an error message on the Windows Updates Settings window.
This issue can happen due to various possible reasons. And depending on your situation, you may need to perform multiple solutions before you can resolve your issue. In this article, we discuss all the reasons along with their corresponding solutions.
Causes for “We Couldn’t Complete the Updates Undoing Changes” Error
Here are the potential causes for the “We couldn’t complete the updates. Undoing changes” error on Windows:
- Incorrect EFI partition ID.
- Incomplete download of update files.
- Issues with necessary services.
- Incompatibility with previous updates or system.
- Missing apps, like Microsoft Edge, or optional features.
- Third-party security apps or VPN blocking the update.
How to Fix “We Couldn’t Complete the Updates Undoing Changes” Error?
First, try installing the update again and see if you still encounter the error. If so, follow the possible solutions we have listed below.
Check EFI Partition’s GUID
You can encounter this error if your EFI partition does not have the correct GUID. This issue usually happens if you extend the EFI partition or clone your system to another drive.
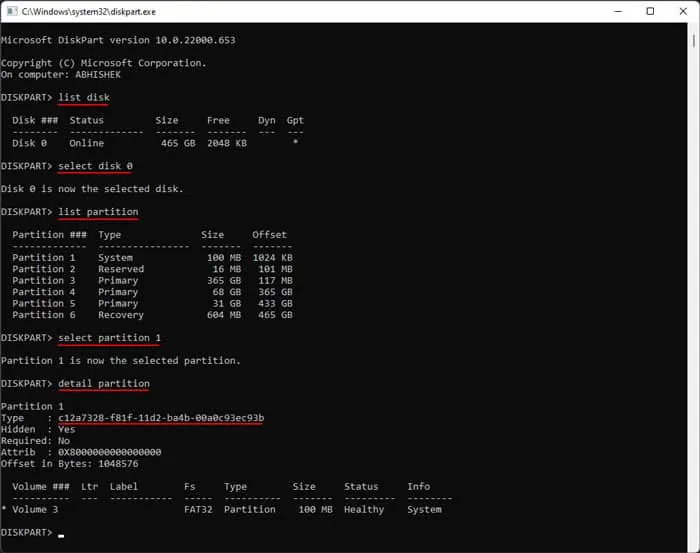
So you need to check the GUID and set the correct one to resolve the error. Here’s how you can do so:
- Open Run by pressing Win + R.
- Type diskpart and press Enter to open Diskpart command line.
Enter the following commands:list disk(look for your primary disk)select disk #(replace # with your primary disk number)list partition(look for the EFI partition, you can check the partition in Disk Management if you can’t figure it out)select partition #(replace # with the corresponding number)detail partition
- If the Type doesn’t show c12a7328-f81f-11d2-ba4b-00a0c93ec93b, enter the command below:
set id=c12a7328-f81f-11d2-ba4b-00a0c93ec93b - Now, enter
exitto close Diskpart.
If you have the legacy MBR partition, your Type should show 0x07 or 07, and the partition you need to check is your System Reserved partition.
Run Update Troubleshooter
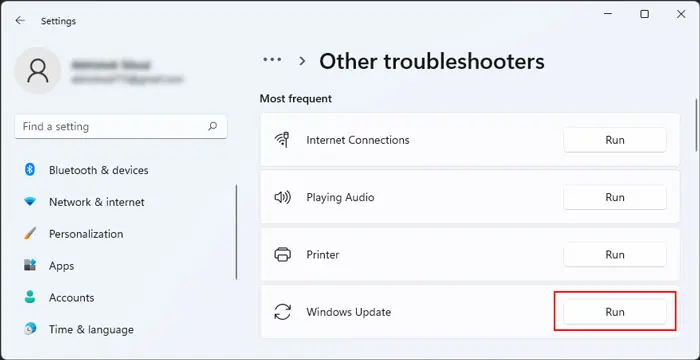
Windows provides dedicated troubleshooters to scan and repair any errors in your system components. So, it’s worth running the Windows Update troubleshooter whenever you encounter any update issues. Here’s what you need to do:
- Open Run.
- Type
ms-settings:troubleshootto open Troubleshoot Settings. - Select Other troubleshooters (Windows 11) or Additional Troubleshooters (Windows 10).
- For Windows 11, click on Run next to Windows Update. For Windows 10, select Windows Update and click on Run this troubleshooter.

- Follow the on-screen instructions.
Delete SoftwareDistribution Folder Contents
It is possible that your system couldn’t properly download the necessary update files and encountered an error during the update installation.
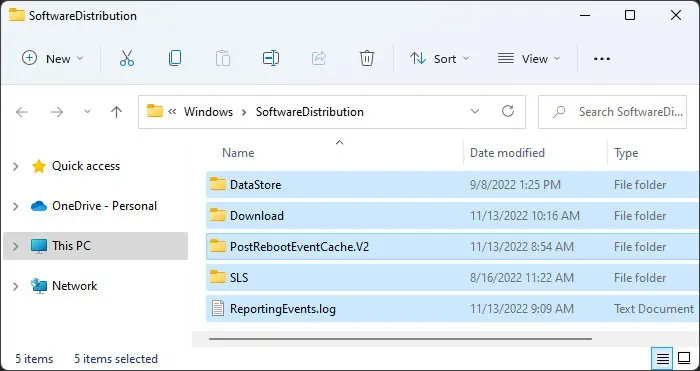
You need to delete the previously downloaded update files and try again in order to resolve such issues. These files are present inside the SoftwareDistribution folder, so follow the steps below to wipe the folder’s contents:
- Press Win + R to open Run.
- Type
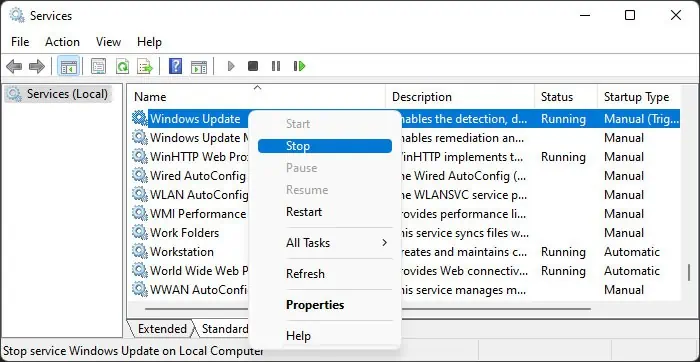
services.mscand press Enter. - Look for Windows Update and check its Status.
- If it shows Running, right-click on the service and select Stop.

- Now, open File Explorer by pressing Win + E.
- Navigate to
C:\Windows\SoftwareDistribution. - Select all the contents and delete them.

- Now, go to Services again, right-click on Windows Update, and hit Start.
You may also need to stop the Background Intelligent Transfer Service (BITS) and Cryptographic Services to delete the contents if the above steps don’t work. Do so in a similar manner to the Windows Update service, and don’t forget to restart them afterward.
After deleting the files, try updating again and see if you still encounter the error.
Reset Windows Update Components
If deleting the SoftwareDistribution folder contents doesn’t work, it’s better to reset all Windows components to restart the update process properly. Here, you need to restart the necessary services, delete the files downloaded by BITS and Window Update service and reset the Winsock catalog. Here’s how you can do all of these:
- Open Run.
- Type
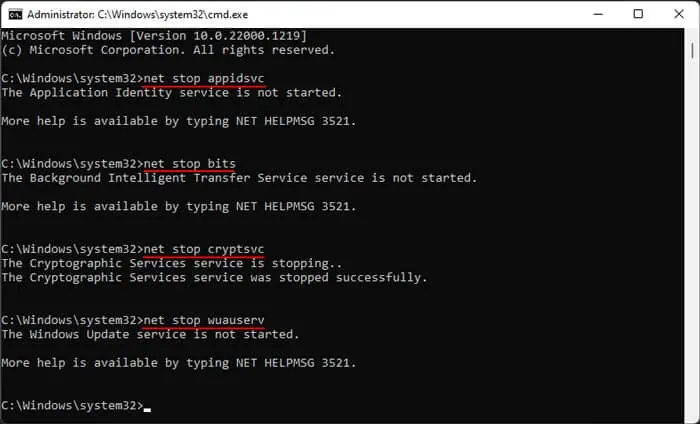
cmdand press Ctrl + Shift + Enter to open the Elevated Command Prompt. - First, you need to stop some services in order to be able to delete the update files. Use the commands below to do so:
net stop appidsvcnet stop bitsnet stop cryptsvcnet stop wuauserv
- Then, you need to delete the files downloaded by BITS using the command:
del "%ALLUSERSPROFILE%\Application Data\Microsoft\Network\Downloader\qmgr*.dat" - If the file/directory doesn’t exist, enter the command:
del "%ALLUSERSPROFILE%\Microsoft\Network\Downloader\qmgr*.dat"
- Now, the next step is to delete the SoftwareDistribution and catroot2 folders. Enter the commands below to do so:
rmdir %systemroot%\SoftwareDistribution /S /Qrmdir %systemroot%\system32\catroot2 /S /Q
- If you can’t remove the files, some of the services above may have restarted. So, run those net stop commands again. Then, remove the folders.

- After that, you need to reset the Winsock Catalog using the command:
netsh winsock reset
- Now, start the services you stopped earlier with the commands:
net start appidsvcnet start bitsnet start cryptsvcnet start wuauserv
Now, check if you still encounter the error. If you do,
- Redo steps 1-7 from above.
- Now, enter the commands below to reset the Windows Update service and BITS:
sc sdset bits D:(A;CI;CCDCLCSWRPWPDTLOCRSDRCWDWO;;;SY)(A;;CCDCLCSWRPWPDTLOCRSDRCWDWO;;;BA)(A;;CCLCSWLOCRRC;;;IU)(A;;CCLCSWLOCRRC;;;SU)S:(AU;SAFA;WDWO;;;BA)sc sdset wuauserv D:(A;;CCLCSWRPLORC;;;AU)(A;;CCDCLCSWRPWPDTLOCRSDRCWDWO;;;BA)(A;;CCDCLCSWRPWPDTLOCRSDRCWDWO;;;SY)S:(AU;FA;CCDCLCSWRPWPDTLOSDRCWDWO;;;WD)
- Then, perform steps 8 and 9 again.
If you still can’t resolve the issue, we recommend visiting our article on How to Reset Windows Components to learn about additional steps you need to perform depending on specific scenarios.
Manually Download Updates
If you can’t update your system using the built-in tools and services, you might as well download the update files manually and perform an offline install. Doing so can also avoid the error if your services or previous updates are responsible.
You can find the updates inside Microsoft’s Update Catalog. You can check the update name from inside your Update Settings (ms-settings:windowsupdate on Run) and search for it in the Catalog.
Update Through Windows Update Assistant or Media Creation Tool
If an offline update doesn’t help, you can use the Update Assistant or Media Creation tool. Here’s what you need to do:
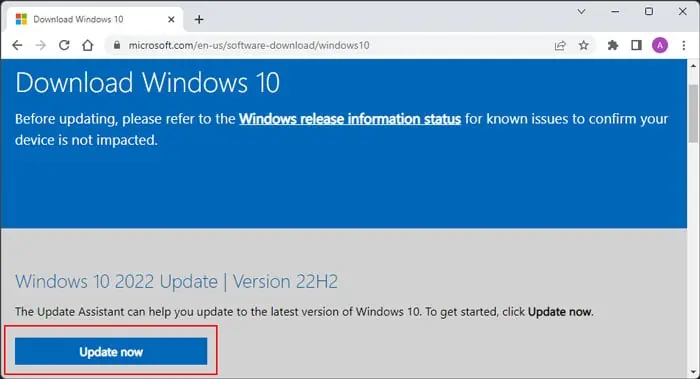
- Go to Microsoft’s Software Download platform and click on your system version.
- If you want to install Windows 10 updates through the Update Assistant,
- Click on Update Now to download the installer.

- Run it and follow the on-screen instructions.
- Click on Update Now to download the installer.
- To use the Media Creation,
- Click on Download now under Create Windows Installation Media to download the installer.
- Run this program and confirm any User Account Control prompts.
- Click Accept.
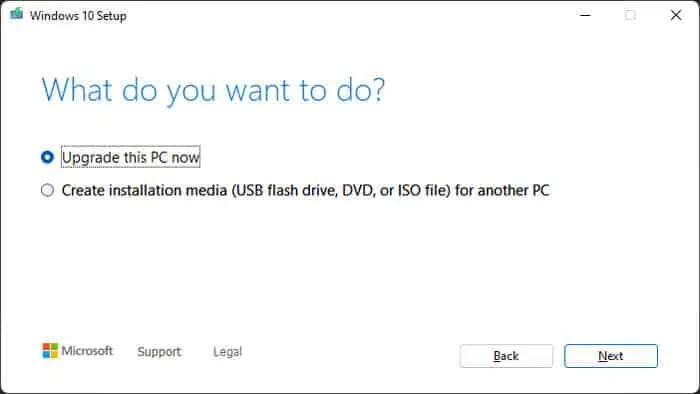
- Check Upgrade this PC now and click Next.

- After everything is ready, click Change what to keep and see if you need to make any changes.
- Then, get back and select Install.
Check Windows Release Health and Update History
The various system updates may carry different bugs, which require specific solutions that won’t work for other updates. Microsoft has a Windows Release Health platform that documents these issues along with their temporary or permanent solutions. You can refer to the website to learn what you need to do for your situation.
You can also check the update history for Windows 11 and Windows 10, as they include the details of even more updates that may not be included in the Release health documentation.
Install or Reinstall Edge
Some updates also contain modifications for the built-in apps like Microsoft Edge. So, if you had removed Edge from your system some while ago or if your app contains some bugs, you may encounter the above error. To avoid this issue, you need to install or reinstall Microsoft Edge from Microsoft’s platform before the update.
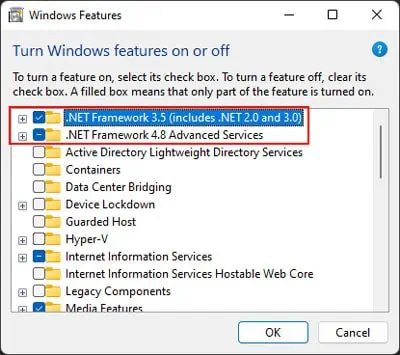
Check .NET Framework
Some Windows updates are also related to .NET Framework, which is useful in running many applications. Sometimes Microsoft rolls out some updates where the user needs to have the feature enabled.
While the next update usually rectifies this requirement, for now, you can enable the features and check if you can successfully update your system. Here’s how you can do so:
- Open Run.
- Type
optionalfeaturesand press Enter to open Optional Features. - Check all options with .NET Framework and click OK. You may need to wait for some time while your system downloads and installs the features.

Uninstall Latest Updates
One of the common reasons for this issue is the conflict between the new update and the old one. Whenever the older update has many issues, Microsoft usually takes it down and creates a new update with features from the previous one, plus necessary bug fixes.
Additionally, it is also possible that the conflict is a bug in the new update, and Microsoft hasn’t gotten around to resolving it.
In both these cases, you can prevent the above error by uninstalling the conflicting update from your system. It is usually the latest ones, so here are the steps to remove them from Windows:
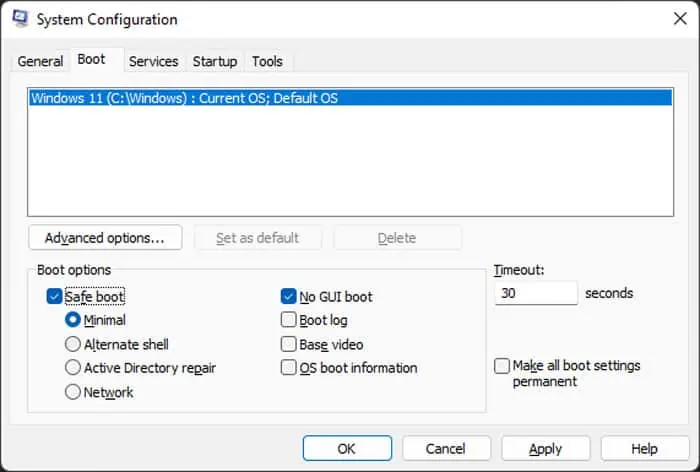
- Open Run.
- Type
msconfigand press Enter to open System Configuration. - Go to the Boot tab, check Safe boot, and click OK.

- Then, click on Restart to boot in safe mode.
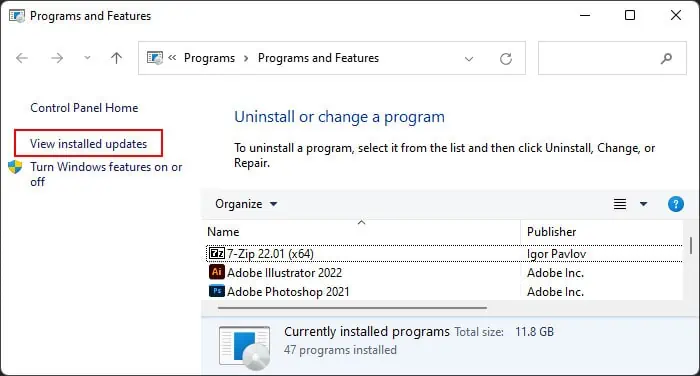
- On safe mode, open Run.
- Type
appwiz.cplto open Programs and Features. - Click on View installed updates.

- Sort the updates by clicking on Installed On.
- Then, scroll down to Microsoft Windows and look for the latest updates.
- Select them and click Uninstall.

- Confirm any prompts.
- Then, open System Configuration again.
- Go to the Boot tab and uncheck Safe boot.
- Click OK and then Restart.
Then, try updating your system again and check if you still encounter the error.
Disable VPN or Third-party Security Software
It is also possible that a VPN or third-party security software is blocking the installation of some update features on your device. In such cases, it’s better to temporarily disable them while you are installing the update.
The method to disable security software like antivirus or firewall depends on the app itself. So if you aren’t sure about what to do, we recommend referring to official sources.
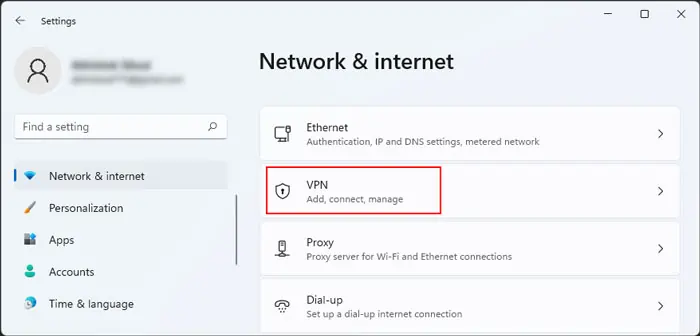
For a VPN, you can either use the app settings or disable it from your Network Settings using the steps below:
- Press Win + I to launch Windows Settings.
- Go to Network & internet > VPN.

- Choose the VPN you wish to disable and click Disconnect.
Pause Updates for Some Time and Try Again
If you couldn’t resolve the issue after performing all previous methods, the most likely scenario is that the update you are trying to install itself contains some bugs. You can only wait for further updates and prevent your computer from installing this one in such a scenario.
You can prevent the update by pausing it. To do so,
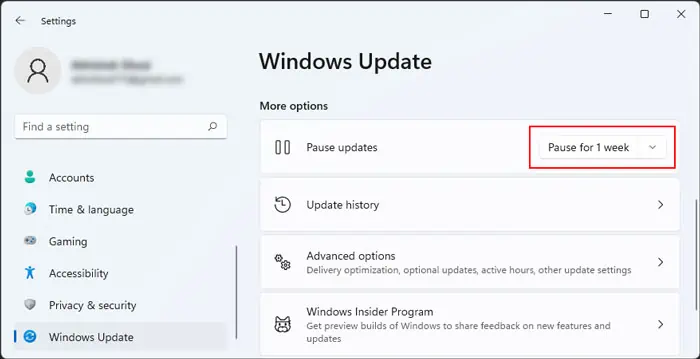
On Windows 11
- Open your Settings and go to Windows Update.
- Set the drop-down box next to Pause updates to the time interval you want and click on it.

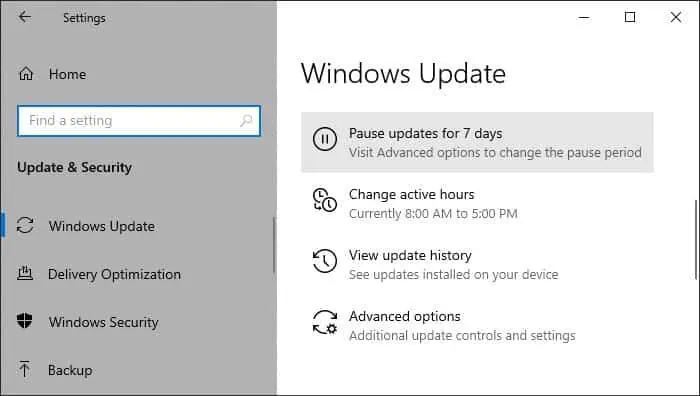
On Windows 10
- Open your Settings and go to Update & Security.
- Click on Pause updates for 7 days to do so. You can keep clicking on the option to extend the pause time.

After that, make sure to regularly check Microsoft’s website for further updates. If any is available, go back to the Update Settings and click on Resume updates.
