Tech News Today
  • Hardware
    • Motherboards
    • CPUs
    • Graphic Cards
    • RAM
    • SSDs
    • Computer Cases
    • Monitors
    • Peripherals
    • Power Supply Unit
    • PC Builds
    • Computer Tips
  • Software
  • Operating System
    • Windows
    • Mac
    • Linux
  • Gaming
  • Mobile
  • Console
  • More
    • Internet
    • Networking
    • Security
    • Buyer’s Guide
    • Gadgets
    • Laptops
    • Reviews
    • How To
    • News
Facebook Twitter Instagram
Tech News Today
  • Hardware
    • Motherboards
    • CPUs
    • Graphic Cards
    • RAM
    • SSDs
    • Computer Cases
    • Monitors
    • Peripherals
    • Power Supply Unit
    • PC Builds
    • Computer Tips
  • Software
  • Operating System
    • Windows
    • Mac
    • Linux
  • Gaming
  • Mobile
  • Console
  • More
    • Internet
    • Networking
    • Security
    • Buyer’s Guide
    • Gadgets
    • Laptops
    • Reviews
    • How To
    • News
Tech News Today
Home»Tips & Tricks»How to Indent Second Line in Google Docs for Citations

How to Indent Second Line in Google Docs for Citations

Jabin ManandharBy Jabin ManandharDecember 19, 2022
how-to-indent-second-line-in-google-docs

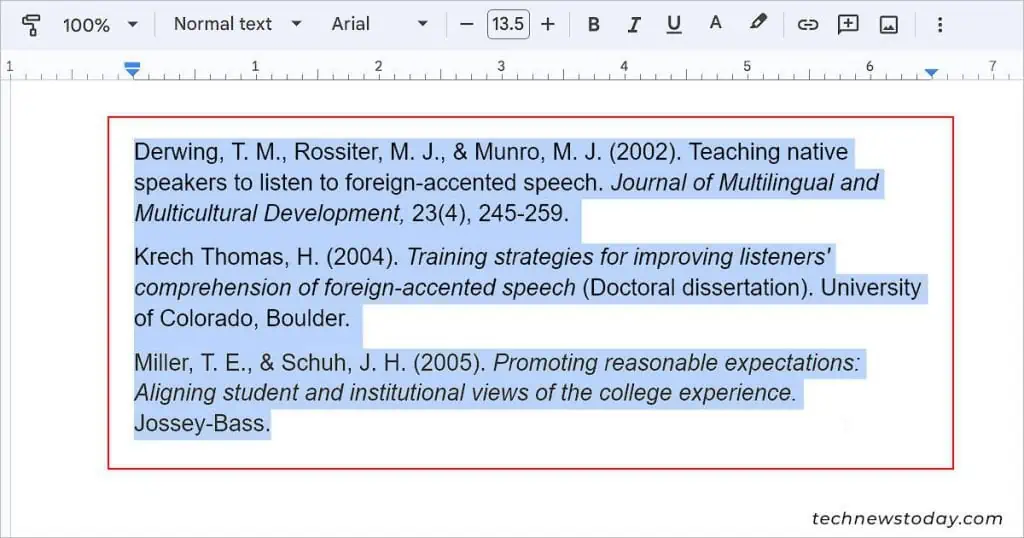
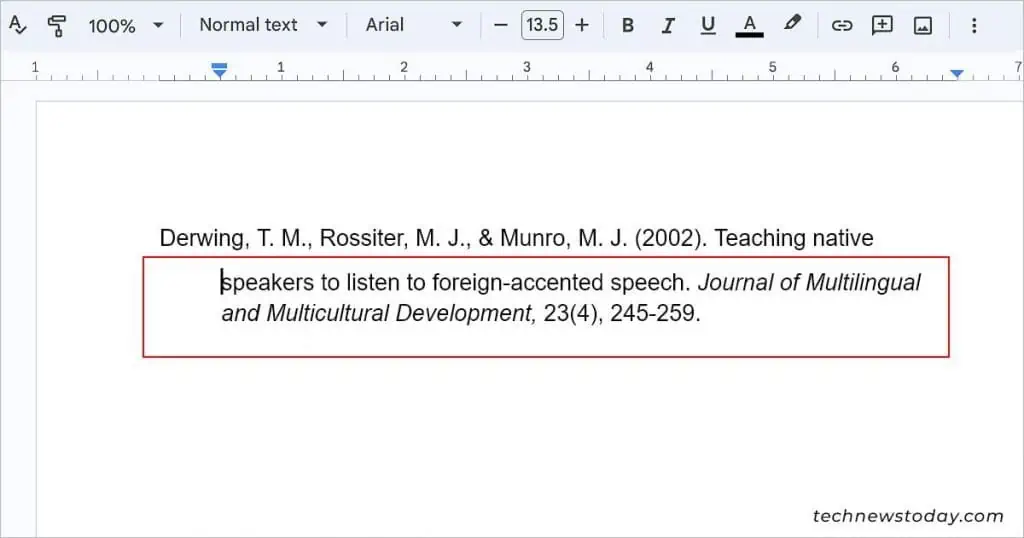
You can indent a second line on Google Docs using a hanging indent. A hanging indent is also called a second line indent. Thus, indenting a  second line is the same as creating a hanging indent. It indents all the selected text except the first line of the paragraph.

There are different ways to indent the second line on Google Docs if you are using a web version. You can use the ruler, indent shortcut, or tweak a few settings.

However, if you are using an app version of Google Docs, you need to go through the settings.

So, let’s get right into the article to learn about the different ways you can create a hanging indent on the Web version and mobile phones.

Manually Adjusting the Markers on the Ruler

Since this method requires markers on the ruler, make sure you have the ruler on display. If it’s not, click on the “View” menu and select the “Show ruler” option. Then, follow the steps below.

  1. Select the text you want to indent.
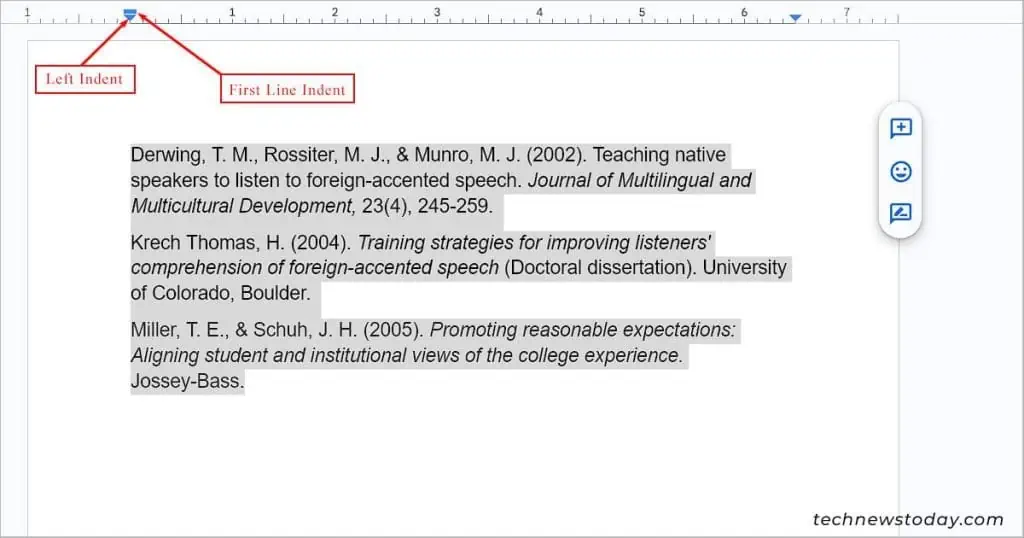
  2. Now, drag the Left indent to the right using the ruler. For your information, the left indent icon looks like a down arrow, and the first indent looks like a horizontal line.
    left-indent-docs
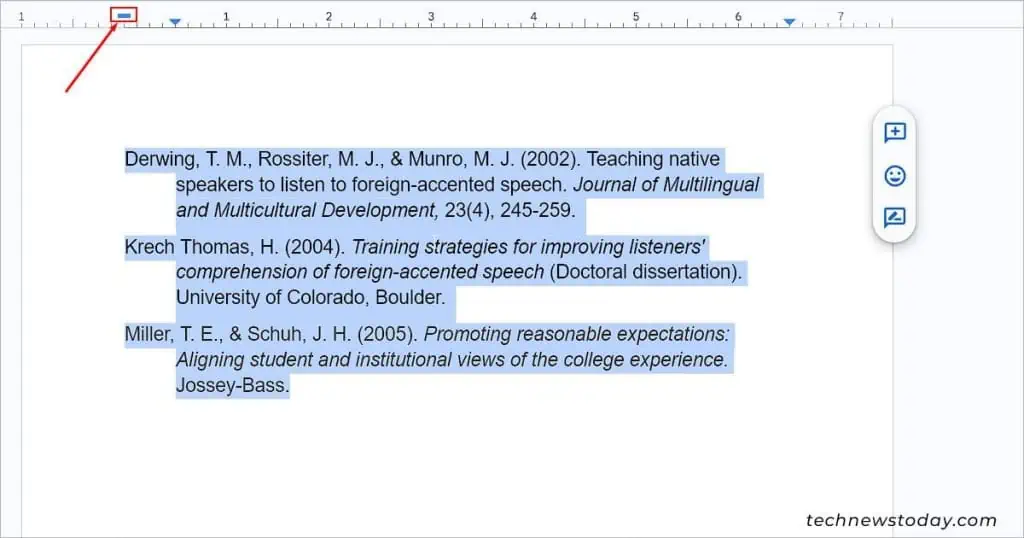
  3. Next, drag the First Line indent to the left and you have everything indented except the first line.how-to-indent-second-line-docs--first-indent-

Using Google Docs Settings

Google Docs itself provides a way to create a hanging indent. Here’s how you can access the necessary settings on both the web version and the mobile app.

On the Google Docs Web version

If adjusting markers is a little inconvenient for you, you can tweak the settings as follows. 

  1. Select all the text you want to indent.
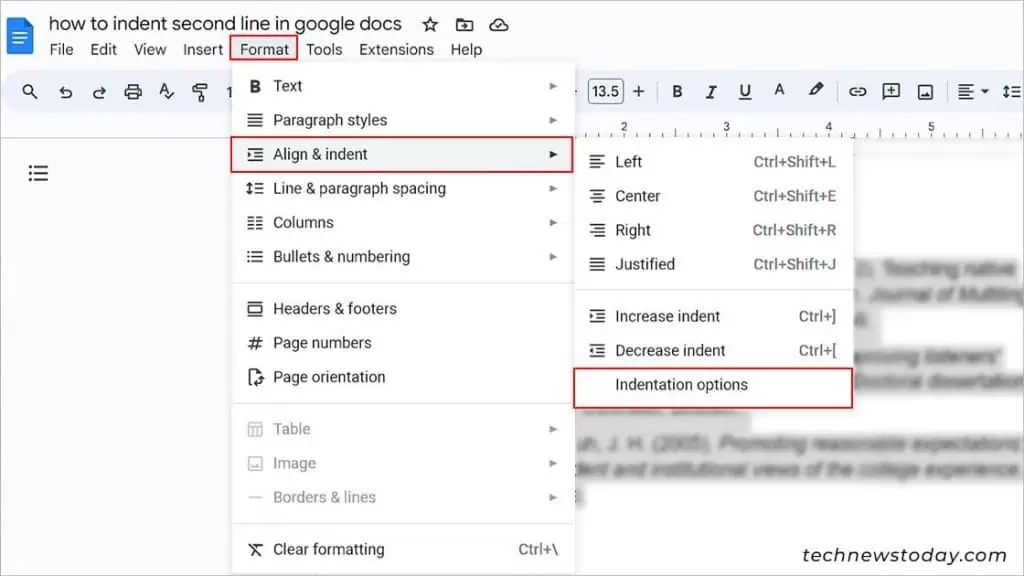
  2. Then, click on the Format menu and navigate to Align & indent > Indentation options.
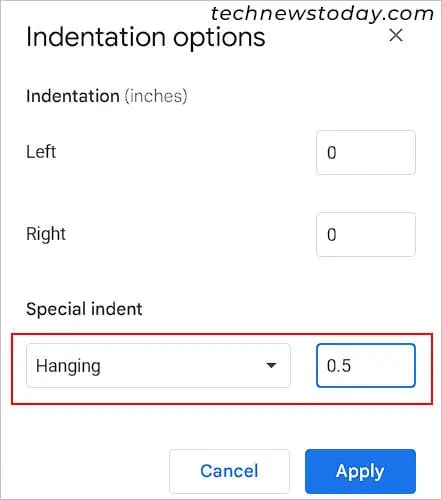
  3. Now, click to expand the dropdown under the Special indent section and select the “Hanging” option.
    hanging-indent-google-docs-format-options
  4. Finally, click on Apply.

On the Mobile App

There is no ruler available in the Google Docs mobile app. However, you can use a workaround method. This works for both Android and iPhone devices. Here’s how you can do it.

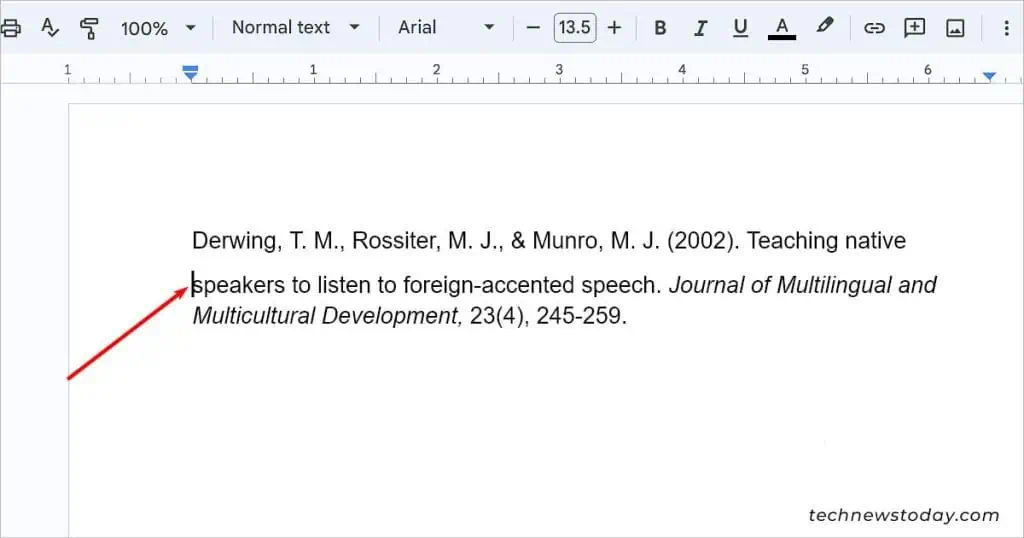
  1. Tap and place the cursor at the start of the second line. Alternatively, you can place it anywhere you want to indent.
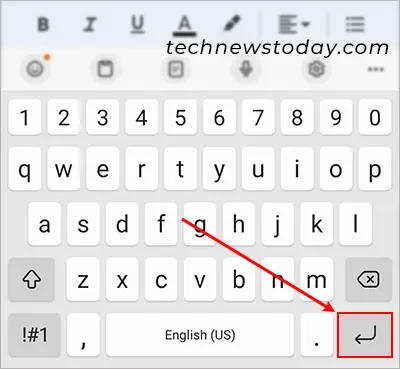
  2. Then, tap the return key or enter the key only once.
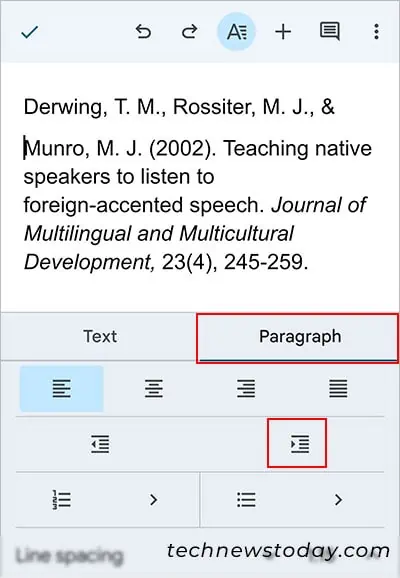
  3. Now, tap on the little ‘A’ icon from the top menu, and a pop-up appears from the bottom.
    change-second-line-indentation-on-mobile
  4. Tap to the Paragraph tab, and then tap the right-indent icon. 
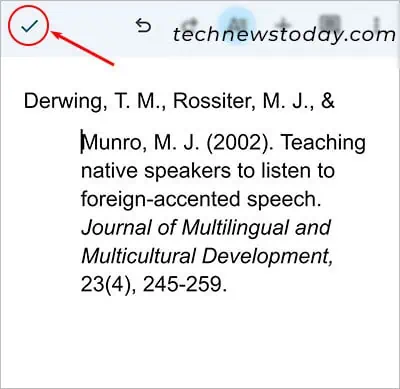
  5. When done, tap on the tick icon in the top right corner.

Using the Indent Shortcut

You can use the indent shortcut below the Menu bar to indent the second line on Google Docs. For this,

  1. Place the cursor where you want to indent and press Enter to separate the text.
  2. Then, click on the Increase indent icon below the Menu bar. Alternatively, you can use the shortcut key Ctrl + ].increase-indent
how to
Jabin Manandhar

Jabin is an IT Graduate. Working for almost a year as a tech writer, Jabin has covered a gamut of articles, ranging from Windows troubleshooting, Android, iOS to Internet-related issues. Besides them, he is experienced in Microsoft Office programs and has written numerous articles on Outlook, Excel, and Word. Most of his work includes resolving various Outlook issues and general software fixes. You can contact him at jabin@technewstoday.com

Related Posts

how-to-compress-a-video

How to Compress a Video and Reduce File Size

May 16, 2023
How to Send Large Files

Best Ways to Send Large Files Over the Internet

May 14, 2023
google search for pdf

5 Ways to Google Search for PDF

April 13, 2023
partial screenshot windows

How to Take a Partial Screenshot on Windows?

December 12, 2022
how to copy text from a picture

How to Copy Text from a Picture

December 8, 2022
how-to-open-cfg-file

How to Open CFG File in Windows and macOS

December 4, 2022
Add A Comment

Leave A Reply Cancel Reply

Latest Posts
Best-1200W-PSU

8 Best 1200W PSUs for Extreme PC Builds in 2023

May 16, 2023
Best-1000W-PSU

10 Best 1000W PSUs in 2023

May 16, 2023
best-700w-psu

10 Best 700W PSUs for Gaming in 2023

May 14, 2023
You may also like
antimalware service executable high memory

Fix: Antimalware Service Executable High Memory

May 18, 2023
printer-printing-pink

Why is My Printer Printing Pink? 6 Ways to Fix It

May 18, 2023
how to clean usb c port

How to Clean USB-C Port Safely

May 17, 2023
Recommended
Cookie Clicker Garden Guide

Cookie Clicker Garden Guide to Unlocking Every Seed

September 26, 2021
monitor no signal

Computer Turns On But Monitor Says No Signal (9 Ways To Fix)

November 10, 2022
Facebook Twitter Pinterest
  • Home
  • About Us
  • Our Team
  • Editorial Guidelines
  • Privacy Policy
  • Affiliate Disclosure
© 2023 TechNewsToday, editor@technewstoday.com | Tech Central Pvt. Ltd.

Type above and press Enter to search. Press Esc to cancel.