
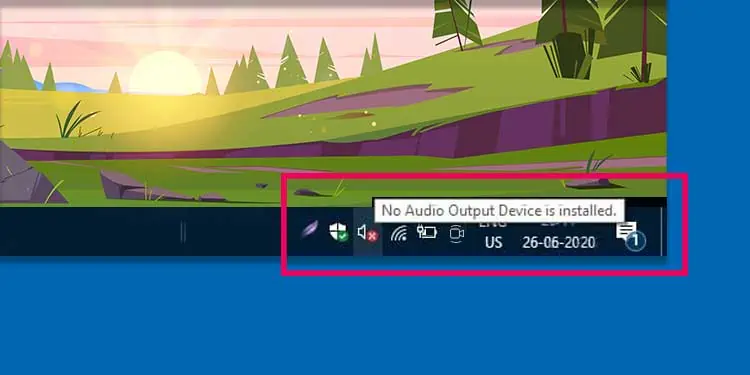
The error message “No audio device is installed” indicates the Operating System is having trouble identifying an audio device which results in no audio output from the computer. Due to unknown reasons, the audio output device gets disabled, sometimes even after a major Windows update. If that’s the case for you, we can simply fix the issue by enabling it.
However, that may not be the only reason the error “No audio device is installed” is displayed. Here in this article, we have listed some other reasons that can cause the error and solutions to fix the issue.
What Causes “No audio output device is installed” Error Message?
Here is a list of reasons the Operating System has issues on detecting the audio output device.
- Audio output device disabled
- Corrupted driver files
- An issue with Windows Update
- Outdated driver or Windows
- Faulty sound card
- Wrong Registry Entries
Now that we know what can stop the OS from detecting an audio output device, let us get right into how we can fix the issue.
Fixing “No audio output device is installed” Error
Before we start, let us see if the computer is detecting the audio drivers. If not, then the issue is most likely with the audio drivers.
Please follow these steps to verify that the installed sound drivers and device is actually recognized.
- Press the Windows + R key and type “dxdiag“ and press Enter.
- Go to Sound tab. Here, check for Device and Drivers.
- If the system recognizes the sound card and driver, its Name, Version or and the Hardware ID will be displayed.
Perform Solution Update/Roll Back Drivers if the system is not detecting the driver.
Here are solutions that you can try to play sound from the computer once again.
Enable Disabled devices
When we update Windows, many settings can get changed due to unknown reasons. Similarly, one of the changes is a disabled audio output device. Once disabled, if the computer is not connected to another audio output device, it cannot produce any sound.
To fix this issue, we need to enable the audio device. The steps explained below will help you enable the audio output device.
For Windows 11,
- Press the Windows + I key to open Settings.
- On System, click on Sounds.
- Scroll down and click on More sound settings.


For Windows 10,
- Press the Windows + I key to open Settings.
- Go to Personalisation > Themes.
- Here, click on Sounds.
Now, once the Sound Dialog box opens, follow these steps.
- On the Playback tab, right-click on the open space and make sure that Show disabled device is checked.
- Then you will see all audio output devices that are disabled.
- Right-click on Speakers, then select Enable.

Once we enable the speaker, the OS should detect the audio device.
Run the Audio Troubleshooter
The troubleshooter utility in Windows allows users to pinpoint and fix errors with components like the network adapter, internet, microphone, display, and audio. If enabling the audio device does not work, running the audio troubleshooter can figure out what is causing the issue and suggests possible solutions to fix the problem.
The steps mentioned below will guide you in the troubleshooting process.
For Windows 11,
- Press the Windows + I key simultaneously to open Settings.
- On System, scroll down and click on Troubleshoot
- Click on Other Troubleshooters.
- Now, run the Playing Audio troubleshooter.

For Windows 10,
- Press the Windows + I key to open Settings.
- Go to System > Sound > Troubleshoot.
Once we run the Troubleshooter follow these steps
- Choose the audio output device that you want to troubleshoot then click on Next.
- Now the troubleshooter will start. If it asks to turn off the sound enhancement, click on Yes, Open Audio Enhancements.
- In the Advanced tab, under Signal Enhancement, uncheck Enable Audio Enhancement.
- Click on Apply, then OK.


The troubleshooter may or may not display the same process as above. The steps that the troubleshooter displays depend on the type of issue you face. Therefore, after step 6, you may not get the same troubleshooting steps.
Scan Hardware Changes
Sometimes, due to unknown reason, the system may have difficulties in detecting audio devices and driver. If this is the case, we can scan the hardware for any changes to bring the driver back and make the device-detectable again.
We can follow these mentioned steps to scan for hardware changes.
- Press the Windows + X key and select Device Manager.
- Right click on the desktop name, located on the top section of Device Manager list.
- Select Scan for hardware changes.
- If the system has issues on detecting hardware, scanning will fix the issues with it.
Similarly repeat the same steps for Sound, Video, and game controllers and System devices.
Run SFC Command
The SFC or the System File Checker command is responsible for finding and replacing any corrupted or missing system files. As driver files are also system files, any corrupted sound driver files can be fixed using the SFC command.
The following steps will guide you in running the SFC command.
- Press the Windows + R key simultaneously to open Run.
- Type “cmd” without a quotation mark and press Ctrl + Shift + Enter to open Command Prompt as administrator.
- Now type “sfc /scannow” without quotations and press Enter.
- Now the command will check for any corrupted system files and fix them. It will take a few minutes to complete this process.

Check for Hardware Issues
If you are on a desktop computer, the port or cable that connects the speaker to the computer may be damaged. Try connecting the speaker to another computer and make sure that the speaker works without any issue. If it works there may be some issue with the ports on the computer.
We can also check for dust settlement on the 3.5mm jack that may be stopping the connection. Also, make sure that the 3.5mm jack is plugged in the right port, i.e., the speaker port. If connected to the microphone port, the computer will not detect the output device.
Any damage to the Speaker cable can also stop the system from detecting the speaker. So, make sure that there are no visible damages to the cable.
The system will also have an issue detecting the audio output device if we connect the 3.5mm jack to the wrong port. The 3.5mm microphone jack is pretty similar to the 3.5mm speaker jack and it can be mistaken. If so, the system will not detect an audio device.
Also, ensure that the headphone jack is completely inserted onto the port as a loose connection can also cause this issue.
Change Registry Values
Wrong changes in the Registry values can also stop the OS from detecting the audio driver. The Windows Registry contains all the Internal OS settings like registry keys and value data. Therefore, a small change in the registry can cause the “No audio output device installed” error message.
However, we need to be very careful while changing any values inside the registry, as wrong changes can slow down the OS or even render it useless in some cases.
Backing up the registry is always recommended before making any changes to it.
Follow these steps to back up the Windows Registry.
- Press the Windows + R key to open the Run dialog box.
- Type regedit and press Enter to open the Registry Editor.
- Click on File, then select Export.
- Under the Export range, check All to backup all Registry values and keys.
- Please enter the name for your backup file and choose a location to save it.
- Click on Save.


Now that we have created a backup. Let’s change the registry values to fix the audio issue.
- Open the Registry Editor by following steps 1 and 2 from above.
- Navigate to
HKEY_LOCAL_MACHINE\SYSTEM\CurrentControlSet\Control\Terminal Server\WinStations
Now, on the right panel, check the Data column from ConsoleSecurity. If this value is (zero-length binary value), continue with the following steps. However, if the value from ConsoleSecurity in the Data column is a set of two numbers, proceed with another solution.
- Close the Registry Editor dialog box and run Command Prompt as administrator.
- Enter the following command and press Enter.
REG ADD "HKLM\SYSTEM\CurrentControlSet\Control\Terminal Server\WinStations" /f /v ConsoleSecurity /t REG_BINARY /d 010014809c000000a800000000000000140000000200880006000000000014000100000001010000000000050400000000001400bf030f000101000000000005120000000000140089000f00010100000000000513000000000014008100000001010000000000051400000000001800bf030f000102000000000005200000002002000000001800210100000102000000000005200000002b020000010100000000000512000000010100000000000512000000
- Above command will replace previous value from ConsoleSecurity in the Data column to sets of two integer numbers.
- Once the process is complete, restart your computer.
If you make some wrong changes in the registry when performing the above steps, double click on the backup file to restore to previous registry settings.
Update/Rollback Drivers
The Operating system (OS) to communicate with any devices requires a specific device driver. If this driver is not up-to-date, issues can arise when the OS tries to connect to the device. Therefore, updating sound drivers can fix the problem that we face.
To update the driver, press the Windows + X key and click on Device Manager. Expand Audio input and outputs, then right-click on Speakers. Click on the Update driver. Then, select Search automatically for drivers. Now, the Device Manager will automatically download and install the latest driver.
There are multiple audio and speaker drivers, so we will need to update all of them. Here is a list of drivers that we need to update.
- All audio drivers inside Sound, video and game controllers
- High Definition Audio Controller, located inside System devices
Sometimes, the OS will also face issues while detecting audio drivers when connected to an external monitor through HDMI. Therefore, we may even have to update drivers such as the Display Audio driver (located inside Sound, video and game controller).
If automatically updating the audio drivers does not work, we can also use the audio-chip-manufacturers download center to get the latest driver. Most motherboards use Realtek HD audio drivers. We can use its download center to get the latest driver and install it manually.
For Intel audio drivers are packaged into the graphics driver. Therefore, if you are an Intel user, download the latest graphics driver from Intel’s Official Download Center.
As for AMD, we can download the latest audio driver which is also embedded onto the graphics driver in AMD’s Official Download Center.
Once we download the latest driver from the manufacturer’s download center, double-click on the file to install them.
However, updating the driver to the latest version may not be best as sometimes, a driver update is also known to bring in some bugs to your system. If that’s the case, we can always roll back a driver update. The following steps will guide you through a driver roll-back process.
- Open Device Manager and expand your driver category.
- Right-click on the driver and click on Properties.
- Click on the Driver tab.
- Click on Roll Back Driver. This option will be highlighted if we have recently updated our driver.
- Check Previous versions of the driver performed better.
- Click on Yes.
- Once the roll-back process is complete, restart your computer.

If updating and rolling back the driver does not fix the issue with OS not detecting the audio device, we can uninstall all audio drivers and perform a clean install. Uninstalling and reinstalling will replace all driver files, including any corrupted files that were causing the issue.
To uninstall a driver, right-click on the driver and select Uninstall Driver. Once we uninstall all audio drivers, restart your computer. Once the computer restarts, the OS will automatically reinstall all audio drivers.
Update Windows
Microsoft is constantly fixing bugs and problems in their Operating System by constantly providing Windows updates. So, if we have not updated the system and Windows stops detecting any component, it is ideal to Update Windows to the latest versions.
Here are the steps to update Windows.
- Press the Windows + I key to open Settings.
- Go to Windows Update (Update & Security > Windows Update in Windows 10).
- Here, click on Check for updates or Install updates.
- Once the download and installation are complete, restart your computer.

Note: Installing Windows Update will also update all drivers to the latest version.
Uninstall Windows Update
Although updating Windows to the latest version will solve most issues with it, there are cases where the Windows update itself consists of bugs and errors. Therefore, if the OS stops detecting the audio device after a Windows update, there is a good chance that some bugs in the Windows update are causing this issue.
If that’s the case for you, we can always uninstall recent updates. The following steps will guide you in uninstalling the latest Windows update.
- Press the Windows + I key to open Settings
- Go to Windows Update (Update & Security > Windows Update in Windows 10) > Update history.
- Scroll down and click on Uninstall updates.
- Right-click on the latest update and click on Uninstall.
- Once the uninstall is complete, restart your computer.


