The PCI drivers act as an interface between the OS and the PCI devices and ensure that they are working properly. If these device drivers are missing, this can inhibit the PCI devices’ functionality. In the worst cases, they may not work at all.
Generally speaking, things like buggy Windows updates lead to corruption of the driver store, which results in issues such as the PCI Device Driver Missing error.
Since the current PCI driver files are either corrupt, or missing entirely, identifying the device and installing the drivers for it manually will be your best bet at resolving this error. We’ve detailed how to do so in the sections below.
Why is the PCI Device Driver Missing?
Many reasons could go into why the drivers are missing. Usually, outdated or corrupted drivers due to Windows updates are the main reason. If you do not have the motherboard chipset driver installed, then that can also cause the issue. The motherboard chipset acts as a link between the CPU and other components so it is a vital component.
- Outdated/Corrupted Drivers.
- Pending Windows updates.
- Motherboard chipset driver missing.
- Missing BIOS update.
How to Fix PCI Device Driver Missing Issue?
We have come up with all the possible fixes to the problem. Follow along and try each step to see which one works out for you.
Update PCI Drivers
The first thing you should try is updating PCI drivers through the control panel. Oftentimes, updating the drivers directly solves the issue with the drivers.
To update PCI drivers in the device manager, follow these steps:
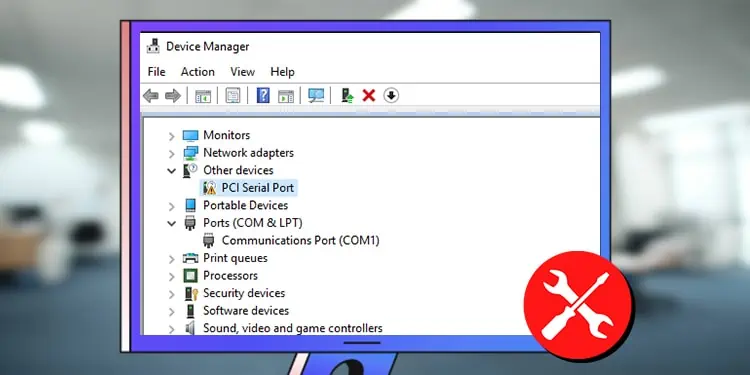
- Right-click on the Start menu button and then select Device Manager.
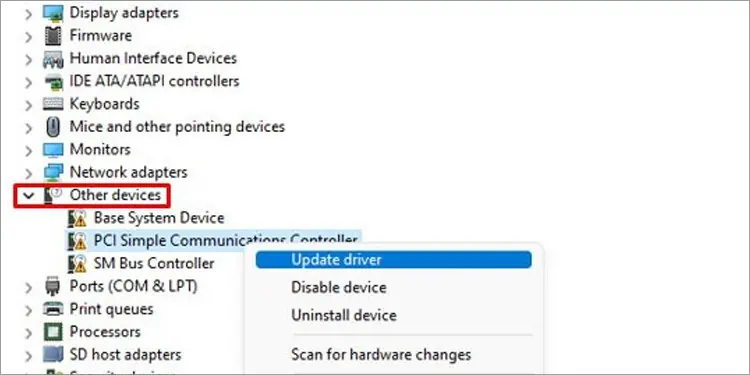
- Then under the Other devices, right-click on drivers with the yellow exclamation mark.
- Click on the Update Driver option.

- Now you can either choose Search Automatically or Browse my computer.
- If you do not know what specific driver to install then choose the automatic option. Else, choose to Browse my computer.
- Wait until the process is completed. The PCI drivers will update if there are any new updates.
- Restart your PC and check if that fixed the issue.
Update Drivers Through the Manufacturer’s Site
Try this method if updating through the device manager did not work. You need to specifically choose the outdated driver – get the hardware ID and download the drivers for it through the manufacturers.
Follow these steps to learn how to do so:
- Right-click on the Start menu button and then select Device Manager.
- Then under the Other devices, right-click on drivers with the yellow exclamation mark.
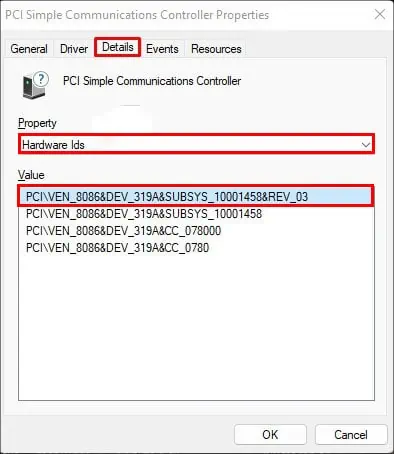
- Click on Properties > Details.
- Now click on the drop-down menu under Property and choose Hardware Ids.
- Copy the ID that appears on the top of the list.

- Now you can either go to the manufacturer’s site if you know it or google the hardware ID.

- Either Way, proceed to download the drivers according to your system (OS, Bit Memory).
If the downloaded driver files are in the form of executable files, then you can directly install them. If not you will have to manually install them.
To do so, follow these steps:
- Under Device Manager, right click on the outdated driver and click on Update Driver.
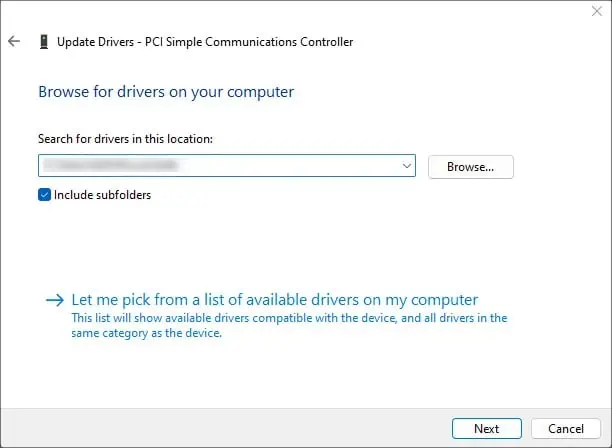
- Choose Browse my computer for drivers.
- Specify the location for the downloaded driver files and hit Next.

- Complete the remaining steps and restart your PC.
Download Motherboard Chipset Driver
A Motherboard chipset controls the link between the CPU and other components of the PC. It also links the PCI lane with the CPU. Hence, it is a very important component. If you do not have the right drivers installed for the chipset, this causes issues with other components and more than likely messes with the PCI devices.
To download, go to the motherboard manufacturer’s website and get the latest drivers. If the downloaded driver file was an executable, you can run the installer to directly update the drivers. Otherwise, you can update it via the Device Manager. We’ve listed the steps to do so in the sections above.
Update the BIOS
A BIOS is the motherboard’s firmware, it serves as a communication between the computer and its components. The PCI devices connect to the system through the slots on the motherboard. Hence, having updated BIOS is important.
To check for the latest BIOS, follow these steps:
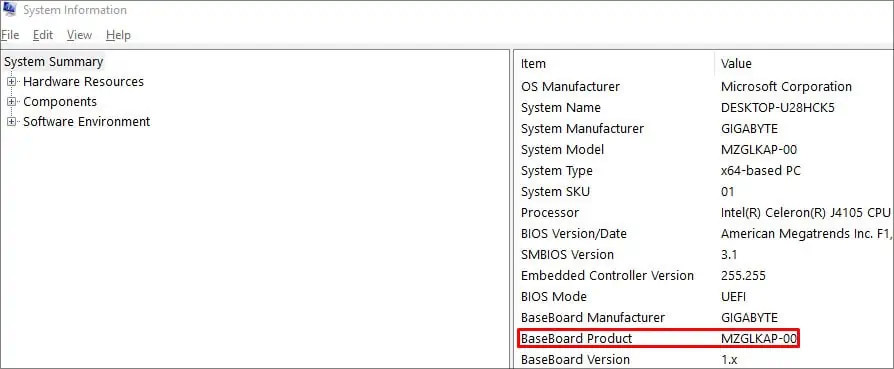
- Press Windows Key + R and type
msinfo32. - You should see your motherboard’s model labeled under BaseBoard Product.

- Head over to your motherboard’s manufacturer’s website.
- Navigate to the Download section for your specific motherboard.
- View the list of BIOS versions and download the latest one.
The downloaded BIOS file should contain a readme.txt file which will guide you through the updating process.
Note: Don’t interrupt the BIOS update in any way as doing so can brick your system.
There are many ways that you can update the BIOS. This article goes through an in-depth guide on various ways to update the BIOS.

