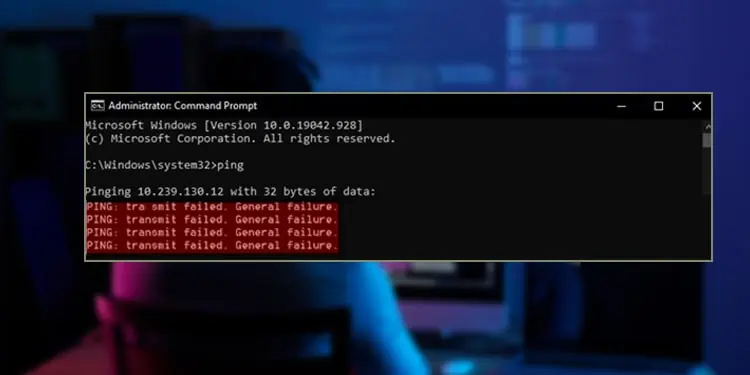
The ping command is a utility command that is used to troubleshoot errors in the network connection. However, while trying to execute the ping command you might have come across the error message “PING: transmit failed. General failure.”
The error message usually occurs when the system can’t send or receive data packets. Or, it could be because of the wrong TCP/IP or DNS settings. As a result, you will have slow or no connection to the internet or the local network group.
In this article, we have compiled a list of causes and fixes to troubleshoot this error.
Probable Causes for the General Failure
There may be various reasons for the “PING: transmit failed. General failure.” error message, but it is generally due to an issue in the network adapter. The issue occurs when the system doesn’t have any communication with the device it’s pinging.
Here are some other common reasons for the error message showing up.
- Corrupted DNS cache
- Misconfigured or conflicting IP address
- Faulty drivers
- Hardware issues
How to Fix “Ping transmit failed general failure” on Windows?
There are several causes for your ping transmit failing and different fixes. Before trying the fixes in this list, try restarting your computer and check if your network adapter driver is enabled first.
If that doesn’t work, here are some ways to fix this issue on Windows.
Restarting Your Entire Network
The first thing you should do is restart your entire network or internet setup. That means restarting the router, restarting your PC, turning Wi-Fi on and off, unplugging the LAN cable, and plugging it back in.
If the ping transmit failed issue only shows in the local network group, also restart the local network group.
Run the Internet Connections Troubleshooter
The Internet Connections troubleshooter checks and fixes any issues within the network. The process is very simple, and it can troubleshoot various network issues.
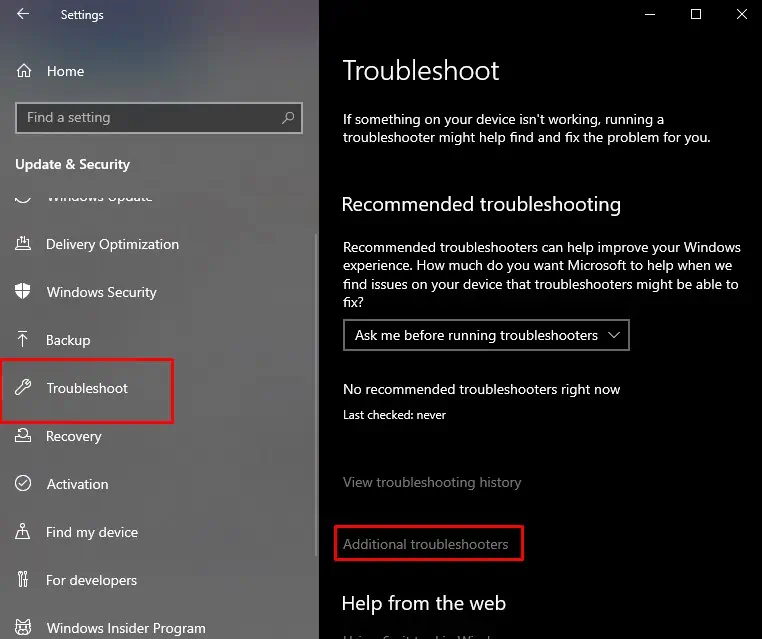
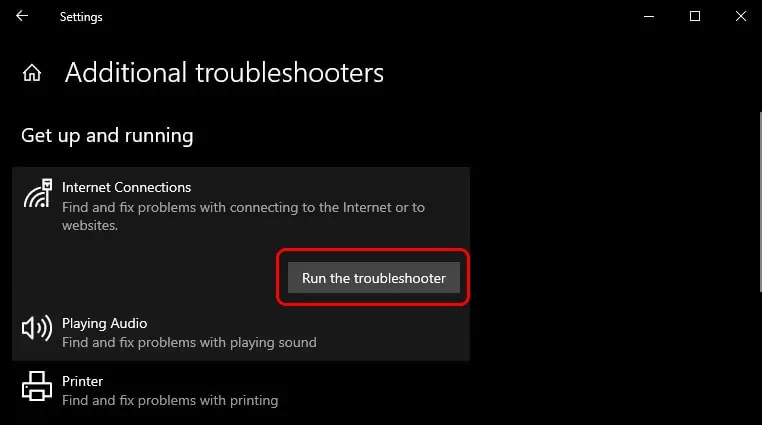
To run the Windows troubleshooter, follow the steps below.
- Open settings from the start menu.
- Click on Update & Security.
- Select the Troubleshoot option from the sidebar and click on Additional troubleshooters.

- Click on Internet Connections and press Run the troubleshooter.

This method is mainly useful if your computer has access to the internet. You can use it to troubleshoot why your computer is not connecting to a local network group.
Remove the DNS Cache
DNS is the phonebook of domain names that link to IP addresses. Whenever you type a domain name (E.g., google.com) in your browser, DNS will go through its records of listed domain names and match it to its IP address.
IP addresses are needed to locate a website, webpage, or just about anything on the internet. Furthermore, the DNS cache saves your device’s common domain name and IP address, so it doesn’t always have to ask the DNS server what this domain’s IP address is.
However, if your DNS cache gets corrupted, you will face issues like the internet not working and the ping command showing this particular error message.
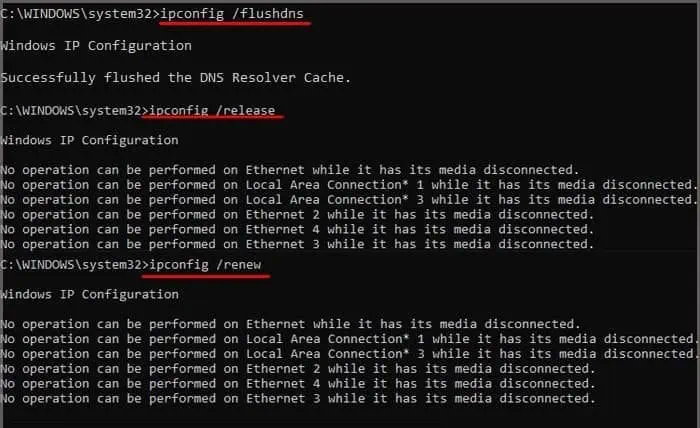
Follow the steps below to flush your DNS cache.
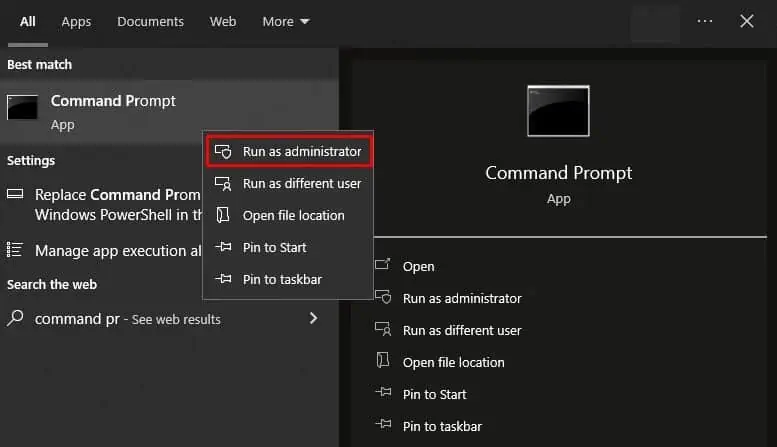
- Search the Command prompt in the search bar.
- Right-click and select Run as administrator.

- Type the following command and Press Enter after each command:
ipconfig /flushdnsipconfig/releaseipconfig/renew
- Restart your computer.
Change to a Static IP Address
A static IP address is an IP address that doesn’t change at all. On the other hand, dynamic IP addresses change every time you disconnect and connect with a network. While both have advantages, static IP addresses are better for devices that need to communicate with each other reliably.
Static IP addresses are easily found in the network and are generally recommended for private or local network groups. However, static IP addresses are not very good for using on the internet, as they always remain the same.
If “Ping: transmit failed. General failure.” is showing when pinging the local network group, you may need to set up a static IP.
Similarly, an improperly set static IP address can also cause the error and block your internet access.
To properly set up a static IP address, follow the steps below.
- Search the Control panel in the search bar and open it.
- Go to Network and Internet, and go to Network and Sharing Center.
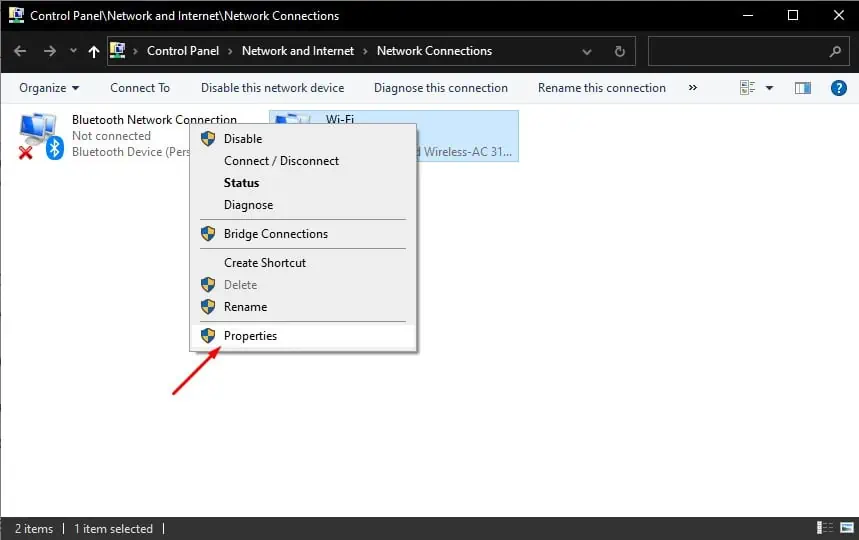
- Click on Change adapter settings in the left sidebar.
- In the new window, right-click the local network group and select properties. (You can also choose the Wi-Fi option to set a static IP on the internet, but it’s not recommended.)

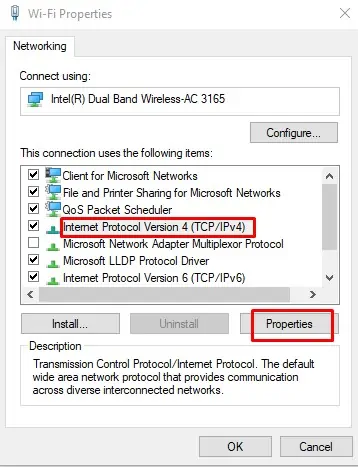
- Click on the Internet Protocol Version 4 (TCP/IPv4).

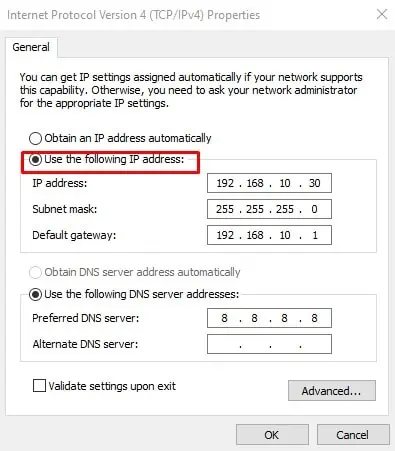
- Click on Properties, and select Use the following IP address in the new window.

- Fill in the custom IP address and press Ok. (You must fill in the IP address, Subnet mask, Default Gateway, and Preferred DNS server. )
- Tap the close button in the properties window.
While filling the custom IP address, you must do the following.
- Your Subnet mask should be
255.255.255.0 - Your default gateway should be your router’s IP address.
- Your IP address should be the same as your router IP address, except the last number should be different.
- Your Preferred DNS server could be any DNS server you like. (E.g. Google’s public use DNS server = 8.8.8.8)
- For a local network group static IP, you do not have to fill the Gateway and DNS server. You can also choose any IP address from a private IP address. (The most common private IP addresses are from 192.168.0.0 to 192.168.255.255 )
-
Note : Your router assigns the last number of your IP address, but if you use a static IP address, you can assign it yourself. However, remember that assigning an already assigned IP address to your static IP will cause your device to be unable to access the internet. If there are a lot of users in the network, your self-assigned IP address could already be used by another device.
It is generally recommended to use the dynamic IP address for browsing the internet. That means, instead of selecting Use the following IP address, you should select Obtain an IP address automatically for the WI-Fi.
Update Your drivers
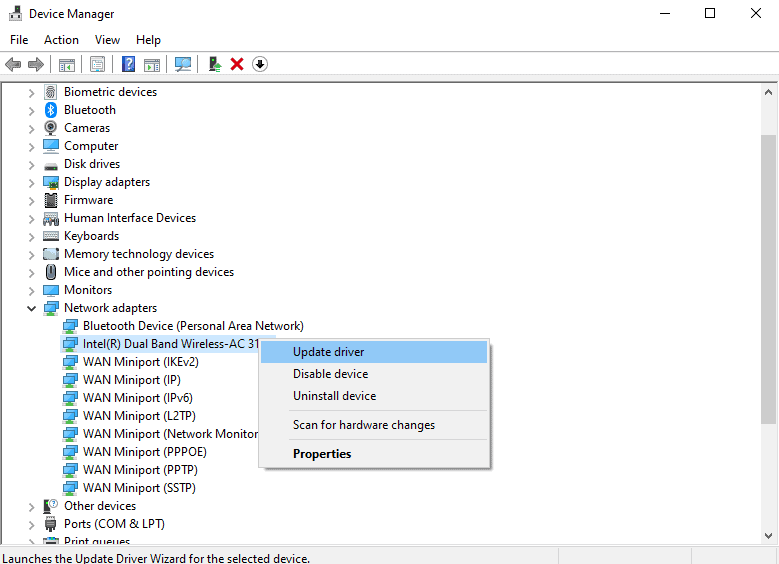
“PING: transmit failed. General failure.” can also be caused due to faulty drivers. Be sure to update your drivers regularly and also check if it’s disabled or not. A disabled network adapter driver will always result in a ping transmit failed error.
Here’s how to update a driver.
- Search Device Manager in the search bar and open it.
- Double click the Network adapters option.
- Right-click the Intel driver and press Update driver.

- Select Search automatically for drivers.
- Click on Done.
Perform a Network Reset
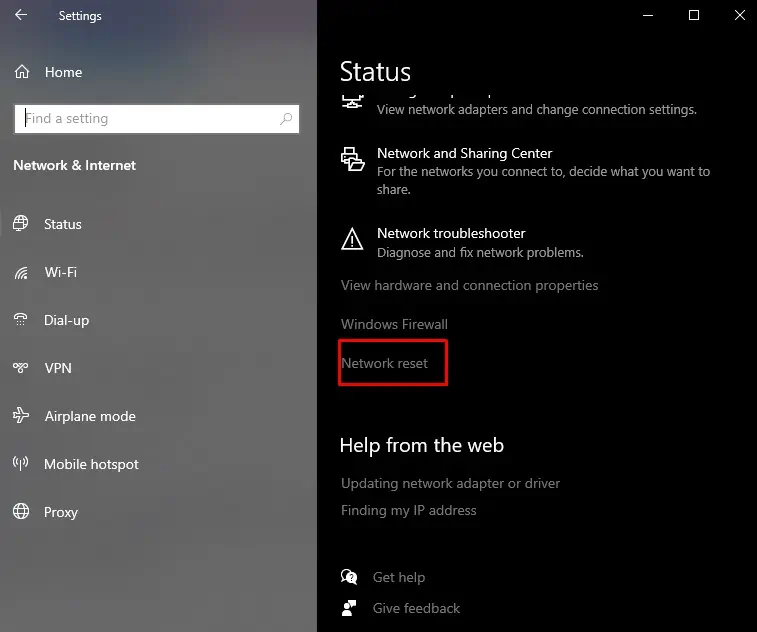
Network reset will remove all your network adapters and reinstall them to resolve any issue with connection settings. It will also revert your settings to their default state.
To perform a Network reset, follow the steps below.
- Open settings from the start menu.
- Go to Network & Internet.
- Scroll down and click on the Network Reset option.

- Click on Reset now and hit Yes.
- Restart your PC.
After your PC boots back up, configure the network settings and try to see if the ping command works.
Perform a Winsock Reset
If none of the above methods work, try doing a Winsock reset. Winsock reset is a command to reset the catalog back to the default setting. It resets the whole Windows Socket API software.
Here’s how to do it.
- Search Command prompt in the search bar.
- Right-click the Command prompt and select Run as administrator.
- Type
netsh Winsock resetand press Enter.
- Restart your PC.
Perform a System Restore
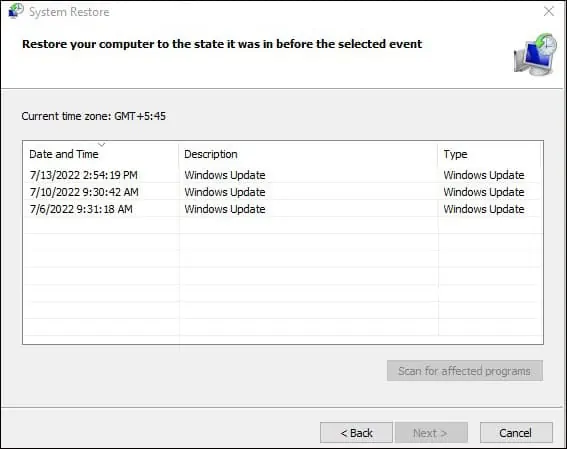
Performing a system restore reverts your computer’s state to a previously determined point. If the “PING: transmit failed. General failure.” error recently cropped up and didn’t show before, try performing a system restore.
Here’s how to do it.
- Search the Control panel in the search bar and open it.
- On the top right, next to View by, select Large icons.
- Select Recovery and click on Open System Restore, and then hit Next.
- Select a restore point where the ping command works properly and click on Next.

If none of the above methods work, the hardware may have problems. You might have to go to a service center and show it to a professional.

