
We generally use domain names (e.g., technewstoday.com) instead of IP Addresses to access resources on a network. This is possible thanks to Domain Name System (DNS) servers which handle name resolution.
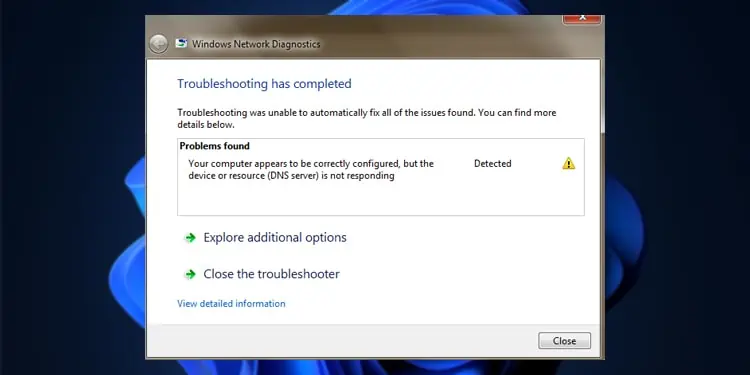
Connection issues due to DNS problems like DNS server is not responding are pretty common. With this specific error, typically your device initiates a DNS query but the resolution fails.
If you’re using your own DNS server, you can check the configurations to resolve any server-end issues. But most people use public DNS servers, meaning they’ll be limited to local fixes like checking local DNS entries or switching to a different server.
Basic Troubleshooting
First of all, reboot your device and router. If the error persists, start with the basic steps listed below:
- Use the network diagnostics tool if you haven’t already done so. The run command for it is
msdt.exe -id NetworkDiagnosticsNetworkAdapter.
- Search or use the
ncpa.cplrun command, right-click your network adapter and disable it. Then, re-enable it. - If that doesn’t help, disable all the adapters and only enable your main network adapter. Disabling the Microsoft Virtual Wi-Fi Miniport Adapter (if present) has been particularly effective at fixing this problem.
- Network connectivity problems are sometimes misinterpreted as DNS problems. Ping your default gateway to ensure this isn’t the case. If there’s high packet loss, check if getting a better signal or switching to an Ethernet connection resolves the problem.
- Switch to a different browser. If the DNS error is limited to one browser only, restart the browser. If the problem persists, restart the device and router as well.
- As the next step, clear the browser’s DNS cache. If that doesn’t help either, reset the browser.


Flush DNS Cache
The DNS client resolver cache sometimes has incorrect entries which can cause DNS problems when trying to access certain resources. You can fix such problems by clearing the DNS cache.
- Press Win + R, type
cmd, and press Ctrl + Shift + Enter. - Type
ipconfig /flushdnsand press Enter. - Additionally, you can also use
ipconfig /registerdnsto account for failed name registration or dynamic update issues.

In some cases, it’s also worth checking that your IP configurations are valid, and resetting the network stack if required.
- First, use
ipconfig /all. - If the IP address, subnet mask, default gateway, or DNS server values seem invalid, you can try setting them manually.
- If that doesn’t help, you can also reset the network stack with the following commands:
Netsh winsock resetNetsh int ip resetIpconfig /releaseIpconfig /renewIpconfig /flushdns


Check Hosts File
When any program initiates a DNS request, the hosts file is the first location that Windows checks. If any DNS entries are specified here, that entry will be used. As such, you should ensure that incorrect values aren’t saved in the hosts file.
- Press Win + R and enter
%windir%/system32/drivers/etc/. - Open any text editor (e.g., Notepad) as an admin, then open the hosts file from this directory.
- Ensure any DNS entries saved here are valid.
- Save any changes made and check if the issue is resolved.

If you want, you can even reset the hosts file to default by replacing the contents with the following text:
# Copyright (c) 1993-2006 Microsoft Corp.
#
# This is a sample HOSTS file used by Microsoft TCP/IP for Windows.
#
# This file contains the mappings of IP addresses to host names. Each
# entry should be kept on an individual line. The IP address should
# be placed in the first column followed by the corresponding host name.
# The IP address and the host name should be separated by at least one
# space.
#
# Additionally, comments (such as these) may be inserted on individual
# lines or following the machine name denoted by a '#' symbol.
#
# For example:
#
#       102.54.94.97     rhino.acme.com          # source server
#        38.25.63.10     x.acme.com              # x client host

# localhost name resolution is handle within DNS itself.
#       127.0.0.1       localhost
#       ::1             localhost
Change DNS server
If no entries are saved in the hosts file, the DNS client resolver will check your NIC settings next. By default, the network card will be configured to obtain the DNS server address automatically.
This can mean that the DHCP server (usually your router) provides IP addresses of DNS name servers that your device can use. Or your router might itself be configured as a DNS server. Or it might even default to your ISP’s DNS server.
These are different scenarios, but the solution in all cases is to manually pick a DNS server to use. If you were already using a specific DNS server on your device, simply switch to a different one to account for server-end problems.
- Press Win + R, type
ncpa.cpl, and press Enter. - Right-click your current connection and select Properties.
- Select Internet Protocol Version 4 (TCP/IPv4) and click on Properties.
- Select the Use the following DNS server addresses option.
- Enter your preferred DNS server addresses. Here are a couple of good options to start.
- Google (8.8.8.8 and 8.8.4.4)
- Cloudflare (1.1.1.1 and 1.0.0.1)
- Press Ok > Ok to save the changes.


Disable VPN
When using a VPN, your public IP changes. But VPNs usually assign new DNS addresses as well. If you’re only facing this error when using the VPN, it’s possible that this new DNS server is facing some problems.

If you’re using a third-party VPN client, simply exit the client and check if the error persists. If you manually set up the VPN connection, go to Settings > Network & internet > VPN and disconnect from there.
Check for Third-Party Conflicts
We’ve also seen some cases where third-party services (typically VPNs and antiviruses) caused DNS problems. You can check for this by booting into safe mode with networking. If the DNS error is resolved in safe mode, here’s what we recommend:
- Press Win + R, type
msconfig, and press Enter. - In the Services tab, enable the Hide all Microsoft services option.
- Click on Disable all and press Ok.
- In the Startup tab, click on Open Task Manager.
- Disable all Startup apps listed here and reboot your PC.


Your PC will now clean boot. Now you can open MSConfig again, but enable a few services this time. Reboot and check if the DNS problem exists. Keep repeating this process.
The problem will likely return after enabling services related to VPNs or antiviruses. For instance, we’ve found McAfee to be a common culprit. In such cases, we recommend removing the problematic program as such:
- Press Win + R, type
appwiz.cpl, and press Enter. - Select the program and press Uninstall.
- Follow the on-screen instructions to remove the program.

Server-end Fixes
If you’re using your own DNS server, we recommend the following troubleshooting steps:
- Use
ipconfig /alland verify that the IP configurations are valid. - Use
net start dnsto ensure the DNS service is running. - Clear the resolver cache with
dnscmd /clearcacheorClear-DnsServerCache. - Ensure your A records and CNAME records are correct.
Additional Fixes
We’ve seen this error occur due to misconfigured modems and routers, or even because a Wi-Fi dongle’s prepaid SIM expired. Niche causes like this can be hard to think of. But if the fixes so far haven’t resolved the error, things like this could be the cause.
In such cases, you can try out generic networking fixes like disabling your firewall or uninstalling/updating the network drivers. Even a system restore or clean reinstall can help sometimes.