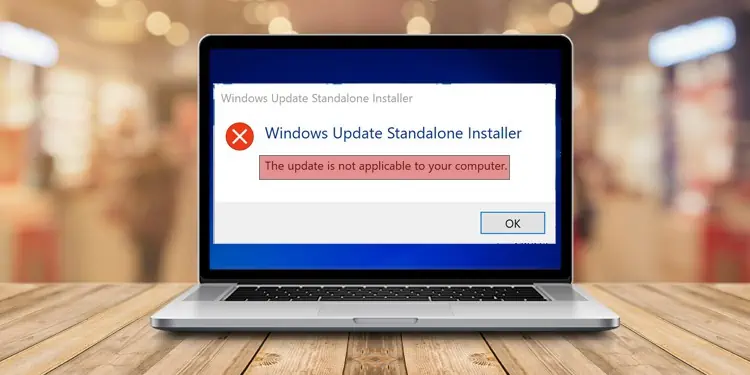
If you are performing a manual installation of updates from Microsoft, you may face the error “The update is not applicable to your computer“. This generally happens when trying to install updates KB2919355 or KB4048955 on your computer.
There are several reasons why this happens. Trying to install incompatible system updates is the main reason behind this error. However, corrupted system files and registry settings can also be the culprit.
Whatever the reasons, we will walk you through all the possible ways to fix this error.
Probable Causes of the Error
- Missing supportive updates
- Doubly installing the updates
- Interfering third-party applications
- Disabled Windows Update services
- Misconfigured regional settings
Fixes: The Update is Not Applicable to Your Computer Error
Installing the latest cumulative updates can be troublesome if you continue facing the update installation error. You can do a minor tweak in the settings and easily solve the problem.
Here, we have compiled a list of 10 fixes you can apply to troubleshoot the problem. Let’s get straight into it:
Check the Compatibility of the Update
Installing updates can be troublesome if it is not compatible with your operating system. You may be using Windows 10 and trying to install the update made for Windows 8.1. In this case, the update is not the culprit. You made a mistake from your side. So, you must first check if the update is compatible with your system. Follow these steps:
- Open the link for Microsoft Update Catalog.
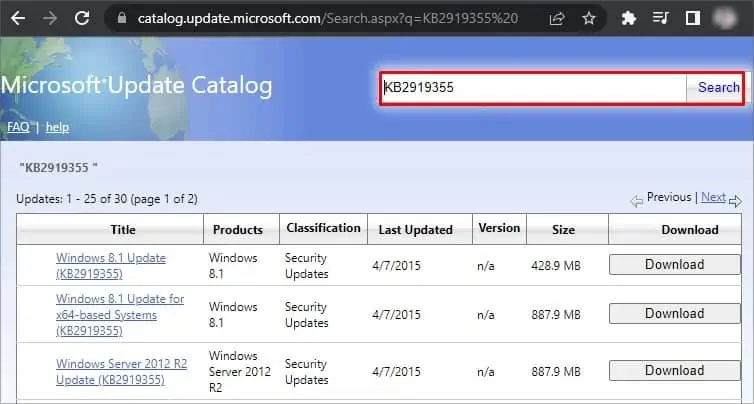
- In the search box, type the update name you want to install. For example: Type KB2919355 and click Search.
- It will show the Windows version with which the update is compatible. The example we just took, KB2919355, is particularly made for Windows 8.1, so you can not install it in Windows 10.

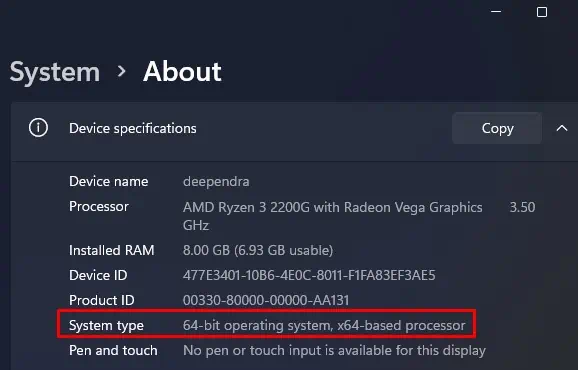
- After verifying it, it’s time to check your processor architecture. Right-click This PC icon from the desktop and select Properties from the right-click context menu.
- In the new window, search for System type. You will see either 64-bit or 32-bit operating systems mentioned.

- Download and install the update according to the system architecture type. You can not install updates made for 64-bit Windows on a 32-bit computer and vice-versa.
Check For the Installed Updates
You can not install the same update twice. Maybe the update you are trying to install already exists in the system, and you are encountering the error from Windows Update Standalone Installer.
Here’s how to check if the update is already installed:
- Hit Windows + R key to open the Run dialog box.
- In the text field of the Run dialog box, type
controland hit Enter to open the Control Panel. - Select the Programs menu and then click Programs & features.
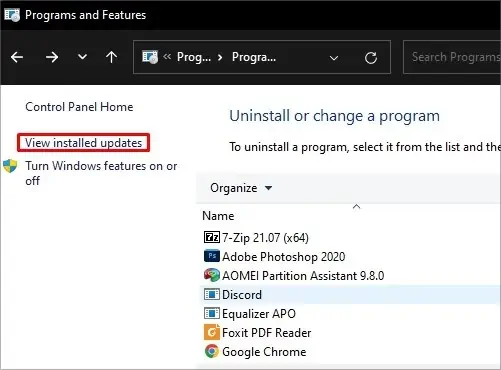
- From the left pane, select View installed updates. It will show a list of recent updates you installed in your system.

- Look for the update’s name you are wanting to install. If it is already installed, you don’t need to panic. But, if you don’t see the update listed there, try again installing the update or move to further fixes.
Install the Supporting Updates
There might be cases when installing one update requires another update to be pre-installed in your system. The packages that the post-update requires may be present in the previous one, and it may throw an error message if it does not find the respective package.
You should ensure you have installed the prerequisite update before installing another update. For example, if you want to install updates released after April 2014 on your Windows 8.1, you should first install the KB 291935 update as a prerequisite. You may search for the prerequisite update for the update you are trying to install.
Follow the steps below to see if the pre-update is installed:
- Open Control Panel.
- Navigate to: Programs > Programs & features
- Click View installed updates in the left section.

- Search for the name of the prerequisite update. If you see it, you are good to go. Else, install it first and then only proceed with the update you are willing to install.
Run the Troubleshooting Tool
Windows has an integrated troubleshooter that comprises many specific troubleshooting tools to help you diagnose and fix issues in your system. One of the troubleshooting tools is the Windows update troubleshooter, which fixes problems with the installer.
Here’s how to run the troubleshooter tool:
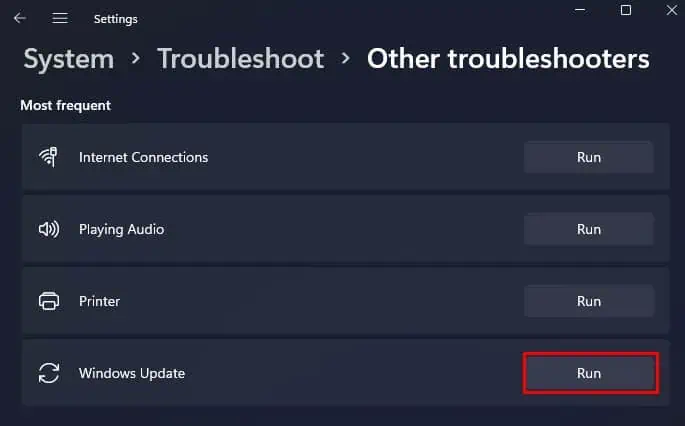
- Hit Windows + S key on your keyboard and type Troubleshoot settings.
- Click the first search result and open it.
- On the Troubleshoot settings page, click the Other troubleshooters option.
- From the list of troubleshooters, find Windows Update and click the Run button.

Run SFC and DISM Tools
Corrupted registry settings or file systems are another reason that might be causing an issue installing the updates. Running the SFC and DISM tools will fix the issues with the corrupted registry and system files and most probably fix the update error.
Follow the steps below to run these commands:
- Right-click the Start button and choose Run from the list of options.
- Type
cmdin the text field and hit Ctrl + Shift + Enter to run Command Prompt as an administrator. - Then type
SFC /Scannowin the command window and hit Enter to run the SFC tool.
- Try installing the update once the SFC tool completes the scan.
- If you still encounter the update error, consider running the DISM tool as well. Copy and paste the command below in the command window and hit Enter.
Dism /Online /Cleanup-Image /RestoreHealth
Once the DISM tool does its task, try installing the update again.
Enable the Windows Update Services
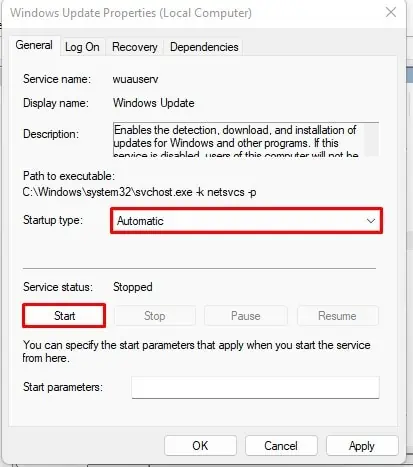
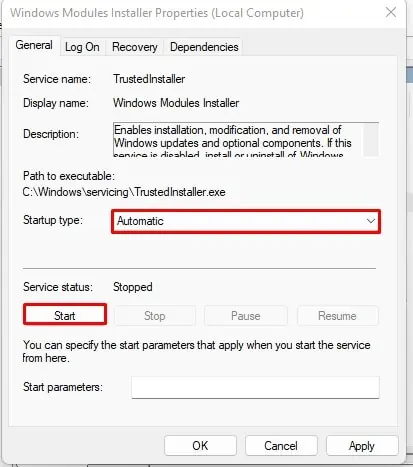
Sometimes, the essential Windows services required for installing updates like Windows Update and Windows Module Installer may stop, creating an issue. In such a case, you should restart them and set their startup type to automatic, so they don’t create further problems. Here’s how:
- Hit Windows + R key to open Run application.
- Type
services.mscin the text field and hit Enter to open the Services application. - Search Windows Update service. Double-click the service and set Startup type to Automatic from the dropdown.

- Under Service status in the same window, click the Start button if it is stopped.
- Click Apply > OK to save the changes.
- Do the same with Windows Modules Installer service.

Change the Regional Settings
Most of the users reported that they fixed the issue after changing the regional settings. If the region on your computer is set other than the United States, there may be a problem installing the update.
Follow these steps to change the regional settings:
- Type Control Panel in the Windows search box and open the top result from the list.
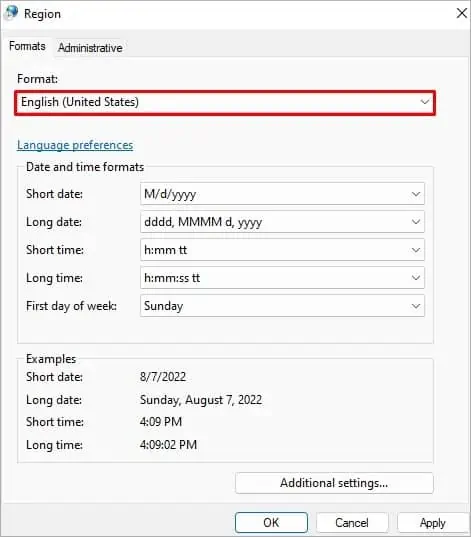
- Select Clock and Region from the Control Panel home and then click Region.
- Select English (United States) from the Format drop-down in the Region window.

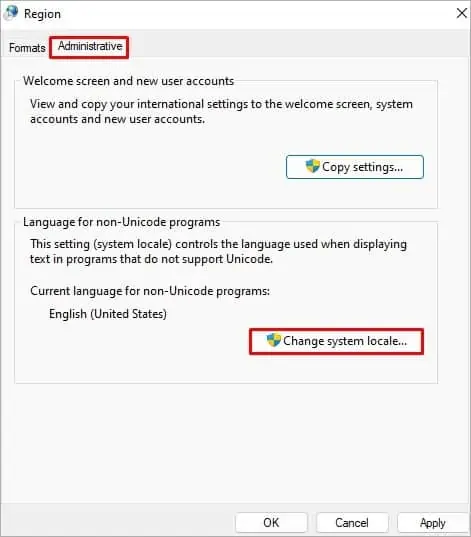
- Next, jump to the Administrative tab.
- Click Change system locale button.

- From the Current system locale dropdown, choose English (United States).
- Save the changes and try installing the update afterward.
Use Clean Boot Mode to Install the Updates
Clean boot mode is the most elementary boot mode available in Windows that lets the computer start only with the fundamental system files and drivers. If any third-party application is preventing the updates from installing, you can boot your system in a clean boot mode and try installing the update.
Here’s how to boot in a clean boot mode:
- Open Run dialog box by pressing Windows + R key simultaneously.
- Type
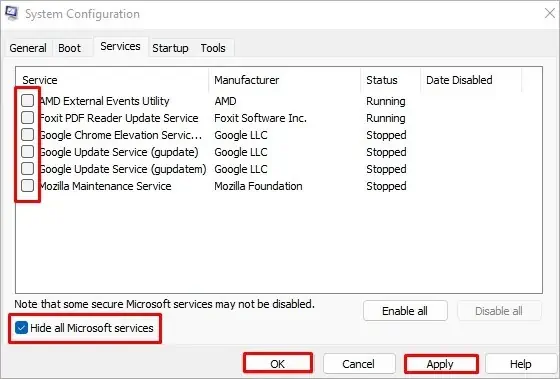
msconfigand hit Enter to open the System Configuration application. - Jump to the Services tab in the System Configuration window.
- Check Hide all Microsoft services.
- Uncheck all the services shown.

- Click Apply > OK
- Restart your computer and try installing the updates again.
Perform a System Restore
If you recently made some changes to your system, it might be troubling for you to install the updates. You can revert to the earlier version of Windows and try installing the updates.
Here’s how to perform a system restore:
- Open Control Panel.
- Type
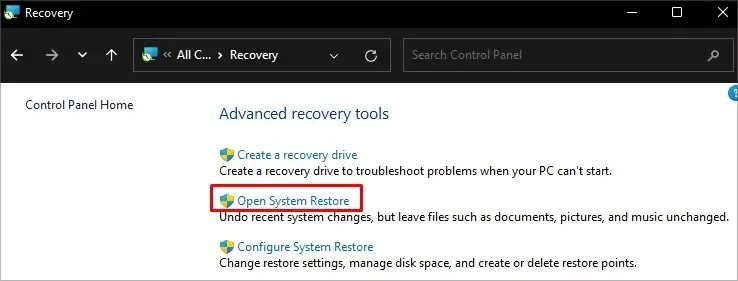
recoveryin the search box of the Control Panel. - Choose the Recovery menu from the search result and then click Open System Restore.

- Follow the instructions in order to perform a system restore.
- Try installing the update once again after you successfully restore the system.
Use an Alternative Method to Install the Updates
You can also use an alternative method to install the updates. You normally install an update by double-clicking the MSU update installer file, but it may not always work.
You can further use DISM in the command prompt to install the updates. DISM stands for Deployment Image Servicing and Management. It is the command that can be used for installing the offline windows update files.
Follow the steps below to install the updates using DISM command:
- Double-click This PC from your desktop icon or hit the Windows + E key on your keyboard to open File Explorer.
- Open Local disk (C:) and right-click over the empty area.
- From the context menu, click New > Folder and rename the folder as updates.
- Now navigate to the folder where you have downloaded the update installer file. Click over the file and hit Ctrl + C to copy the file.
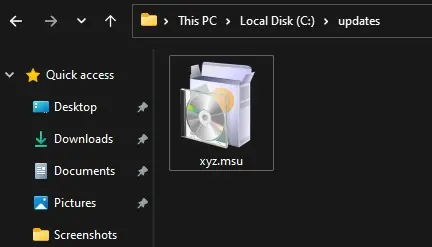
- Go to the updates folder you just created, open it, and hit Ctrl + V to paste the file.
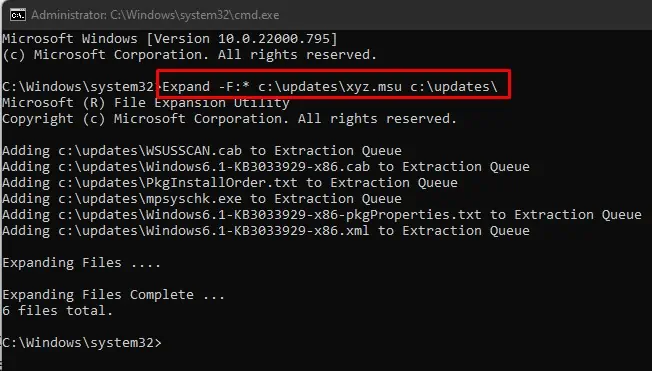
- Rename the installer file as xyz.msu. Sometimes, the long file name creates problems executing the file; this is why we are renaming it.

- Then, right-click the Start button and select Run.
- Type cmd and hit Ctrl + Shift + Enter to open Command Prompt as an administrator.
- Copy and paste the command below:
Expand -F:* c:\updates\xyz.msu c:\updates\
- After executing this command, you will see the KB number of the update you are trying to install. For example, KB2919355.
- Again copy and paste the command below:
DISM.exe /online /add-package /packagepath:c:\updates\KB.cabReplace KB in the command with the KB number. Wait until you see an update completed message.
- Restart your computer.

