Setting up dual monitors in Windows is undoubtedly a cool way to improve your computing experience. Although it’s a simple procedure, there are many instances where Windows fail to detect your second screen.
This is a fairly common issue that almost all of us have faced. Older monitors and screens are usually not detected by the latest Windows built probably because of outdated drivers and incorrect settings configuration.
So, if you’re a user who has been facing this problem a lot, we have listed all the possible methods to fix this recurring issue. So, let’s get right to it.
Why Is Windows Failing to Detect My Second Screen?
Although a second screen can simply be plugged in and played, there are still a few factors that lead to its error and failure. If Windows cannot detect your second monitor, its because of one of the following reasons:
- Driver issues
- Incompatible refresh rates
- Incorrect projection mode enabled
- Unsuitable display settings
- Hardware malfunction issues
How to Fix if Windows Not Detecting Second Monitor
The solutions to your problem are very straightforward. Even if a particular method doesn’t work for you, you should continue to try other fixes to ensure that this problem doesn’t reoccur anymore.
Moreover, all these fixes are simple, effective, and beneficial in all regards. And, they can be followed in any random order. The guide below shall help you understand and effectively troubleshoot your issue.
Check for Hardware Issues
First and foremost, you have to make sure that there are no external hardware malfunctions. Check if the cable you’re using to connect the second monitor works properly. Also, see if you have selected the right input mode to connect your monitor (E.g: HDMI, VGA, etc.) via its built-in controls.
Finally, check if your second monitor works well independently to ensure that there are no hardware defects within the monitor itself.
Adjust Your Monitor’s Refresh Rate
A monitor’s refresh rate determines the rate at which the image is refreshed on that monitor. The refresh rate can be changed by altering your monitor’s frequency.
A desktop monitor usually has a frequency of 60Hz, however, high-end monitors tend to have a frequency of up to 240Hz. So, you have to make sure that both the monitors are set to the same frequency. Follow the steps below to do so:
- Press Windows key + I to open your settings.
- Select System.
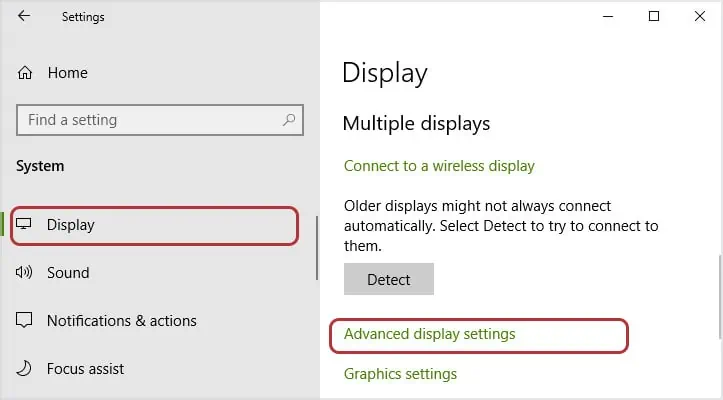
- On the Display panel, select Advanced display settings.

- Select Display adapter properties for Display 1.
- Click on Monitor.
- Note the Screen refresh rate.

- Now, back on Advanced display settings, select Display adapter properties for Display 2.
- Click on Monitor.
- Make sure the Screen refresh rate matches that of Monitor 1.
Enable Extended Projection Mode
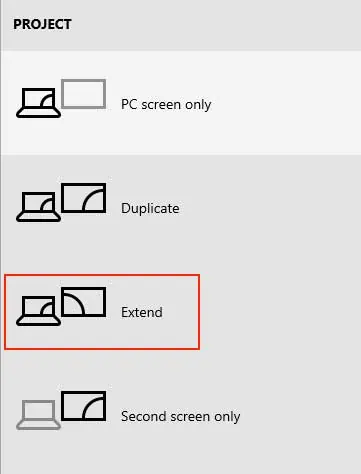
There is a feature on Windows that lets you select the projection mode for the second screen connected. Windows allows you to select any one projection mode from the list consisting of PC screen only, Duplicate, Extend, and Second screen only. Hence, selecting the right mode can fix your problem.
Here’re the steps:
- You can press Fn + F4 on your keyboard to bring up the projection options. However, some devices might have a different button configuration to bring up these options.
- Press Fn + projection mode button on the keyboard and select Extended from the pop-up menu.

Manually Detect a Second Monitor
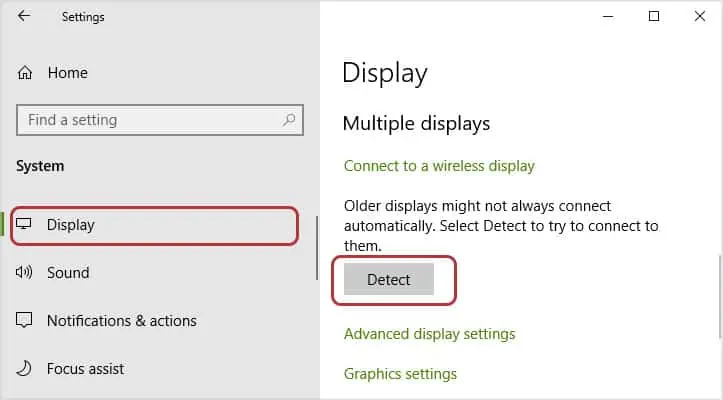
Windows provides you with an option to manually detect a second screen from the display settings. This forces your computer to try and detect the extra screen connected to your system. To do so, follow the steps shown below:
- Press Windows key + I to open your settings.
- Go to System Settings.
- Click on Display.
- Press Detect to try and connect to available devices.

Try Using a Wireless Display
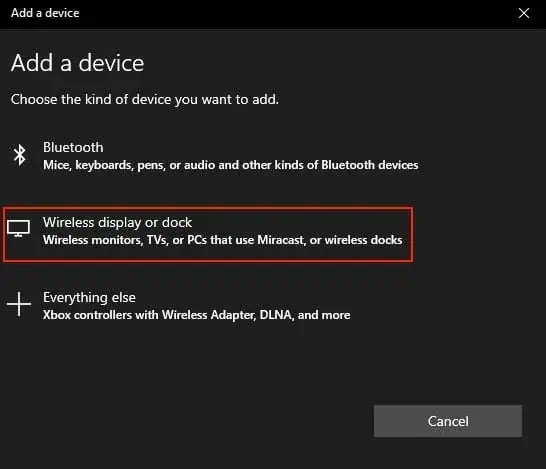
You can try connecting your monitor wirelessly through Bluetooth available in the settings. So, if connection via physical means (cables) is not possible, a wireless connection could do the trick. To use a wireless display, follow these steps:
- Press Windows key + I to open your settings.
- Go to Devices.
- Click on Add Bluetooth or other devices.
- Select Wireless display or dock.

- Make sure the device you’re connecting is discoverable.
- From the list of available devices, select your device to connect.
Update Your Graphics Driver
A graphics driver determines how your system interacts with your graphic component. An outdated graphics driver causes corruption and configuration errors while trying to detect a second screen. Hence, updating your graphics driver might fix your problem.
Here’re the steps:
- Right-click on the Start menu.
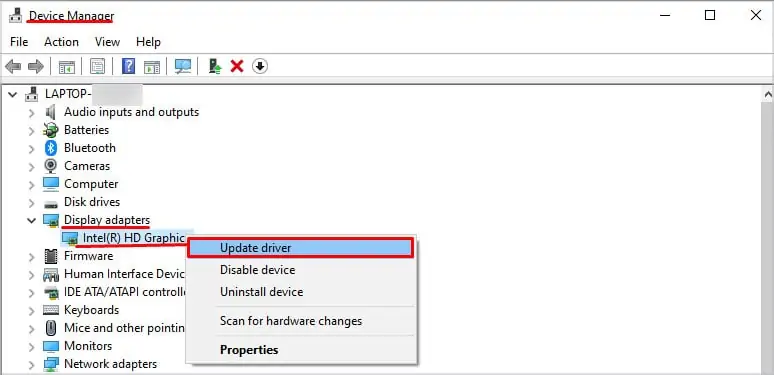
- Go to Device Manager.
- Expand the Display Adapters section.
- Right-click on your graphics driver and select Update Driver.

The graphics driver can be easily updated by visiting the utility software provided by your graphic manufacturer.
Install Windows Updates
Installing all available Windows updates is known to be the best and the safest way to install driver updates. It can fix the compatibility issues with newer systems and security patches. Simply, follow to steps below to do so.
- Press the Windows key + I on your keyboard to open the settings.
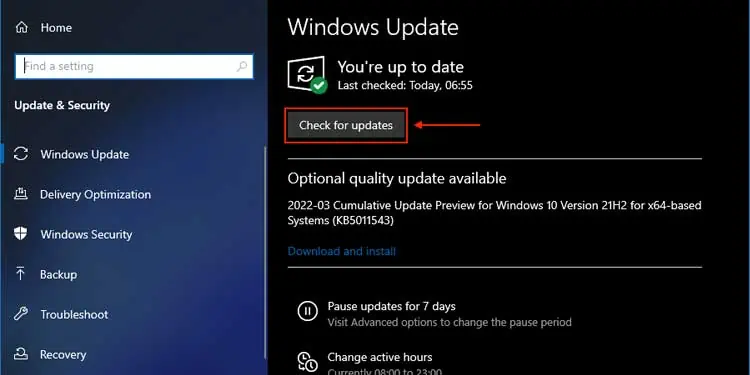
- Click on Update & Security.
- Click on Check for Updates.

Windows will now automatically download the latest updates available on your system.
Reinstall Your Graphics Driver
Reinstalling a graphics driver deletes the installer’s temporary files (which will not harm your system in any way from your system. These files are large in size and take up a significant amount of memory. Reinstalling a graphics driver is even known to make your system faster and smoother.
The steps below show how to reinstall a graphics driver:
- On the Start menu, search for and select Device Manager.
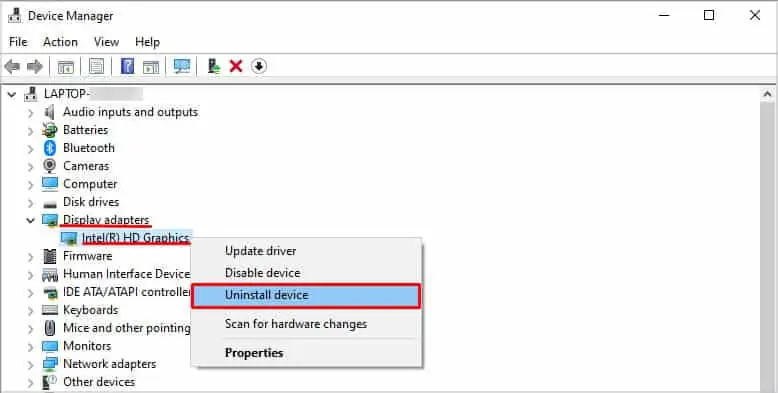
- Double click on Display Adapters.
- Right-click on your graphics adapter and select Uninstall device.

- On the confirmation box, select Delete the driver software from this device.
- Restart your computer.
- Open the Device Manager once again.
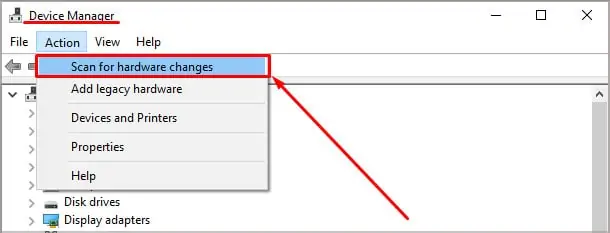
- Click on Action and select Scan for hardware changes.

- Now, Windows will automatically scan and install the required drivers.
Rollback your Graphics Driver
Updating a graphics driver to the latest built doesn’t always guarantee the most beneficial outcome. So, if the newer update is causing unseen problems in your system, rolling back your driver install can help solve the problem.
The rollback feature uninstalls the latest build and reverts your driver back to the previous build. Follow these steps to do so:
- On the Start menu, search for and select Device Manager.
- Double click on Display Adapters.
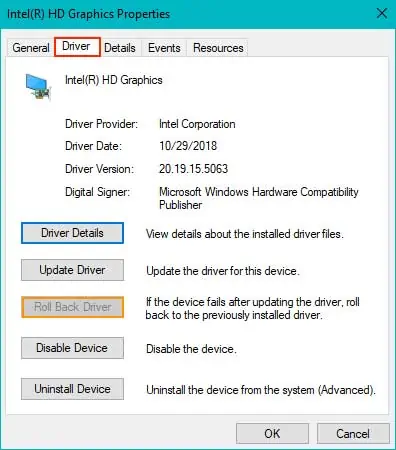
- Right-click on your graphics adapter and select Properties.
- On the Driver tab, click on Roll Back Driver.

- After the instructions, click Yes to complete the process.

