
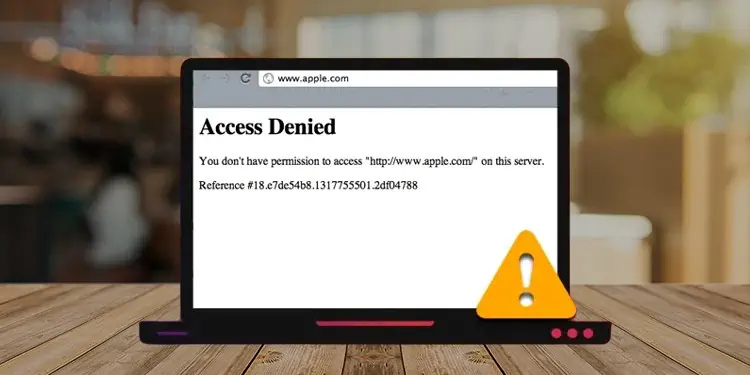
Access denied on this server error can appear any time while browsing a website, irrespective of the browser you are using. You may also see a reference code below the error. When you come across this error message you cannot further browse that particular website.
The error can pop up in a variety of cases. For instance, your ISP may have blocked access to the website. Or, the web server may itself block your IP address if your PC is making persistent requests.
Whatever the reasons, In this article, you will learn the ways to fix the Access denied on this server error.
Causes For “Access denied on this server” Error
- Using a Proxy Server
- Cached data on your browsers
- Misconfigured browser settings
- DNS server unable to resolve the web address
Fixes For “Access denied on this server” Error
Fixing this error is of the utmost importance since you can not visit that particular website until you solve it. Fixes for this problem are pretty easy to carry out unless it is an issue on the server side itself.
We have compiled a list of 7 fixes you can apply when encountering this error. Let’s get straight into them.
Turn Off VPN
VPN (Virtual Private Network) allows you to surf the Internet cloaking your identity. Your real Internet address is hidden when you use VPN, and you browse the Internet anonymously. VPN has its own perks; however, it does not always work.
You never know if the VPN’s IP address assigned to your computer is blacklisted. If it is, the website’s server may have blocked it, and you may encounter the access denied issue. If you have an active VPN connection on your PC, it may be preventing you from accessing the website.
Here’s how you can turn off the VPN from the Windows settings:
- Hit Windows + I to open Settings.
- Click the Network and Internet tab from the left pane and click the VPN menu from the right section.
- Under the VPN menu, you will see the VPN connections created on your PC.
- Click Disconnect button beside the active VPN connection.
- You can also remove the VPN profile. Click the VPN name and then click Remove button.


If you use third-party VPN applications or extensions in your browser, disable it and try accessing the website afterward. Steps to disable the extensions depend upon the browser you are using.
If you are bound to use VPN, consider using the premium version. Free VPNs have blacklisted IPs that are blocked from accessing many websites.
Change the DNS Settings
DNS (Domain Name System) acts as a middleman between your web browser and the web server. It is used for the name resolution process. i.e., convert domain names to IP addresses and vice-versa.
Your Internet Service Provider (ISP) dynamically assigns your computer a DNS Server’s IP address. However, it can sometimes fail to resolve the website address. Consider using the Google DNS and see if the issue persists.
Follow these steps:
- Hit Windows + R key on your keyboard to open the Run dialog box.
- Type
ncpa.cpland press Enter key to open Network Connections window. - Find the active network adapter; it may be Wi-Fi or LAN. Right-click over it and click Properties from the context menu.
- On the Networking tab, select Internet Protocol Version 4 (TCP/IPv4) and then click Properties.
- In the new popup, click Use the following DNS server addresses.
- Click on the text field and enter these addresses:
- Preferred DNS server:
8.8.8.8 - Alternate DNS server:
8.8.4.4
- Preferred DNS server:
- Click the checkbox next to Validate settings upon exit and click OK.


Disable Proxy
If you are on your organization’s computer, an enabled proxy can be the reason behind the error. Proxy creates a channel between your PC and the Internet so that your organization’s admin can know which sites you are visiting and monitor the Internet activities.
System admin can block your access to specific websites, and you may face the issue. You need to disable it before you can surf the Internet.
Here’s how you can do it:
- Right-click the Start button and choose Run from the list.
- In the text field, type
inetcpl.cpland hit Enter to open the Internet Properties window. - Navigate to the Connections tab and click LAN Settings.
- Uncheck Use a proxy server for your LAN option under Proxy server.
- Click OK on both of the windows to save the changes.


Run Internet Connections Troubleshooter
Windows also provides an Internet connections troubleshooter integrated into its troubleshooting tool to help diagnose and fix any issue with the Internet connections. You can run it and see if it identifies the issue with the denied access error.
Follow these steps to run the troubleshooter:
- Press Windows + S key, type Troubleshoot settings in the text field and open it.
- Click Other troubleshooters in the right section.
- Find Internet Connections in the next window and click the Run button beside it.

Perform a Network Reset
Performing a Network Reset helps solve many problems with Internet connections. If any network adapter settings were misconfigured, it would be reverted back to the factory defaults, and you should not face the access denied issue.
Follow these steps to perform a network reset:
- Hit Windows + I to open Settings.
- Select Network and Internet > Advanced Network Settings.
- Click Network Reset under More settings.
- Click the Reset now button in the next window and confirm the reset by clicking Yes in the next popup that appears.

Clear Browsing Data
Websites you surf in your browser store cookies, images, and files as a cache to load them faster. Over time, it gets cluttered. They even get corrupted, which can lead to the access denied error. You can delete the entire browsing data from your browser. It will probably help you get rid of this error.
You don’t need to clear your passwords but need to delete everything else except them. Steps to clear the browsing data vary with the web browser you are working with.
We have listed steps to clear the data for a few popular browsers.
On Google Chrome
Follow these steps to clear the browsing data from your Google Chrome:
- Launch Google Chrome.
- Click (⋮) menu button located at the top right of Chrome and select Settings.
- Select Privacy and Security tab from the left section.
- Click Cookies and other site data from the right pane.
- Scroll down, find See all cookies and site data and click over it.
- You can delete the cached data for problematic websites only by searching it in the search box and clicking the trash can icon next to it. If it solves the titled error, no need to remove all the cookies in your browser.
- Else, click the Remove All button to delete cookies and site data for all websites.


On Firefox
Follow these steps to clear the browsing data from your Mozilla Firefox:
- Open Firefox.
- Click the ( ≡ ) button in the top right corner and then select Settings option.
- Navigate to the Privacy & Security tab in the left section.
- Scroll down to find Cookies and site data. Click Manage Data under it.
- Find and select the website with which you are facing the issue and click Remove Selected.
- If deleting the selective cached data did not solve your issue, click Remove All.
- Click the Save changes button.
- Click Remove button in the next pop-up.


On Opera
- Click the Opera’s logo on the upper left side and select Settings.
- Scroll the Settings page to find Cookies and other site data under Privacy and Security and click it.
- Click See all cookies and site data.
- You can use the search box to find the problematic website and click the trash icon to delete the associated cookies. Or, Click the Remove All button to delete all cookies and site data.

On Microsoft Edge
- Launch Microsoft Edge.
- Hit Alt + F key on your keyboard and select Settings from the list.
- Select Cookies and site permissions from the left section of the Settings page.
- Click Manage and delete cookies and site data and then click See all cookies and site data.
- Search for the website whose cookies you want to delete using the search box and delete it using the trash icon.
- Click Remove All to delete all the stored cookies.

Reset Your Web Browser
This is the final fix you can apply when you are facing the access denied issue. Many users reported that they fixed the problem after resetting their browser. Resetting will revert any changes made to the browser settings to the defaults.
It also deletes the extensions and cookies that might probably be causing the issue. Bookmarks and saved passwords are not affected, though. Steps to reset also vary with the browser you are using.
We have listed steps for some of the browsers.
For Google Chrome
- Click the Chrome’s menu icon (⋮) at the top right corner.
- Click Settings option from the list.
- Click Reset and clean up tab under Advanced in the left section of the Settings page.
- Click Restore settings to their original defaults > Reset Settings

For Firefox
- Open the Firefox menu by clicking the ( ≡ ) button at the top right.
- Click Help > More troubleshooting Information > Refresh Firefox
- Click Refresh Firefox button in the popup.

For Opera
- Open the Opera’s menu clicking its logo on the top left corner.
- Select Settings.
- Click Privacy & Security from the left pane.
- Scroll down and click the Advanced drop-down list.
- Scroll further to click Restore settings to their original defaults.
- Click Reset in the popup.

For Microsoft Edge
- Hit Alt + F key and select Settings.
- Click Reset Settings tab from the left pane and then click Restore settings to their default values.
- Click the Reset button in the popup, and you are done.
