
When the Client Server Runtime process consumes excessive GPU, you may experience a sudden FPS drop when playing your favorite game. In the worst case, this may even freeze the computer, making your Windows experience severely degrade.
Basically, the Client Server Runtime (cssrs.exe) is one of the vital Windows processes that manage the overall graphical subsystem and instruction sets. In normal conditions, its GPU usage is between 0% to 1%. But this may increase for various reasons, like enabling high graphics settings, corrupted drivers, viruses, etc.
Such a problem can occur anytime – when the OS is booting up, watching videos, playing games, or performing regular tasks. Nonetheless, you do not have to worry, as this can be easily solved.
What Causes “Client Server Runtime Process High GPU” Issue?
Most Windows users claim to have encountered a high GPU usage problem after performing a clean Windows installation. This is because several background activities are possibly running after the installation.
Likewise, your system may also seek an additional OS update, or your Windows files are yet to be indexed. Whatever the reason, this can lead to FPS bottlenecks, laggy computers, or even trigger the blue screen of death.
- Service has a high priority
- Wrongfully configured Visual Effects
- High graphical settings enabled
- Corrupted drivers, Windows updates, BIOS, or other third-party programs
- Malware
- Overclocked or underclocked GPU
- Corrupted user profile
How to Fix Client Server Runtime Process High GPU
High GPU usage is a common bug on both Client Server Runtime and Desktop Window Manager (dwm.exe) processes. In either case, users claim that their system starts to heat, and the fans make unnecessary noise.
Whatever might be the reason, this section includes simple yet effective fixes that should help you fix the problem.
Scan for Malware
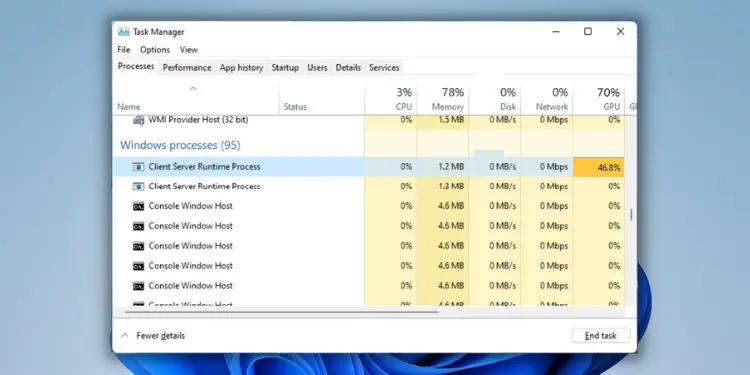
If you open Task Manager, you will likely find more than one Client Server Runtime process running. However, one of these may not be legit. To confirm this, right-click on each process and pick Open File Location. If this doesn’t take you to the System32 folder, know that this is some form of malware.
Likewise, the cssrs.exe process may indicate high GPU if your computer is affected by bitcoin mining malware. So, we recommend using the built-in Windows Security app to scan for possible viruses quickly:
- Use the start menu to search and launch the Windows Security application.

- Next, go to Virus & threat protection.
- Under Current threats, click on the Quick scan button.
- Wait until the scan is complete. The amount of time depends on the number of files to be scanned. You should even receive a notification once this is completed.


Update Your OS
An outdated operating system is another reason behind this issue. The second possible solution is to download and install the latest Windows update:
- Open Settings using the Windows + I shortcut.
- Navigate to Windows Update.
- Here, click on the Check for updates button.
- If there’s an update available, press Download & install.
- Wait until your OS gets updated. Once that’s done, restart your PC and check the Client Server Runtime’s GPU usage.


If you’re already running an update, it could be downloading something that’s overkilling the GPU. So, it’s best to wait until the installation is complete.
Tweak Priority
Whether it be cssrs.exe or any other process, setting a high priority will allocate more system resources (CPU, GPU, memory, etc.). Since manually stopping this isn’t possible (as it can make your computer unstable), we recommend tweaking its priority, which should help decrease the GPU usage:
- First of all, launch Task Manager using the Ctrl + Shift + Esc keys.
- Switch to the Details tab and find
csrss.exe. - Right-click on it and expand the Set priority option.
- Now, choose Normal, Below Normal, or Low.
- Restart Task Manager and check the GPU usage of the Client Server Runtime process from the Process Tab.


Disable Hardware-accelerated GPU Scheduling
If the csrss.exe process utilizes high GPU, causing overheating problems, we highly recommend turning off the Hardware-accelerated GPU Scheduling setting. Also, some Windows users have faced freezing or crashing issues as this setting speeds up rendering by utilizing more GPU.
- Go to Start Menu and open Settings.
- Move to System > Display.
- Scroll down and navigate to the Graphics settings.
- Under Default settings, click on Change default graphics settings.
- In the new window, toggle off the Hardware-accelerated GPU Scheduling option.
- Now, restart your computer, launch Task Manager, and check if the problem persists.


Disable Transparency Effects and HDR Settings
Enabling the built-in Transparency Effects and HDR settings does not affect the overall computer performance. However, it can make the process use more GPU than usual. Go through the following procedure to disable these options in Windows 11 to fix the Client Server Runtime Process high GPU problem:
- Press Windows + I shortcut to directly open Settings on your Windows PC.
- Navigate to System > Display > HDR.
- Now, toggle off the Play streaming HDR video option.
- Next, move to Personalization > Colors.
- Here, turn off Transparency Effects.
- Once both settings are disabled, open Task Manager and check if the
cssrs.exeprocess still shows a high GPU.

Tweak Visual Effects
It’s pretty obvious that your PC requires more significant usage of the GPU to get dazzling visual effects. In fact, this is one of the various ways to optimize your Windows. However, if you have adjusted this setting based on your appearance, you may encounter the Client Server Runtime Process high GPU problem.
- In the Settings application, go to System > About.
- Move to Device Specifications and choose Advanced system settings.
- After the System Properties dialogue box pops up, press the Settings button from the Performance section.
- Once the Performance Options window launches, select the Adjust for best performance option and hit Ok.
- Close all the windows and open Task Manager to check if the process still shows a high GPU.


Check Issue in Safe Mode With Networking
If tweaking the graphics settings didn’t do the trick, there may be issues with your driver or operating system. But before moving forward, it’s a good idea to check if the Client Server Runtime Process shows high CPU usage in safe mode with networking.
Basically, this is a Windows feature that starts your system with network drivers and limited services. If the issue occurs here, you can update or reinstall the corrupted device drivers. Kindly check the following steps on how to boot Windows in safe mode:
- In Settings, go to System > Recovery.
- Now, press the Restart Now button in Advanced Startup.
- Again, hit the Restart now button to enter the Windows Recovery Environment.
- In the Choose an option window, select Troubleshoot.
- Next, go to Advanced options.
- Then, choose Startup Settings.
- In the next window, tap the Restart button.
- Now, use the F5 key on your keyboard to enable the safe mode with networking.
- Once the PC starts, open Task Manager and check if the high GPU problem prevails.


Perform Clean Boot
Sometimes, third-party programs (games, startup apps, or other background programs) may utilize high GPU without your knowledge. So, try performing a Windows clean boot if your device worked well in the safe mode. Otherwise, you can skip this and move on with the next fix.
Go through the below guide on how to perform a clean boot in Windows 11:
- Press Windows + R and execute the following command in Run to open the System Configuration utility:
msconfig - Move to the Services tab and mark the Hide all Microsoft services option.
- Now, hit the Disable all button.
- Then, press the Ok button to save the changes.
- Next, switch to the Startup tab and tap on Open Task Manager.
- After the Task Manager opens up, right-click on each application having a high startup impact and pick Disable.
- Then, restart your computer to perform a clean boot.
- After the computer boots, check the Client Server Runtime process in Task Manager.
- If GPU usage is still high, you now know that the third-party applications do not have any issues. But if the problem is resolved, you can boot the PC in normal mode and start enabling each service to identify the culprit.
- Finally, remove the troublesome app or service, and you should no longer face the Client Server Runtime Process high GPU issue.


Update, Reinstall, or Rollback GPU Drivers
Well, checking and updating the drivers can significantly help fix any security or incompatibility problems that might be responsible for high GPU usage. Follow the below instructions on how you can do just that:
- Use Windows + X to open the Quick Link menu and pick Device Manager.
- Expand the Display Adapter drop-down, right-click on your graphics driver, and choose Update driver.
- In the new dialogue box, select Search automatically for drivers.
- Wait until the latest drivers are installed.
- If this doesn’t solve your problem, right-click on your GPU driver and choose Uninstall device.
- After the dialogue box pops up, press the Uninstall button to uninstall the driver. This will likely turn your screen black, as there’s no graphics driver to render the content.
- Force restart your computer, and the necessary device driver should be installed automatically.


If the problem still exists, we recommend manually installing the drivers. To do so, you can visit Intel, NVIDIA, AMD, or other manufacturer’s official website and download the appropriate .INF file.
Some Windows users have also faced high GPU usage issues after updating their drivers. In such a case, you’ll need to roll them back:
- In the Device Manager window, right-click on your GPU driver, and choose Properties.
- Move to the Driver tab and press the Roll Back Driver button.
- Now, choose an appropriate reason why you’re rolling back the driver and press the Yes button. This should fix the Client Server Runtime Process high GPU issue.


Delete User Profile
Another possible cause of the high GPU is a corrupted user profile. We recommend checking this on a different administrative user account. If the Client Server Process shows normal GPU usage, we recommend deleting the user profile of your main account:
- First, sign out of your user account and log in to an administrative account.
- Here, navigate to Settings > System > About > Advanced System Settings.
- In the Advanced tab, press the Settings button from the User Profiles section.
- Next, select the target user profile and hit Delete.
- Press the Yes button to confirm your action.
- Now, sign in to your user account again. You should see a welcome animation.
- Finally, open Task Manager and check if the process still shows a high GPU.


Repair Install Using Windows Media Creation Tool
Repair installation or upgrade means overriding the OS installation on your hard drive. This way, several issues, including broken system files and settings, get fixed. Go through the below guide to learn the necessary steps for repair installation using the Windows Media Creation tool:
- Download the Windows Media Creation setup file and run it.
- Accept the license terms and hit Next.
- Select Create installation media and press Next.
- Confirm your language setting and hit Next.
- Then, choose the ISO File option and tap Next.
- Once the dialogue box pops up, set the path to a flash or DVD drive and save it.
- Now, right-click on the dedicated ISO file and pick Mount.
- Wait until the process is complete and navigate to the DVD drive. Here, find and execute the
setup.exefile. - In the Windows setup window, click on Change how Windows Setup downloads updates.
- Proceed with the on-screen instructions and in the final window, hit Finish.
- Now, your PC should restart. After the Windows boots, navigate to Task Manager and check if the problem persists.


Perform System Restore
If none of the nine fixes helped limit the cssrs.exe GPU usage, the final option is to perform a system restore. If you had tweaked some OS settings, this might have triggered the issue.
So, returning your system to its previous state can help fix it. Moreover, if the problem is due to a recent Windows update, we recommend rolling back the system and waiting until Microsoft releases a new update to help fix the bug:
- In Settings, go to System > About > Advanced system settings.
- Once the System Properties dialogue box appears, switch to the System Protection tab.
- In the System Restore section, hit the System Restore button.
- After the System Restore window opens up, set the Recommended restore option and hit Next.
- Finally, click the Finish button and proceed with the on-screen instructions to revert your system to its earlier state.
- Once the PC restarts, check the issue in Task Manager, and you should no longer see the Client Server Runtime Process consuming high GPU.


