
Whether you create a partition in the existing disk or install a secondary storage drive, you expect it to show up as D Drive in File Explorer. All external HDDs/SSDs are plug-and-play and should be detected automatically. But internal storage drives work differently and need to be initialized first.
While D drive not showing up is a common issue during new hard drive installation, it can even happen due to connectivity, letter assignment, and other system-related issues.
In this article, I’ll guide you through the possible solutions for every case that can cause the D drive to not show up.
Check Connection
Before anything else, I suggest checking whether the storage drive is showing up on Disk Management. For example, if you have installed two drives and there’s only Disk 0, it means that your secondary disk has connectivity problems.

A simple solution is to reconnect the drive and reboot your computer. If it’s a SATA HDD or SSD, make sure both the power and data cables are properly connected. For NVMe, ensure the drive is properly seated.
When an internal hard drive is not showing up, a loose connection is a common cause. Other than that, it can also happen due to a damaged port or cable. In that case, try another slot (if available) and check using another cable (if you have a SATA drive).
In case your external hard drive is not showing up, I advise checking both the USB port and cable for possible damages. Try another port or cable and see if the problem persists.
If you have a spare drive, you can try connecting it to the same port. Or you can connect the problematic drive to another computer. In case the problem persists on the working PC, know that the drive is faulty. Otherwise, there are some other issues with your PC that I shall discuss ahead.
Rescan Disks in Disk Management
Some Windows users have encountered a problem where the drives are connected properly but still don’t show up on File Manager and Disk Management. In such cases, rescanning the disks can be extremely beneficial as this will try to force discover your storage drives:
- Press Windows + X to get to the Quick Link menu.
- Here, select Disk Management.
- Now, from the menu bar, select Action.
- Next, select Rescan disks.

- Wait for the rescan progress to complete. Once that’s done, check if the D drive is now showing up.


Create New Volume
Did you recently install an internal hard drive? Unlike external drives, they are not plug-and-play and as mentioned earlier, you need to initialize them first. After that, you need to create a partition and assign the available letter to make them usable.
If you’re not tech-savvy and were expecting the drive to show up immediately, here’s what you should do first:
- First, launch the Disk Management utility as described above.
- If you hadn’t initialized the disk earlier, a dialogue box should pop up. Here, select a partition style (MBR for legacy systems and GPT for UEFI systems) and hit Ok.
- Check whether the desired drive or partition is listed under the Volume column. If you do not see the desired volume, navigate to the Disk section below.
- Whether it’s a partition or a new disk, you should notice that the space is unallocated. Right-click on the unallocated space and pick New Simple Volume.
- In the New Simple Volume Wizard, hit Next to continue.
- In the volume size specification, enter the volume size such that it is less than or equal to the maximum disk space. Once you’ve configured that, press Next.
- Next, assign the drive letter to D and hit Next.
- In the format partition window, configure the fields as necessary and click Next.
- Press the Finish button and your drive should now show up under the Volume column.
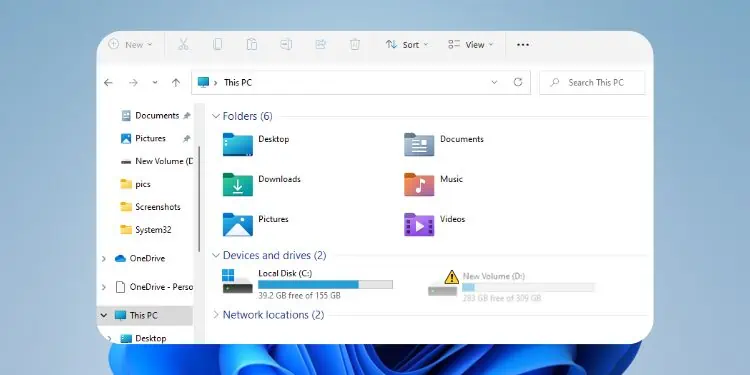
- Navigate to File Explorer using Windows + E shortcut and go to This PC. Now, the D drive should show up here as well.


Assign Drive Letter
If you hadn’t assigned a drive letter or path during initialization, Windows will not provide it automatically. If there’s no letter, File Explorer won’t recognize your drive even though the drive/partition shows on Disk Management as New Volume. Here’s a quick workaround to this problem:
- Open Disk Management and right-click on the New Volume drive.
- Pick Change Drive Letter and Paths.
- Click on the Add button.
- In the Assign the following drive letter field, select D from the drop-down. In case a CD/DVD drive is occupying this name, D won’t be on the list. So, you may pick any other letter of your choice.
- Hit Ok and check for the ‘D’ drive in both Disk Management and This PC.


Run Hardware and Devices Troubleshooter
The D Drive might not show up on Windows due to issues within the storage drives too. In such cases, the aforementioned solutions might not be helpful. Before anything else, I suggest running the Hardware and Devices Troubleshooter. This should identify the problems with your HDD, SSD, flash drive, or even SD card and help fix them:
- Use Windows + R hotkey to launch the Run utility.
- Execute the below command to open the Hardware and Devices troubleshooter:
msdt.exe -id DeviceDiagnostic - Press the Next button on the first screen.
- Now, wait for the troubleshooter to find and fix your issue. This may take a few seconds to even a minute depending on the problem you’re facing.


Update or Reinstall Device Drivers
If you get the “Troubleshooter couldn’t identify your problem” message when running the Hardware and Device troubleshooter, it’s time to diagnose the device drivers.
Whether it’s an internal or external storage disk, faulty drivers can bring up undesirable errors, including missing D Drive. For that reason, I highly recommend keeping the disk drives (drivers for your storage drives) updated. You might have to reinstall them if updating drivers didn’t help:
- First of all, open Device Manager from the Start Menu.
- Click on the ‘>’ arrow to expand Disk drives.
- Right-click on the troublesome drive and select Update driver.
- In the Update drivers pop-up, choose the Search automatically for drivers option.
- If this didn’t fix your problem, right-click on the driver again. This time, pick Uninstall device.
- Once the warning dialogue box pops up, hit the Uninstall button.
- Now, reboot your computer and wait for the necessary driver to get installed.
- After logging into Windows, verify whether the D drive is now showing up.


Run SFC and CHKDSK Commands
While updating/reinstalling the device drivers usually solves the related problems, the issues can also lie within the system files. Along with that, a corrupted hard drive is another common cause for the D drive to not show up.
For each of these situations, the best solution would be running SFC and CHKDSK commands.
- Open Command Prompt as an administrator as demonstrated below.
- Execute the following command to scan and fix the corrupted system files:
sfc /scannow - Next, run the below command to fix possible corruption of your storage drive:
chkdsk /f - Restart your computer and check if the issue is resolved.


Unhide Partitions/Drives
Even though you didn’t tweak the Local Group Policy Editor, some forms of malware can edit certain policies without your knowledge. If the policy setting is enabled to restrict the D drive, it will simply not show up. While this is a rare case, you can certainly check if this is what has caused the problem. Here’s what you should do:
- In the Run utility, execute the
gpedit.msccommand to open Local Group Policy Editor. - Here, navigate to User Configuration > Administrative Templates > Windows Components from the left pane.
- Now, select File Explorer.
- Move to the right pane and double-click on Hide these specified drives in My Computer.
- In the new dialogue box, set the option to Not Configured or Disabled.
- Finally, press Ok and check File Explorer. All your hidden drives/partitions should now show up.


Clean the Drive
If none of the above troubleshooting techniques helped you, the final option is to clean the drive completely and initialize it from scratch. This involves deleting all data and partitions. If possible, make sure you back up your important files first.
- Open Command Prompt as an administrator.
- Execute the
diskpartcommand to start the Disk Partition command-line utility. - Now, run the following commands in succession to clean and reuse the drive:
list disk(lists all the drives connected to your computer)select disk [disk_number](selects the specified disk)clean(cleans the specified drive)create partition primary(creates a primary partition)format fs=ntfs(formats to NTFS)assign letter=D(assigns letter D to the created partition)exit(quit the Diskpart utility) - Execute the
exitcommand again in the Command Prompt window. - Now, the drive should show up in File Explorer and you can start using this from scratch.
- To recover lost data, you can use any data recovery tool.


Restore Your System
In the past, Windows update has caused issues with D drive and it seems some users are still facing it. If you remember making a vital change to your system, you can utilize the built-in System Restore option to restore it to the state when the D drive was showing up:
- Press the Windows key and search for ‘Create a restore point’.
- Select this and you should be taken to the System Protection tab in System Properties.
- Here, find and press the System Restore button.
- Select Next in the first window.
- Pick a restore point and hit Next as shown below.
- Press Finish in the last window to confirm system restoration.
- A dialogue box will pop up asking you to confirm your action. Hit Yes to continue.
- Follow the on-screen instructions to complete the system restoration.


If the D drive is not showing after factory resetting or installing a new Windows OS, you might have done it wrong in one of the steps.
Did you happen to delete the partition that is not showing up? In that case, your D drive was probably deleted. So, you need to create the partition again but to recover the files, you require dedicated software.