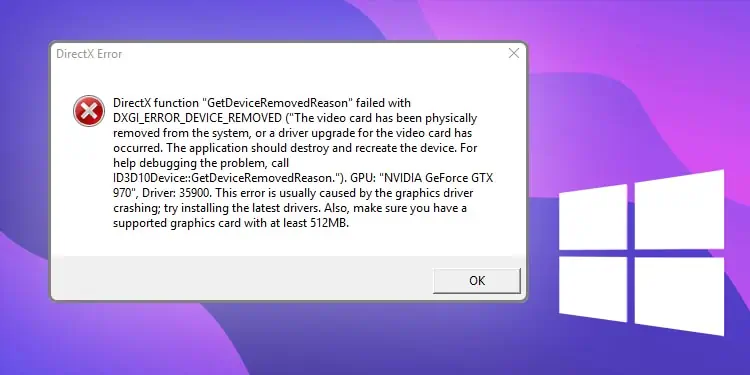
DXGI_ERROR_DEVICE_HUNG is one of the many error codes returned by the DXGI function. This error is common while gaming, especially if it is a graphically demanding game. It is categorized by improper instructions sent by the application, which results in DXGI Error.
Many gamers have faced this error during gameplay, causing it to freeze their games. They would then have to force restart the game to reload it.
As this is an issue with the DirectX Graphics Infrastructure (DXGI), most of the fixes revolve around updating your DirectX or GPU driver.
How to Fix DXGI_ERROR_DEVICE_HUNG?
There are several methods to fix this particular DXGI error, and not all of them may work for you. Depending on the cause of the issue, you may want to cycle through the fixes to determine which one works for you.
Before you begin, you might want to lower your graphics settings to see if it solves the issue.
Here are the possible fixes for this specific DXGI error code.
Reinstall Graphics Card Driver
The graphics card, also known as GPU, is essential computer hardware. The graphics card is used for rendering computer displays, but it mostly shines when rendering video game graphics.
However, the more demanding a game is, the more it pushes the limit of your GPU. If your graphics card driver fails at critical times, you can get DXGI errors.
So, reinstalling the GPU drivers will ensure a good working copy of the driver to be installed.
Here’s how you can reinstall it.
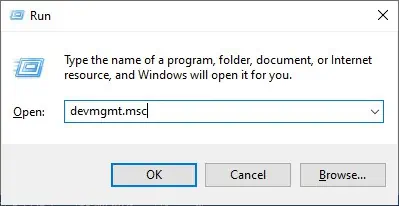
- Press Windows + R shortcut key to open the Run utility.
- Open Device Manager by entering
devmgmt.msc
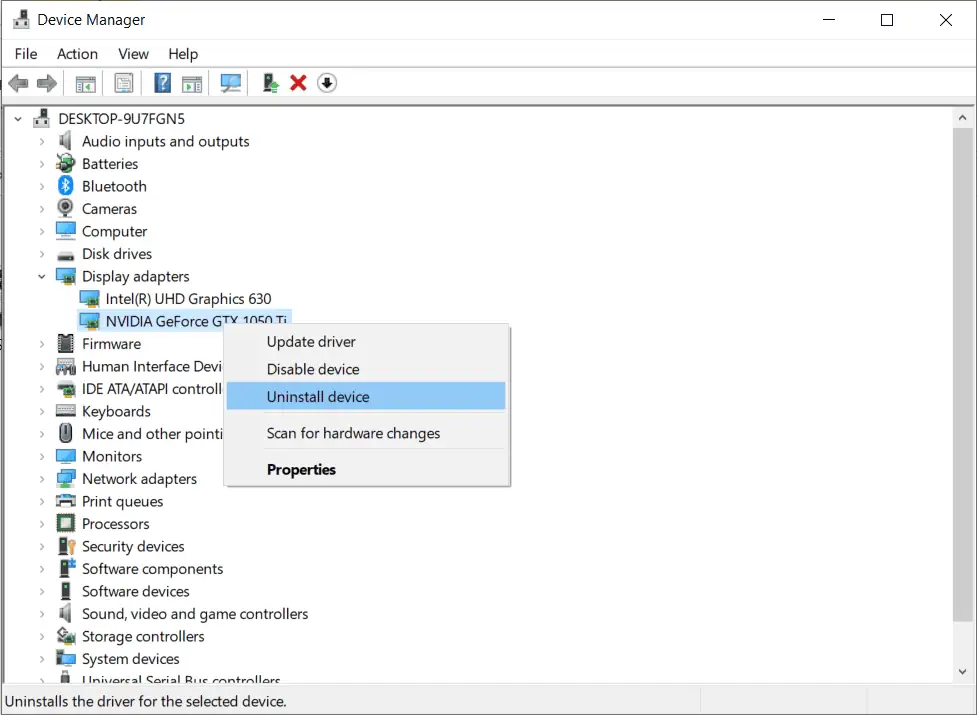
- Navigate to Display adapters and right-click your graphics card driver.
- Choose Uninstall driver and confirm.

- Download the latest version of your GPU driver from the official manufacturer’s website.
- Run the setup file.
- Follow the prompts.
You can also use the open source software, Display Driver Uninstaller, to completely uninstall a display driver and its registry and user files. This ensures that none of the previous corrupt files are present in the reinstalled driver.
Clear DirectX Shader Cache
Clearing your DirectX shader cache can help with several DirectX errors. The DXGI error is the direct result of DirectX not working properly. It can be because the DirectX cache may have been corrupted.
Furthermore, if the DirectX cache is too large, you may even see a slight increase in performance after clearing it.
So, you can try clearing your DirectX cache to resolve this issue.
- Access the start menu and launch Settings.
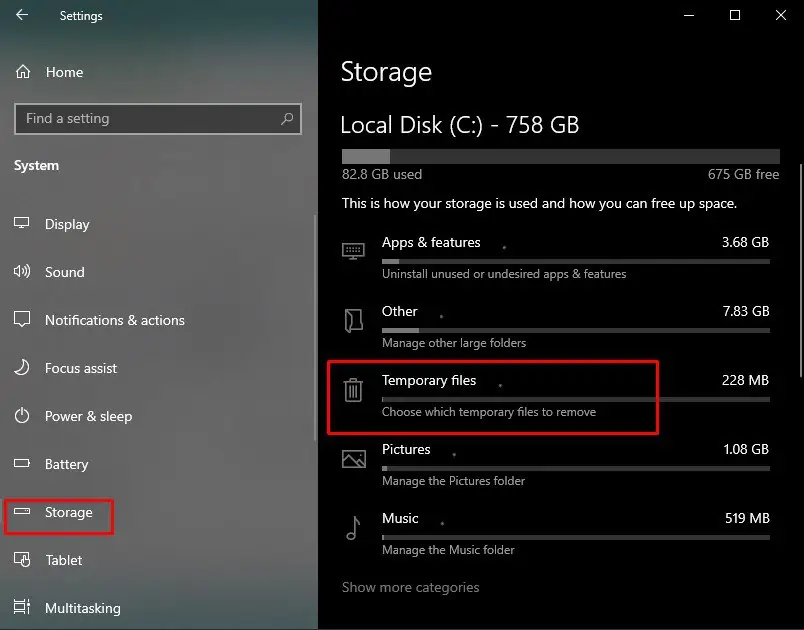
- Click the System tab and select Storage option.
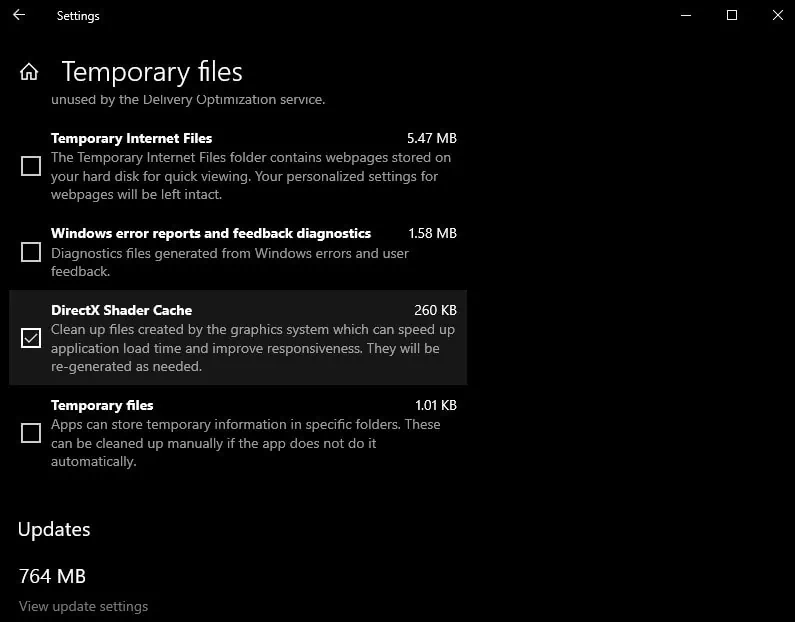
- Tap on the Temporary files menu.

- Select DirectX Shader Cache and click on Remove files.

Only Use Dedicated GPU
Only using dedicated GPU for gaming has also fixed this issue for many who have faced the DXGI error. While this method varies from PC to PC, here’s an example of how you can enable this setting from the NVIDIA control panel.
- Right-click on the desktop and choose NVIDIA control panel.
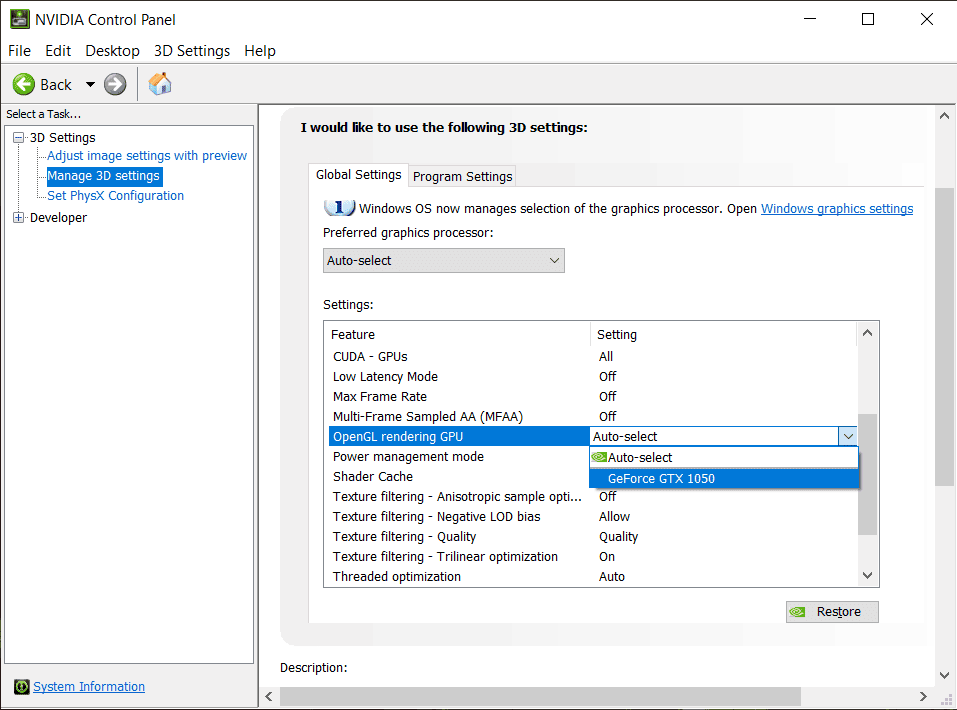
- Go to Manage 3D settings in the new window.
- Under Global Settings in the right panel, locate OpenGL rendering GPU.
- Click on it and choose your GPU from the dropdown menu.

- Exit NVIDIA control panel.
Check Your RAM Module
Another cause for this specific error could be a problem with your main system memory. The RAM is essential for running games, and demanding games stress the computer’s RAM.
Using the built-in Windows Memory Diagnostic Tool, you can check if your RAM is working fine. If it does find some error, you may need to replace your RAM.
Follow the steps below to check your RAM.
- Press Windows key + R key to open Run dialog box.
- Enter
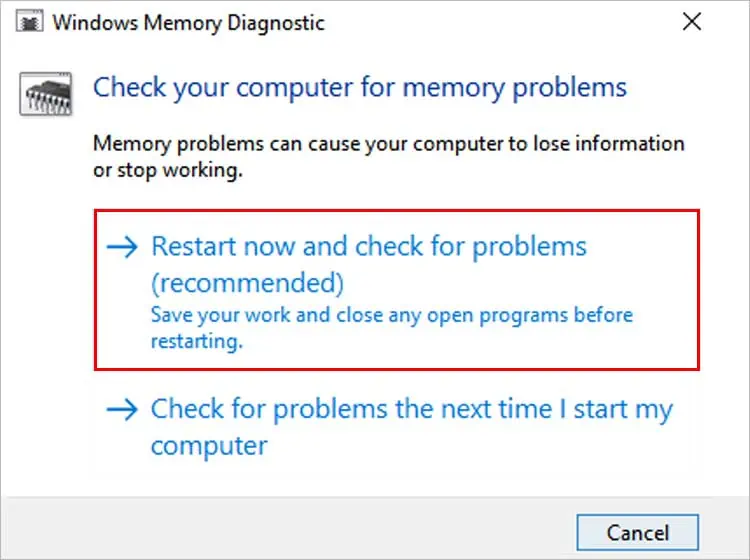
mdsched.exeto open Windows Memory Diagnostic Tool. - Choose the Restart now and check for problems option.

- After your PC restarts, it will start scanning your RAM. The results will be displayed after another restart.
Windows Memory Diagnostic Tool only performs a surface-level scan of your RAM. You can use powerful third-party applications like Memtest86+ to perform a deeper level scan if you like.
Furthermore, if you have enabled XMP, you may want to turn it off and see if it fixes this DXGI error. XMP is an overclocking profile but for the RAM.
Turn Off Overclocking
If you’ve enabled GPU overclocking, you can try disabling it to see if it fixes the issue. Overclocking pushes your GPU over the recommended limit set by the manufacturer for better performance.
However, it causes a serious drain on your GPU and can cause various errors. The DXGI errors can also stem from overclocking GPUs.
There are different tools with which you can overclock your GPU, and it is recommended that you disable it from the same tool.
Furthermore, most big GPU manufacturers have dedicated software for overclocking the GPU. You can easily disable this process from there.
However, here’s how you can disable this function directly from the BIOS.
- Restart your computer.
- As soon as it turns on, repeatedly press the Del key to open the BIOS menu. (The key to open BIOS may vary depending on your motherboard. Check with your hardware manufacturer to get the corresponding key.)
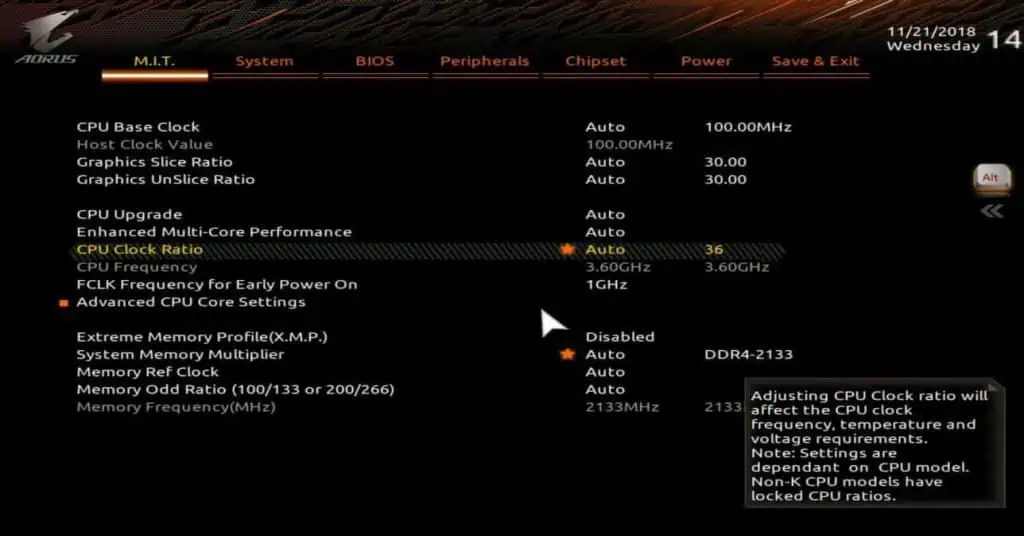
- Press F2 to view in classic mode and navigate to the M.I.T. tab using arrow keys.
- Choose Advanced Frequency Settings, select CPU Clock Ratio.

- Modify it to Auto.
- Hit F10 to save and exit BIOS.
Note: The above method is for the Gigabyte BIOS menu, and some steps may vary depending on your motherboard BIOS.
Edit Registry Files
You can disable TDR from the Registry Editor to fix this DXGI error. The TDR (timeout Detection and Recover) is a system process that determines if the graphics card is unresponsive. While this is an important system process, it can give false positives to cause the DXGI error.
However, disabling TDR may cause your computer to experience freezes, so you should consider it before applying it.
Follow the steps below.
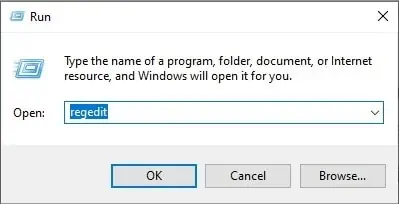
- Launch the Run utility by pressing Windows + R hotkey.
- Open Registry Editor by entering
regedit
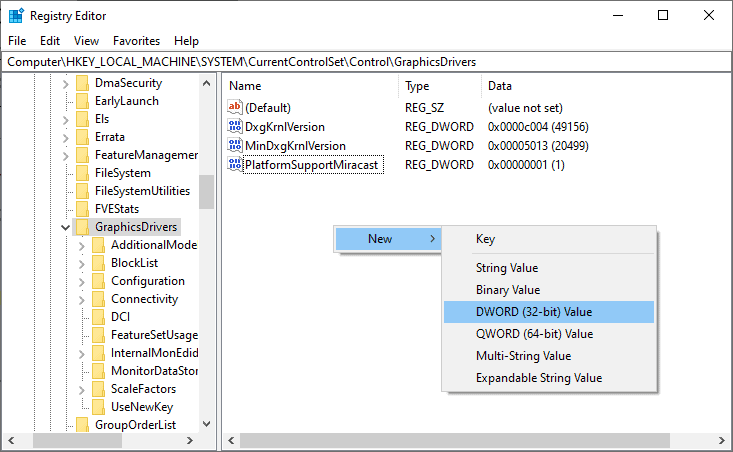
- Navigate to
HKEY_LOCAL_MACHINE\SYSTEM\CurrentControlSet\Control\GraphicsDrivers - Right-click on the empty area, select New, and choose DWORD value. (If there is already a TdrLevel entry, jump to step 6.)

- Name the new value as TdrLevel.
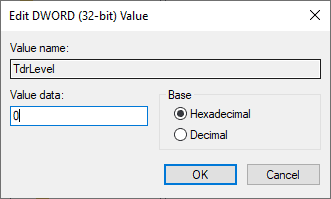
- Double-click the TdrLevel entry and change Hexadecimal value on Base section to
0and click OK.
- Exit Registry Editor and restart your PC.
Update Windows
Windows updates can also help solve the DXGI error. If your previous Windows update was improperly installed or had some bugs and errors, updating it will clear the problem. It also brings various new updates like driver updates and DirectX updates.
It is always recommended to update your Windows build to the latest. Follow the steps below to update your Windows OS.
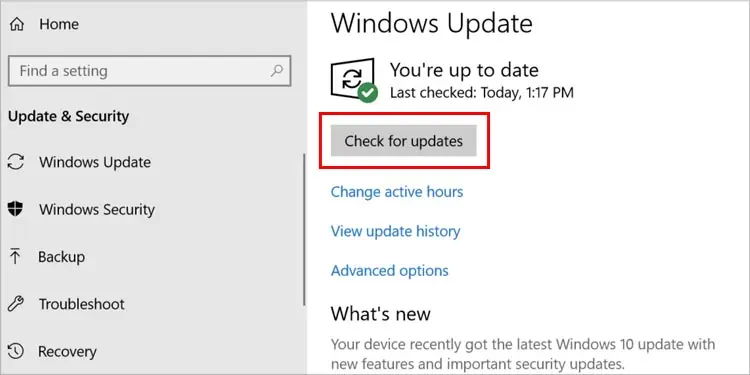
- Press Windows + I shortcut key to launch Settings.
- Navigate to Update & Security and choose Check for updates.

- Download and Install any new updates if there are any.
Reinstall Application
If the DXGI_ERROR_DEVICE_HUNG error shows up in only one application or game, you can consider reinstalling it to resolve the issue. If there are any problems with the application itself, a reinstall will help sort it out.
Here’s how you can reinstall the application.
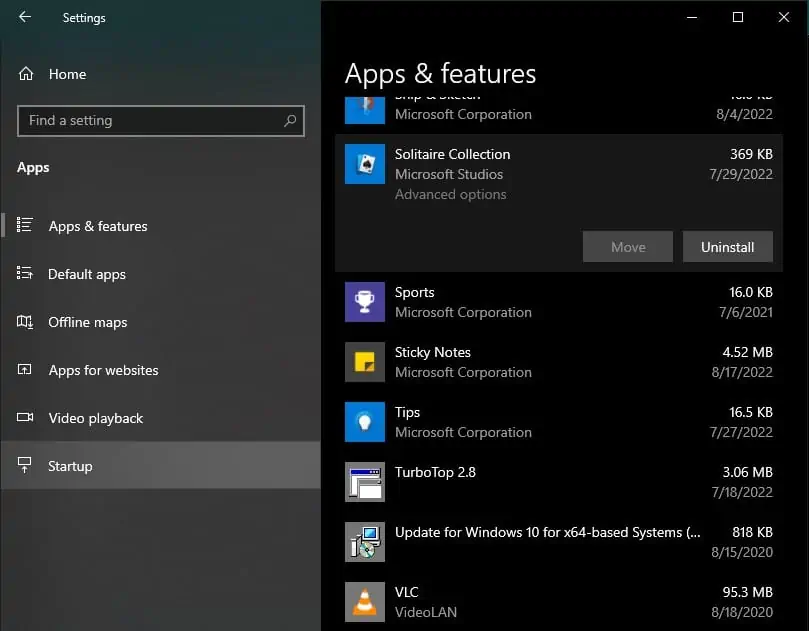
- Launch Settings by pressing Windows + I hotkey.
- Choose Apps from the options.
- Locate the application you want to reinstall and click on it.
- Select Uninstall and confirm.

- After uninstalling, download the application and install it again.
If the fixes on this list don’t work for you, it may be a hardware issue with your GPU. You may need to perform physical repair or replacement to solve this error if it is a hardware problem.

