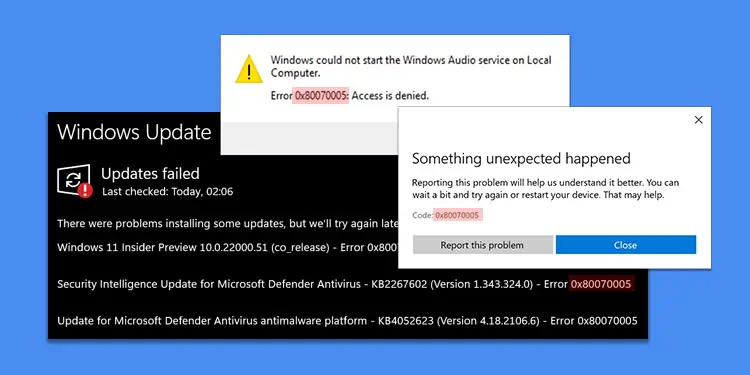
0x80070005 is a general error that you encounter when updating Windows or using Microsoft Store, System Restore, and so on. They all come with different accompanying messages, but the error code 0x80070005 generally means “Access Denied.”
This issue can happen due to incorrect permissions, conflicts due to other apps or files, or if the system can’t access a certain resource due to whatever reason.
Depending on the process where you are experiencing this error, you will need to apply different solutions to resolve the error.
Fixing Update Error 0x80070005

Usually, this error indicates a temporary issue that should go away in the next Windows session. So first, restart your computer and try again.
If you still encounter the error, your system’s update configurations have some problems. You need to run the update troubleshooter or reset the update components to resolve such issues.
Run Windows Update Troubleshooter
Windows comes with dedicated troubleshooters that check and attempt to resolve any issues in certain system components.
The Windows Update process also has its own troubleshooter, so you should give it a try.
- Open Windows Settings by pressing Windows key + I.
- Go to System > Troubleshoot > Other troubleshooters.
- Look for Windows Update and click on Run next to it.

- Follow the on-screen instructions.

Reset Windows Update Components
Issues with the necessary services or libraries and the presence of incomplete or corrupt downloaded update files are some of the main reasons for this update error. You can resolve these issues by resetting the update components, which involves performing the following tasks:
- Restarting the necessary services.
- Deleting the downloaded update files as well as updating the cache.
- Resetting Winsock catalog.
You can perform these tasks easily through the Command Prompt.
- Open Run by pressing Windows key + R.
- Type
cmdand press Ctrl + Shift + Enter to open the Elevated Command Prompt. - Type or copy/paste the following commands individually and press Enter after each. Don’t worry if the service is already not running or the files/libraries don’t exist. Also, click OK after re-registering the libraries.
net stop appidsvcnet stop bitsnet stop cryptsvcnet stop wuauservDel "%ALLUSERSPROFILE%\Application Data\Microsoft\Network\Downloader\qmgr*.dat"Del "%ALLUSERSPROFILE%\Microsoft\Network\Downloader\qmgr*.dat"Del %Systemroot%\SoftwareDistribution\DataStoreDel %Systemroot%\SoftwareDistribution\DownloadDel %Systemroot%\System32\catroot2netsh winsock resetnet start appidsvcnet start bitsnet start cryptsvcnet start wuauserv
- Restart your computer.


You can also copy all these commands to a .txt file through Notepad and save it as a .bat file. Then, running the batch (.bat) file will reset the update components anytime you wish to do so.
In some cases, you will need to re-register the relevant Dynamic Link Libraries (DLLs) as well. I recommend checking out our article that shows the complete process of resetting Windows Components to see how you can re-register them.
Disable Security Features
Third-party encryption or antimalware applications can also block certain updates. In such cases, it’s best to disable them temporarily while updating Windows to prevent this issue.
Some OEM encryption tools can also show similar problems, so I recommend blocking them as well.
Check the CBS Log File
If the above solutions don’t work out for you, it’s likely that you are experiencing a very specific problem. Such situations are usually very rare and might actually be unique to your current system. In such cases, you can check the log file related to the update to determine the exact nature of the problem.
The log file is the CBS.log which is at C:\Windows\Logs\CBS. You can use any text editor, including Notepad, to open this file. There, search for 0x80070005 using the Search or Find tool and check the accompanying messages.
Fixing Service Error 0x80070005

If your system or user account somehow loses the permissions to control a service, you will encounter the 0x80070005 error while trying to start the service. This error usually occurs in the Windows Audio service. But other services can also experience the same issue.
Check Permissions on Registry
This error indicates insufficient permission as it comes with the error message “Access is denied.” So you need to check the permission for the relevant service on the Registry editor and make any necessary changes.
- Press Windows key + R to open Run.
- Type
regeditand click OK to load the Registry Editor. - Go to
HKEY_LOCAL_MACHINE\SYSTEM\CurrentControlSet\Services\ - You will find that the keys inside Services correspond to the display name of the services.
- Look for and get inside the affected service key. For instance, you need to get inside Audiosrv if you are getting the 0x80070005 error on the Windows Audio service.
- If you don’t know the display name of the service,
- Open Run. Type
services.mscand press Enter to open Windows Services. - Look for the service and double-click on it.
- Check the Service name under the General tab.
- Right-click on the service name key and select Permissions.
- Make sure that the groups SYSTEM and Administrators (not Administrator) are present inside Group or user names, and they have full control (Allow for Full Control).
- If not,
- Click on Advanced and select Change under Owner.
- Type
systemand click Check Names. It should turn toSYSTEMafter that. - Hit OK.
- Check Replace owners on subcontainers and objects and click OK > OK.
- Open the Permissions window for the service key again and go to Advanced.
- Click on Disable inheritance > Convert all inherited permissions into explicit permissions on this object if this option exists.
- Select each group or user under Permission entries and click Remove.
- After that, click on Enable inheritance and hit Apply. All the necessary users and groups should automatically appear on the list with the proper permissions.
- Keep clicking OK to close the Permissions window while applying the change.


Then, restart your computer and try running the service again.
Change Service Log On
You can also change the service log on type to bypass conflicts due to improper permission. However, it is more of a workaround than a solution.
Also, changing the log on type is a risky solution and can introduce vulnerabilities in your system. So, only perform this process if the above one doesn’t work out.
- Open Run.
- Type
services.mscand press Enter to open Windows Services. - Look for and double-click on the service showing this issue.
- Go to the Log On tab.
- Check Local System account and check Allow service to interact with the desktop.
- Click Apply and OK.

Fixing System Restore Error 0x80070005

The 0x80070005 error can also occur during a System Restore if the process cannot access a certain file in the restore point. You can try restoring to another point that doesn’t show this error in such cases.
But if you only have one suitable restore point or all the available points show the same error, you need to troubleshoot the root of the issue first. The error message itself points to the possible cause, which is an antivirus program that is currently running on the computer.
Disable or Uninstall Third-party Antivirus
Some third-party antivirus applications can also prevent the System Restore process from working. The system restore also affects all the other executable files in a drive, along with the system files. As such, if the antivirus detects any invalid file, it will stop the restore process.
It can actually be a false positive if the restore point has many archives or .exe files that you directly downloaded from the internet. If you are certain that there are no problems with the restore point, you can temporarily disable the antimalware program and then perform the system restore.
Since Windows already has a good antivirus, Windows Defender (or as it is called now, Virus & Threat protection), I actually recommend uninstalling all third-party antivirus.
If you are not familiar with their working processes, you may experience undesirable situations due to the app’s security configurations.
Perform System Restore from Advanced Startup
You can also try performing the system restore process from the Advanced Startup or Windows Recovery environment. Since it is a pre-OS environment, third-party processes like antivirus apps won’t have started. So, they cannot affect the restore process.
- Open the Start menu (Windows key) and click on the Power button.
- Press and hold the Shift key on your keyboard and click Restart. It will lead you to the Advanced Startup.
- Go to Troubleshoot > Advanced options > System Restore.
- Follow the on-screen instructions to select an appropriate restore point and use it to restore your system.

Fixing Microsoft Store Error 0x80070005

0x80070005 error can also occur while installing or updating an application through Microsoft Store. It indicates some temporary problems with MS Store or, if you are performing an app update, the application itself.
Reset Store Cache
The first thing you should do when you encounter any issues with Microsoft Store is to reset the Store Cache. It resets the Store app and its cache without affecting any of your installed applications.
- Open Run by pressing Windows + R.
- Type
wsresetand press Enter to reset the store cache.

Reinstall Store Application
If you can’t update a certain application through the Store, the app itself may have some problems. In such cases, you can try reinstalling the app to resolve any such issues.
- Open Run.
- Type
powershelland press Enter to open Windows PowerShell. - Type
Get-Appxpackage | findstr /b "Name"Name and press Enter to list the names of Store Applications. - Search for and note down the exact name of the application that shows this error. You can also select the text and copy it.
- Then, type
Get-Appxpackage -Name “Package Name”while replacing the “Package Name” with the above name and press Enter. - Select the text next to InstallLocation and copy it by pressing Ctrl + C.
- Now, use the cmdlet
Add-AppxPackage -register "<InstallLocation>\AppxManifest.xml" -DisableDevelopmentModewhile replacing the <InstallLocation> with the above value. You can press Ctrl + V to paste the copied location in this placeholder. - Check if you still encounter the 0x80070005 error.


You may need to run this last cmdlet 2-3 times to resolve the issue depending on your situation.
You can also remove the application package altogether and then download the latest version from Microsoft Store.
To remove the package, you need to use the cmdlet Get-Appxpackage -Name “Package Name” | Remove-AppxPackage on PowerShell. Make sure to replace “Package Name” with the appropriate value.
Check Packages Folder Permissions
You will also encounter this error if the AppData folder which stores the necessary data for the Store applications does not have the proper permissions. So, you should check this permission setting and make sure everything is alright.
- Open Run.
- Type
%localappdata%and press Enter to go to theAppData\Localfolder. - Here, search for and right-click on Packages.
- Select Properties and go to Security > Advanced.
- Make sure that your current user account is the Owner and that SYSTEM, Administrators, as well as your account have Full Control permissions.
- If the Owner is not the current user account,
- Click on Change > Advanced.
- Choose Find Now.
- Select the user account from the list and click OK > OK.
- Check Replace owners on subcontainers and objects and click OK > OK > OK to close properties while applying the changes.
- Open the Properties for Packages again.
- Go to Security > Advanced.
- If the option is there, select Disable inheritance.
- Select each Permission entry and click Remove.
- Click Enable Inheritance and then Apply. SYSTEM, Administrators and your current account should appear on the list Full Control permissions.
- Click OK > OK.


