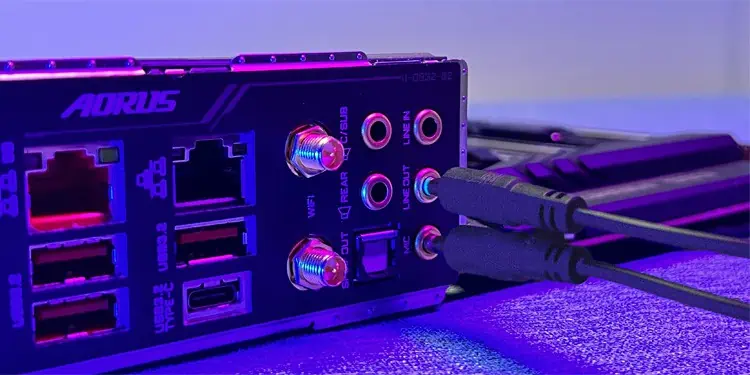
The HD audio ports on the back of your PC, are connected directly to the motherboard. This is the optimal place to connect audio devices. If you cannot hear the audio from these ports, it may indicate faulty hardware or connections. However, you cannot rule out software related issues such as audio settings, services or drivers.
Before we begin, make sure to insert the audio output and input connectors into the proper ports, green and pink respectively. Also, check if the volume settings is set high enough.
Connect Audio Device to Another Device
First, determine if the problem lies with your computer or the audio device itself. To do so, connect the audio device to other computers or devices. Also, check the enable/disable button on the device and enable it if necessary.
If the issue persists, it’s likely the device is damaged and your only solution is to get a replacement.
Check Ports and Connections
When the audio device are working fine, check if the problem lies on the audio ports and connections. This issue mostly occurs due to loose connections and physical damage to the ports.
- First, look for loose connections and ensure that they are secure. You can unplug and replug the cables into the proper ports to do so.

- Connect the audio device to the ports on the front panel.
- Connect a USB headphone and check if you can listen through it.

If you also can’t hear any sound from the USB device, it indicates that some software component is responsible for the error.
And if the device works on the front panel, your motherboard audio ports have likely been damaged. Sometimes you can see the damage on the ports easily. But in some cases, the damage is internal and difficult to observe. So first, you should try cleaning them.
Clean Audio Ports
Your I/O ports can gather dust and debris over time if not cleaned regularly. This dust and debris can prevent audio connectors from properly connecting to the ports.
Try cleaning them using canned air or a cotton swab with rubbing alcohol. Make sure to use different angles while spraying the air to clean all internal surfaces thoroughly.

Enable Onboard Audio From BIOS
Sometimes, your system disables the motherboard audio (especially analog audio chipsets) if you install a discrete graphics card with an audio interface, such as HDMI. Then, your system starts using the HDMI audio interface to send audio signals.
You can check if this is the case and change it from your BIOS or UEFI settings. The exact steps may vary between the different manufacturers, but the general steps are as follows:
- Power up or restart your PC and press the BIOS key to open the BIOS interface.
- Go to Advanced Mode if necessary.
- Navigate to Onboard Audio, HD Audio Controller, or a similar setting and set it to Enabled. You should usually find it under Chipset or Peripherals categories.
- Save and exit the BIOS.

Check Default Audio Device
When your computer has multiple audio option, it could choose one of them as default.
Some updates or system changes may also alter the default audio device and prevent audio output through desired device. To fix this, check and adjust this setting from your Sound Options.
- Open Run by pressing Win + R.
- Type
mmsys.cpland press Enter to open Sound Options. - On the Playback tab, look for your audio output device.
- If it’s not there, right-click on any device and check Show Disabled Device by clicking on the option.
- Right-click on the necessary device and enable Set as Default Device and Set as Default Communication Device.
- Double-click on Speakers or Headphone and go to the Enhancements tab.
- Make sure no options are enabled and click OK.
- If your microphone is also not working,
- Go to the Recording tab.
- Perform steps 4 and 5 for the microphone as well.
- Double-click on the device and go to the Listen tab. Check Continue running when on battery power.
- Head over to the Levels tab and set the volume to the highest and make sure the device is not muted.
- Click Apply and OK. Click OK again.


Run Audio Troubleshooter
Windows provides dedicated troubleshooters to diagnose and fix your system components. So, if you have any issues with your audio, it’s best to run the Audio troubleshooters before trying to change other settings on the system.
- Open Run.
- Type
ms-settings:troubleshootto open Troubleshoot settings. - Go to Other troubleshooters or Additional troubleshooters.
- Click on Run under Playing Audio. If your microphone is not working, you need to select Run under Recording Audio as well.
- Follow the on-screen instructions.

Check Microphone Permissions
If your speaker or headphone works but the microphone does not, your permission settings are likely restricting their usage. Microsoft includes permission settings for many components such as microphone, camera, location, etc., in order to protect your privacy. So if the permission for the microphone is not enabled, you can’t use it. To enable it,
- Open Run.
- Type
ms-settings:privacy-microphoneand press Enter to open Microphone Privacy Settings. - Toggle on the switches next to Microphone access, Let apps access your microphone and all the necessary apps.

Enable Audio Device and Services
Windows uses services such as Windows Audio to run audio functions on the system. So, you must ensure that all the required services are running properly. If they are already running, you can restart them to resolve any minor issues with their operation.
- Open Run.
- Type
services.mscand press Enter to open Windows Services. - Look for Windows Audio and double-click on it.
- Set Startup type to Automatic and click on Start. If it is already running, click Stop and then Start.
- Hit Apply and OK.
- Then, double-click on Windows Audio Endpoint Builder and do the same.


Update or Reinstall Audio Drivers
Corrupt audio drivers may also be responsible for this issue. We always recommend updating the driver as soon as possible as they roll out patches for previous bugs. Also, rather than using the Device Manager to check for updates, it’s better to use Windows Update for this task.
- Open Run.
- Type
ms-settings:windowsupdateto open Windows Update. - Click on Check for updates. If any updates are pending, install them and then select Check for updates.
- Go to Advanced options > Optional updates and look for driver updates.
- Check all the options including audio driver updates and click Download and Install.


You can also check on your motherboard’s official website for any driver updates and install them.
If you can’t update the driver, you need to reinstall it.
- Open Run.
- Type
devmgmt.mscand press Enter to open the Device Manager. - Expand Sound, video and game controllers.
- Right-click on the default audio devices (usually High Definition Audio) and select Uninstall device > Uninstall.
- Restart your PC to install them automatically.

Repair or Replace Audio Ports
If none of the solutions worked for you or the audio ports are broken, you should get the ports replaced.
Check if your motherboard or computer is still under warranty. In such case, contact its servicing center or distributor to repair the ports free of cost. Although it might not be the case, we still recommend seeking professional help. As many things can go wrong when you try replacing these components yourself.
Alternatively, you can try using USB audio devices instead or install a PCIe sound card.