When the message “Operation Did not Complete successfully because the File Contains a Virus” pops up, it prevents the file or program that you have selected from starting up.
This message might show up when Windows Defender detects a suspicious file in your system. In some instances, these files could contain false or actual malware.
Thankfully, in this article, we will cover the methods of how you can scan and remove malware or bypass this false alert from your Windows PC.
How to Fix Operation Did Not Complete Successfully Because the File Contains a Virus Message Error?
If you are certain that the programs you have downloaded are genuine, then let us move ahead with the methods on how to bypass this message error.
Perform a Full Scan
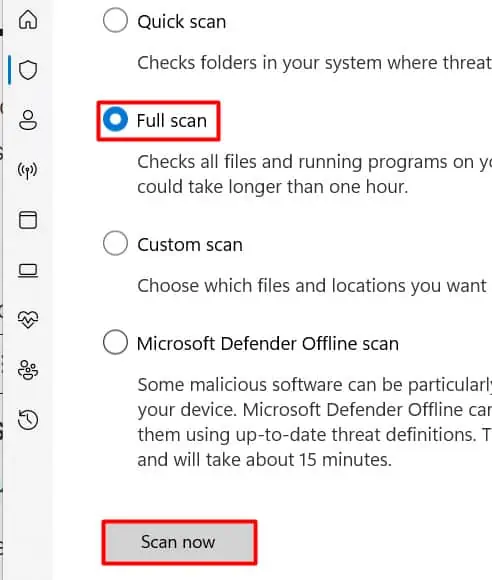
Firstly, we recommend initiating a full scan of your PC. This method allows you to identify any potential malware in your system. To do so,
- Go to the Start icon and type in Windows Security.
- From the Virus and Threat Protection, click on the Scan options.
- Enable the Full scan option and click on the Scan Now button.

Disable Windows Defender
In some instances, the built-in Windows Defender antivirus software might trigger false warnings while on protection mode. So, to fix this minor issue, we suggest you temporarily turn off the protection. To do so,
- Go to the Start icon and click on Settings.
- Select the Update and Security option.
- From the left panel, click on Windows Security.
- Select Virus and Threat Protection.
- Under the Virus and Threat Protection Settings, click on Manage Settings.

- Turn off the toggle for Real-Time Protection.
- Click on Yes to confirm.
- Scroll down and disable the toggle for Cloud-delivered Protection.
- Click on Yes to confirm again.
Now, see if you can open your file. If it does not fix the issue, you can follow the below methods.
Windows Firewall Registry
In some cases, you might not be able to disable Windows Defender through the Settings. Many users have expressed that it can only temporarily disable the program, and after a while, it will re-enable again. To fully disable the program, you will have to configure it through Registry Editor.
Here are some steps you can follow.
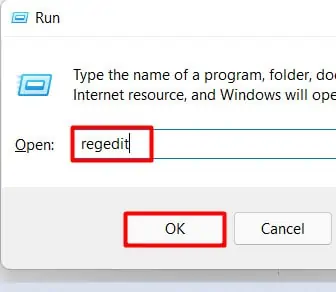
- Use the shortcut command Windows + R to open up the Run Utility.
- Type in regedit and click on the OK button.

- On the Registry Editor address bar, enter the following path:
Computer\HKEY_LOCAL_MACHINE\SOFTWARE\Policies\Microsoft\Windows Defender - Find the DisableAnitSpyware option.
- If you don’t see the option, right-click on the blank space and select New > DWORD 32-bit value.

- Name the key as ‘ DisableAntiSpyware’ and click on it.
- Now, set the Value Data to 1 and click on the OK button to make changes.
Disable Third-Party Antivirus Applications
If you have set a third-party antivirus software as your startup application, then you can try disabling it. To do so,
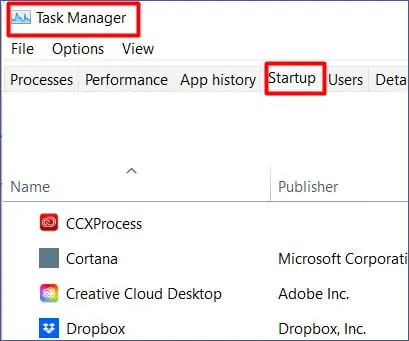
- Use the shortcut command Ctrl + Shift + Esc to open Task Manager. Navigate and switch to the Startup tab.

- Locate your Antivirus application from the list of options.
- Select the application and click on the Disable button.
- Finally, Restart your computer.
Create App or File Exclusions
If you don’t want to take the risk of completely disabling your antivirus software, you have the option to add exclusions to certain apps or files, which allows you to bypass the warning message. To do so,
- Open up the Search box and type in Windows Security.
- From the left side panel, click on Virus and Threat Protection.
- Under the Virus and threat protection settings, click on Manage Settings.
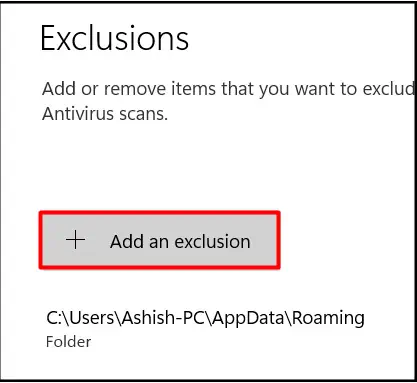
- From the Exclusions section, click on Add or Remove exclusion.
- Select on the Add an exclusion button.

- Navigate to the Program File you want to open.
Now, check if you can access the file. To be on the safe end, we recommend that you run an antivirus scan to check for any malware or virus on the file.
Repair File Through Command Prompt
In some cases, the warning message might prop up if the problem is in the File or even in the File Explorer itself. To repair it,
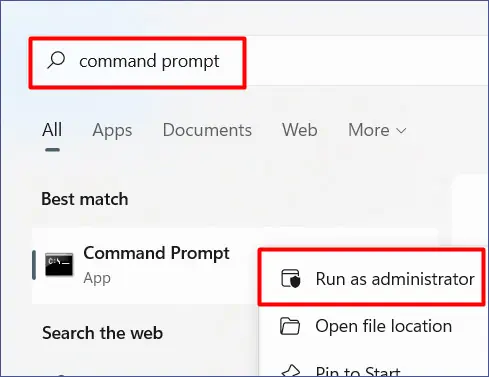
- Navigate to the Start icon and type in Command Prompt.
- Right-click on it and select the Run as Administrator option.

- If the User Account Control box appears, click on Yes to provide administrator permission.
- Now, type in the following codes on the Command Prompt box. Please make you hit Enter after each command to execute it.
- sfc /SCANFILE=c:\windows\explorer.exe
- sfc /SCANFILE=C:\Windows\SysWow64\explorer.exe
Run Disk Cleanup
Sometimes, temporary internet files like your caches, cookies, and browsing data stored in your backup might get corrupt or cause hindrances. As a result, the warning message might show up. Here are some steps you can follow to delete these files.
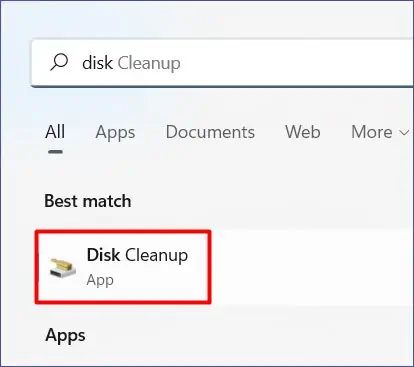
- Go to the start menu and type in Disk Cleanup.

- Choose your System Drive. In most instances, it is installed onto your C Drive.
- Hit on the OK.
- From the pop-up window, check the boxes for Temporary Internet Files and Temporary Files.
- Click on the Ok button.
Perform a Clean Reboot
A clean reboot is an effective troubleshooting method that allows you to identify the program or file causing the issue. This method is similar to booting up your Windows on Safe mode but gives you more control on which programs can run at startup to help pinpoint the problem.
- Open the Run Utility by using the shortcut Windows + R key.
- Type in msconfig and click on the OK button.
- On the System Configuration Window, switch to the Services tab.
- At the bottom, check the box for Hide all Microsoft Services.

- Then, click on the Disable All button.
- Now, switch to the Startup tab and click on the Open Task Manager link.
- Right-click on the applications and select the Disable option.
- Exit out of the Task Manager and click on Apply > OK.
- Finally, Restart your Device.
Perform a System Restore
If your device is still showing the warning error, you might be able to fix this issue by performing a System Restore. This method allows your device to revert to your PC’s previous operating settings preventing the warning message to appear.
- Go to the Start icon and type in Control Panel.
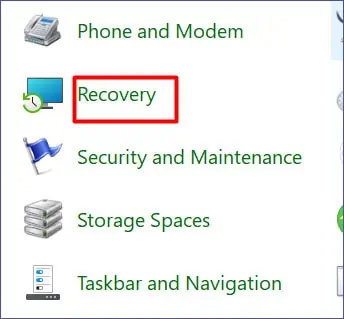
- Search and select the Recovery option.

- Click on Open System Restore and click Next.
- Check the box for Show More Restore points.
- Select the most recent restore point and click Next > Finish.
- From the pop-up, click on the Yes button to confirm.
Update Windows
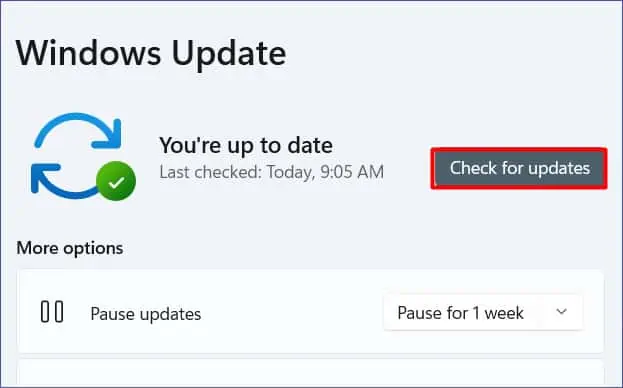
In some instances, the older version of Windows might contain bugs and errors. As a result, it can cause a false virus warning on your devices. To fix this issue, make sure you are up-to-date with the latest updates. Here are some steps you can follow.
- Go to the Start icon and click on Settings.
- Choose Update and Security.
- Select the Windows Update option.
- Click on Check for Updates.

If there are any available updates, please make sure you download and install them.
Factory Reset your PC
If all the above methods fail to resolve the error message, you can reset your PC. This method allows you to revert back to the default settings. So, if you have important files on your computer device, please make sure you have a backup before proceeding with the steps.
- Go to the Start icon and click on the Power button.
- Press and hold the Shift key and click on Restart.
- Select the Troubleshoot option.
- Select Reset this PC.
- Choose Remove Everything.
- Click on the Reset button to confirm.

