Windows shows the Welcome screen right after logging in to a user account unless you have disabled it from your Group Policy. During this time, it loads essential processes and drivers. Only after loading the Windows Explorer (explorer.exe), you can get to your usual desktop.
Sometimes, Windows takes a long time to load Windows Explorer, causing a slow Welcome screen issue. It can happen if there are many processes it needs to load prior to explorer.exe or if there are some issues with the processes. There are many ways such scenarios can occur on a Windows system.
Additionally, other reasons may also be responsible for this issue. So, we have created this article to provide you with all the possible causes along with their corresponding solutions.
Causes for Slow Welcome Screen on Windows
Here are the potential causes for slow welcome screen on Windows:
- Errors in the Startup programs or services.
- Malware infection.
- Corrupt system files.
- Missing or corrupt drivers or device firmware.
- Improper logon settings.
- Low-spec hardware.
How to Fix Slow Welcome Screen on Windows?
The first thing you should do is to check if your system drive has enough storage space and clear unnecessary files if required. If you still encounter the error, apply the possible solutions below to resolve your issue.
Disconnect Peripherals
It is possible that the drivers or firmware of your peripheral devices have some bugs leading to problems while loading them into your system. You can test for such issues by disconnecting the devices while powering up your system.
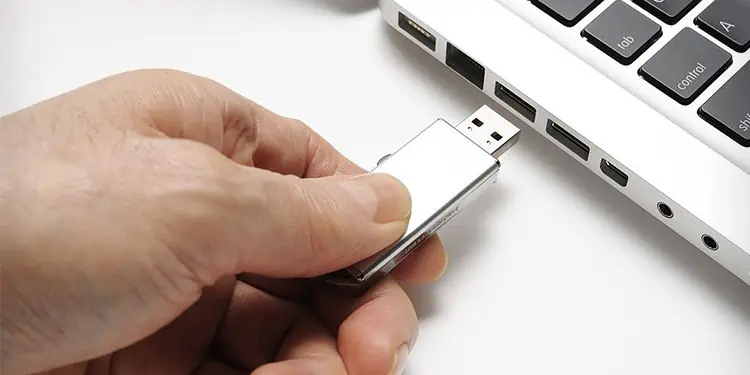
If it’s an essential device like a keyboard which you need to enter the password, we recommend connecting another device to your PC and checking if the issue resolves. If the Welcome screen doesn’t stay that long after doing so, there’s definitely a problem with your peripherals. You can again test by connecting all except one device at a time.
After determining the responsible hardware, you need to update its driver or firmware. If such updated software is not available yet, you can only wait for it and use alternative devices in the meantime.
Clear Temporary Files
Your temporary files may also affect the welcome screen time. When your system starts, it also loads application processes that create or use some temporary files. So, if you have a large number and size of temporary files on your system, such processes take additional time to use or delete and create new files.
So, it’s better to routinely clear your temporary files. You can use the disk cleanup tool. However, it doesn’t clear all such files, so here are the steps to manually delete them:
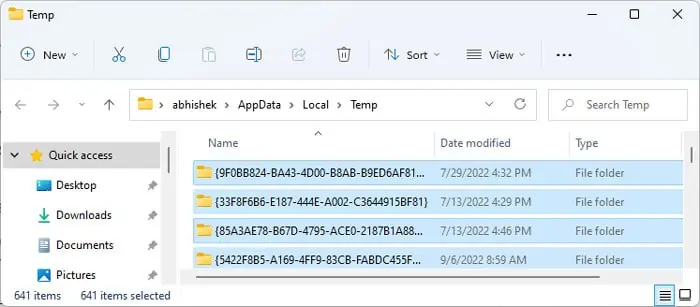
- Open Run by pressing Win + R.
- Type
%temp%and press Enter to open the AppData Temp folder. - Select all folders/files and delete them. You can skip the files you can’t delete.

- Do the same for files in the Windows Temp and Prefetch folders. You can access them by using the following commands on Run:
- Windows Temp folder –
temp - Prefetch folder –
prefetch
- Windows Temp folder –
Disable Startup Apps
As we mentioned earlier, your system launches many processes while the Welcome screen shows up. If the processes or programs are corrupted or have some errors, it can also prolong the Welcome screen time.
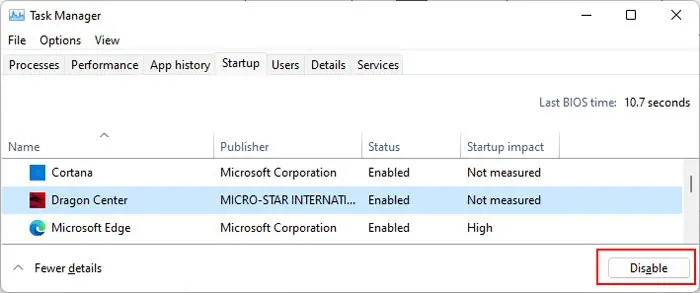
To avoid issues with the applications that load on startup, you can disable them through the Task Manager. Here’s what you need to do:
- Press Ctrl + Shift + Esc to open the Task Manager.
- Go to the Startup tab.
- Select each Enabled option (see the Status column) and click Disable.

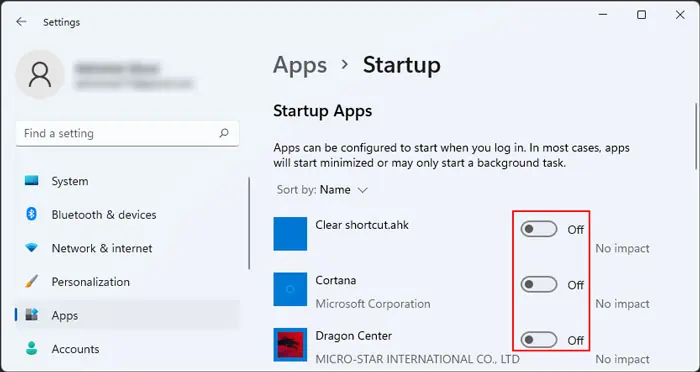
- Then, open Run.
- Type
ms-settings:startupappsto open the Startup App Settings. - Make sure to disable all apps here as well.

Now, restart your system and check if the issue resolves. If it does, you can check which program is responsible by enabling them one at a time and restarting your system. Then, you can update or uninstall the app or simply keep it disabled from startup.
Disable Startup Services
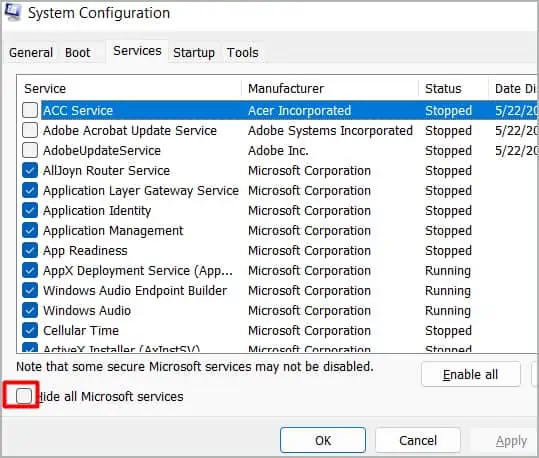
Like the various processes, Windows also loads many services during the startup. You will also face the above problem if one of the services conflicts with your system or another service/process or itself contains some bugs. Similar to the apps, you can also disable third-party services and check if any one or more is causing the issue. To do so,
- Open Run.
- Type
msconfigand press Enter to open System Configuration. - Go to the Services tab and check Hide all Microsoft services.

- You can look through the remaining services and disable unnecessary ones or disable all of them and troubleshoot for faulty ones in the same way as the above method.
Repair Corrupt System Files
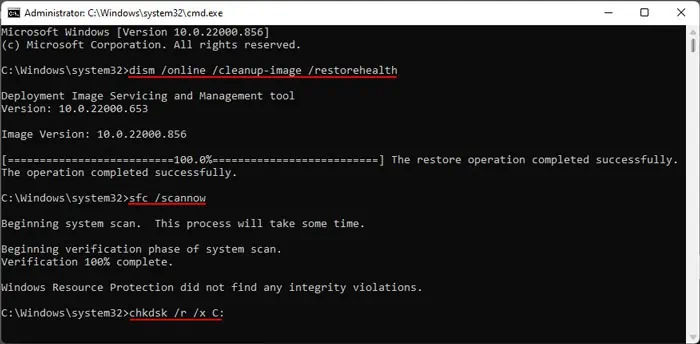
While you can disable any potentially corrupt application files, you can’t do so for system files as they are necessary to run your operating system. For that, you need to run some system repair utilities like Deployment Image Servicing and Management (DISM) and System File Checker (SFC). It’s also better to run the disk checking utility (CHKDSK) if your drive has corrupt sectors.
Here’s what you need to do:
- Open Run.
- Type
cmdand press Ctrl + Shift + Enter to open the Elevated Command Prompt. - Enter the following commands:
dism /online /cleanup-image /restorehealthsfc /scannowchkdsk /r /x C:
Restart your computer to finish the chkdsk process. Then, reboot again to see if you still experience the issue.
Scan for Malware
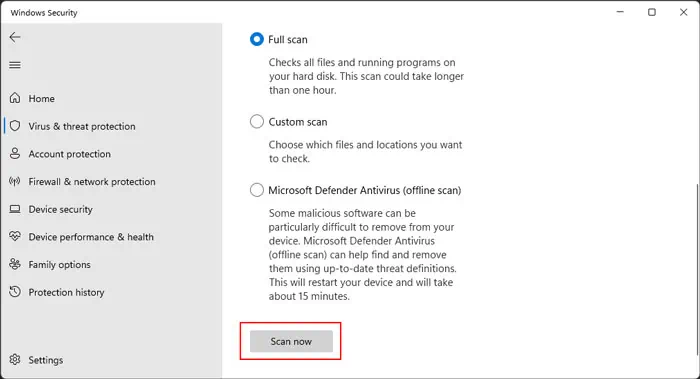
It is also possible that some malware script is responsible for the issue. Malware can load on startup and cause various natures of issues on your system. So, it’s always better to scan for such threats on a regular basis. Here’s how you can scan for malware using the built-in Windows Defender or Virus & threat protection feature:
- Open Run.
- Type
ms-settings:windowsdefenderto open Windows Security. - Go to Virus & threat protection and then Scan options.
- Check Full scan and click on Scan now.

Update All Drivers
Windows also loads the drivers for all devices present on your system during startup. So, if there are any issues with your drivers, the startup time can take a long time. If you are experiencing the error due to an external device’s driver, you can avoid it by disconnecting the device during the boot. However, such methods aren’t feasible for an internal driver.
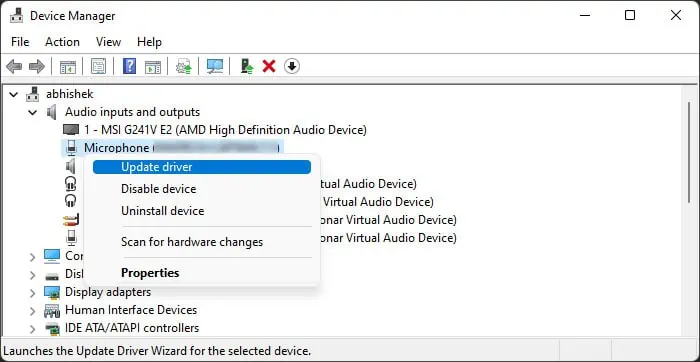
So, we recommend having all your drivers fully updated to prevent such issues. It helps whether the responsible device is external or internal. Here’s how you can update your drivers:
- Open Run.
- Type
devmgmt.mscand press Enter to open the Device Manager. - Expand all categories and right-click on each device.
- Select Update driver and then Search automatically for drivers.

You can also download the driver packages from the official websites of your motherboard or devices as well as the Microsoft update catalog.
Check Logon Group Policy Settings
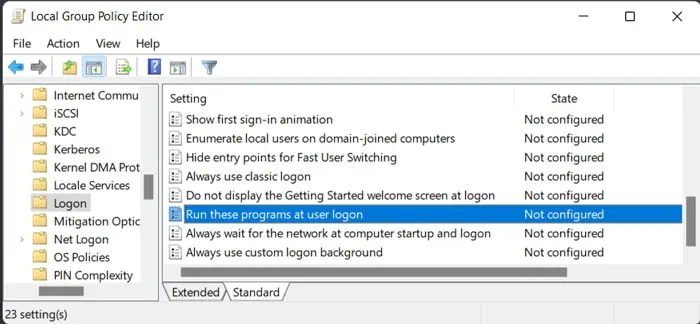
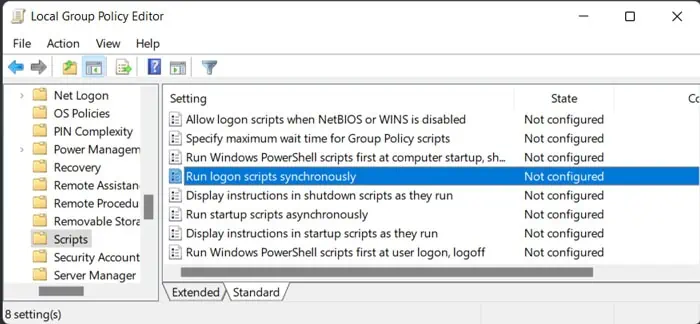
Windows offers a way to modify logon settings through the Local Group Policy Editor. If you change the configuration to start certain programs during the logon or run logon script synchronously, it can slow down the welcome screen time.
You need to revert all such settings from the Local Group Policy Editor to resolve the issue. To do so,
- Open Run.
- Type
gpedit.mscand press Enter to open the Local Group Policy Editor. - Go to Computer Configuration > Administrative Templates > System > Logon.
- Make sure to set all options to Not Configured, especially Run these programs at user logon.

- You can double-click on an option, check Not Configured, and click OK to do so.
- Then, go to Computer Configuration > Administrative Templates > System > Scripts and check for the same, especially Run logon script synchronously.

- Now, go to User Configuration > Administrative Templates > System > Logon as well as User Configuration > Administrative Templates > System > Scripts and perform the same tasks.
Restart your PC and check if the error persists. Also, if your computer is part of a domain, you need to have the system admin make these changes in the relevant Group Policy Object.
Check Event Logs
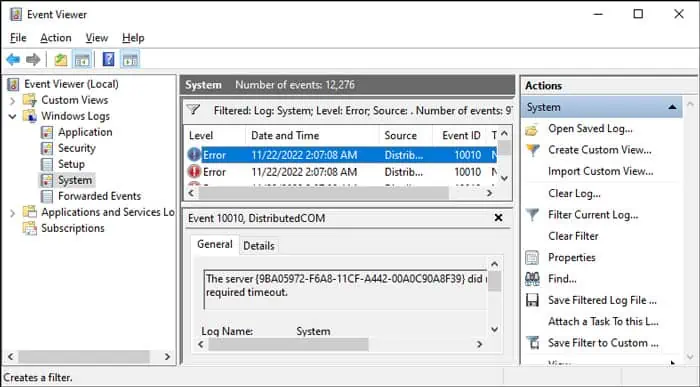
If the previous solutions do not help, you can check the event logs and find out all events that occurred during the time the Welcome screen was loading. Doing so will let you figure out which process was responsible for the issue. Here are the necessary steps:
- Open Run.
- Type
eventvwrto open the Event Viewer. - Expand Windows Logs and click on System.
- Scroll down to the time when the issue occurred and click on all Errors (check Level column).

- Read the description under General and Details to determine the culprit.
Then, you can perform the troubleshooting steps for that particular process or application.
Update or Rollback System
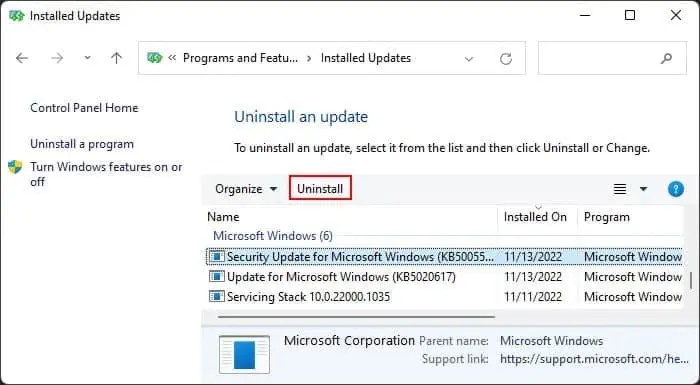
Some Windows updates such as KB4535996 included bugs that were responsible for the slow Welcome screen issues. If you started encountering this error after the latest system update, you can only report it to Microsoft and wait for further updates. In the meantime, you can resolve the issue by uninstalling the update. To do so,
- Open Run.
- Type
appwiz.cplto open Programs and Features. - Click on View installed updates.

- Look for the recent update by checking the Installed On column.
- Select it and click Uninstall > Yes.

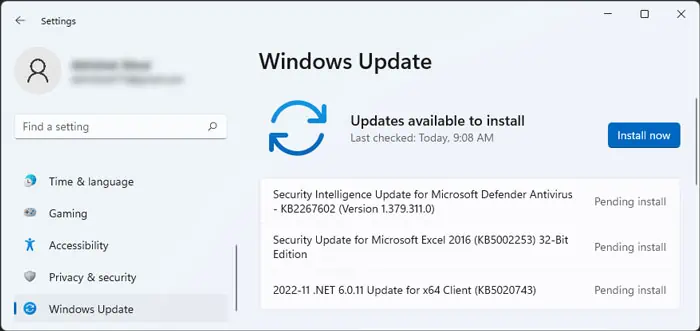
On the other hand, if the latest update was not responsible for the error, you need to update your system to the latest version to prevent such an issue. Here’s how you can do so:
- Open Run.
- Type
ms-settings:windowsupdateto open Update Settings. - Click on Install now if newer updates are available and Check for Updates if they are not.

Try Additional Methods to Decrease Boot Time
The Welcome screen time on your PC will also be high if you have an older or a low-spec computer. In such cases, you might be able to decrease it a little bit by trying additional methods to increase performance as well as decrease boot time.
There are many things you can do for this purpose. So, we recommend you refer to our article on How to Optimize Windows to learn the possible methods.
Restore or Reset System
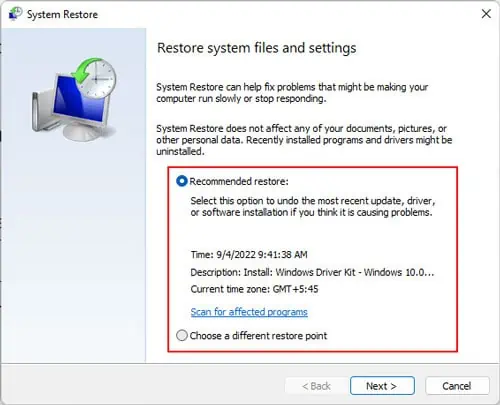
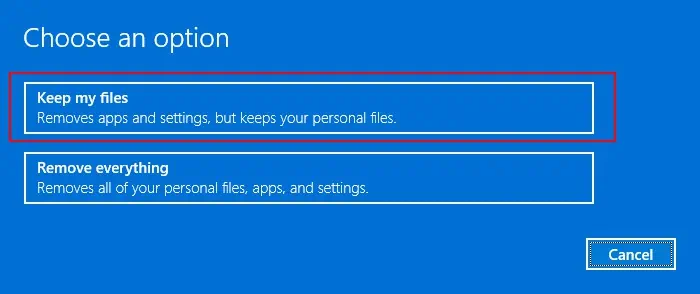
If you couldn’t solve the issue using the previous methods, you can try restoring or resetting your system. System Restore reverts your system to the state of a previously created restore point. And System Reset restores the system to factory setting while still giving you the option to keep your user files.
If you have a suitable restore point, you can perform System Restore using the steps below:
- Open Run.
- Type
rstruiand press Enter to initiate this process. - Select an appropriate restore point and follow the on-screen instructions.

Otherwise, you need to reset your system. To do so,
- Open Run.
- Type
systemreset -factoryresetto initiate the process. - Choose Keep my files and follow the on-screen instructions.

Upgrade Hardware
If your setup itself is old or doesn’t have the necessary specs, you won’t be able to decrease the logon time through all these methods. In such a scenario, you need to upgrade your PC.
It’s better to use an SSD as your system drive to increase computer performance and speed. Make sure you also have sufficient RAM capacity. You can either replace your original RAM with a higher memory RAM or add additional RAM sticks to your PC.
