
SSDs or Solid State Drives are now considered by many manufacturers and customers as the superior alternative when compared to hard disks. They do not have any moving parts and are less prone to damage or failure.
However, SSD’s being an electronic device, are susceptible to faults and come with a list of issues of their own. If you’ve encountered an error where the SSD is not showing in the Disk Management, the most common reasons may include damaged parts, incompatibility issues and device driver problems.
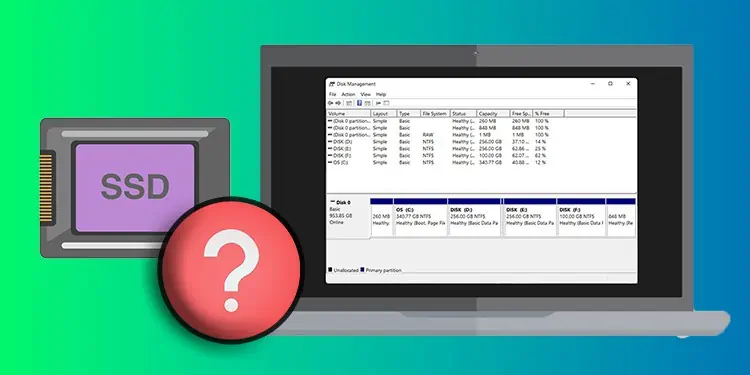
How to Fix SSD not Showing in Disk Management?
Here, we’ll be looking at the various solutions by which you can fix the SSD not being detected or showing in the Windows Disk Management.
Before we move onto the software fixes, you might want to check if any hardware issues may be causing the SSD to not show up in your device.
- Check if the SSD is mounted correctly on the expansion slot
- Check for damaged connectors, ports and cables
- Check if the port you are connecting to supports the interface of the SSD
- Check if the motherboard supports the type of SSD you are installing
- Check if the SSD functions properly by connecting it to another device
If you have confirmed that the SSD is a DOA (dead-on-arrival) product, you may need to exchange or RMA (Return Merchandise Authorisation) for a working one.
After making sure that the issue is not related to the hardware, we’ll be looking at the software side. Here, we’ll try solutions that aim to detect the SSD and repair/reinstall their software components.
Rescan Disks
Sometimes when making changes in the hardware, like adding a new SSD to your device, the Disk Management may fail to detect and show the device. In such cases, firstly you will need to rescan for the disks from the Disk Management. To do this
- Press the Windows key + R to open Run
- Type
diskmgmt.mscto open Disk Management
- In the Disk Management, click on Action from the toolbar and click on Rescan Disks to run a scan
- After the scan completes, your disk should now be shown in the Disk Management


Restart Windows Services
The Storage Service and the Plug and Play service allows Windows to automatically find, integrate and expand hardware on your laptop or desktop PC. If you have stopped or disabled these services, a newly installed or an external SSD might not be detected by Disk Management. To enable the following services
- Open Run and type
services.mscto open Windows Services - Now, scroll down and select Plug and Play from the list
- Right click on the service and Select Start if the service has been disabled
- If the service is operating, click on Restart to restart the service
- Again, search for Storage Service in Windows Services
- Right click and select Start or Restart to enable the service again
- Open Disk Management and check if the SSD is being shown


Change SATA Mode
SATA controllers allow the disk drive that contains Windows to communicate with the system. Another fix for the SSD not showing up in Disk Management is to change and cycle the SATA controllers from IDE to AHCI or vice versa. To change the SATA mode in your device:
- Boot to the BIOS of your device
- In the BIOS, search for Advanced or Storage Configuration or similar
- Search for option labelled SATA Controller Mode or Configure SATA
- Now, change the SATA Controller mode to IDE or AHCI mode
- Save and exit to apply the changes
- If your device boots normally, open the Disk Management and check if the SSD is visible in the list

If changing the SATA controller mode causes a BSOD in your device, boot back to the BIOS and revert the changes and select the other option until your device boots to Windows. Check Disk Management every time you change the controller mode to see if the problem is fixed.
Another method to fix the crashing issue after changing the SATA Controller mode is to change the AHCI driver value from the registry. You can also perform this step before attempting to change the SATA Controllers in the BIOS. To do this
- Open Run and type
regeditto open Registry Editor - Now, navigate to the following path:
HKEY_LOCAL_MACHINE\System\CurrentControlSet\Services\Msahci - If the above path is unavailable, go to:
Computer\HKEY_LOCAL_MACHINE\SYSTEM\CurrentControlSet\Services\storahci - Now, on the right side, double click on the Start and type 0 in the Value data
- Again, go to:
Computer\HKEY_LOCAL_MACHINE\SYSTEM\CurrentControlSet\Services\iaStorV - And change the Value data of Start to 0
- Click on OK to save the changes and exit the Registry editor


Now, again boot into the BIOS and change the SATA controllers to AHCI. Your device should no longer show the Blue screen error when you try to boot into Windows.
Run Disk Partition Utility
The next process is to run the disk partition utility from the command prompt and see if it detects the SSD installed in your device. If the disk is showing in the command prompt, you will need to format it from there to make it visible in the Disk Management.
To run the disk partition from command prompt
- Open Run and type
cmd. Press the Ctrl + Shift + Enter keys together to open command prompt with elevated access - Now, on the console, to enter the disk partition and list the available volumes in your disk, type
diskpartand press the Enter keylist diskand press the Enter key - Make sure that the disk is shown here. If not, power off the device and check for connections with the motherboard.
- if the device is shown, enter the commands to proceed and select the disk to create a partition
select diskand press the Enter key, eg: select disk 0 - Now, type
create partition primaryand press the Enter key - After creating the partition, to format the disk and to give a name to it, type
format fs=ntfs label=drive nameand press the Enter key, eg: format fs=ntfs label=Games - Wait until the process completes and see if the device is now showing in Disk Management


Delete Storage Pools
Note: This option is applicable only if your device has two or more storage drives installed and pooled in Windows. Deleting or making changes to the storage pool will purge the data in the selected SSD permanently. Make a backup of the drive before proceeding.
Storage pools are a feature in Windows that allows users to combine two or more disks into a pool to minimize data loss by hardware failure. Sometimes Windows automatically combines the SSD into a pool before initializing and allocating the disk, making your SSD undetectable by the Disk Management. To fix this issue
- Open Run and type
controlto open the Control Panel - Click on System and Security and scroll down to find Storage Spaces
- Inside the Storage menu, click on Storage Spaces
- Click on the Change Settings button. Allow if asked for administrator rights
- Now, click on Delete the storage pool you want to delete
- Click on Delete Storage Space again in the next page to confirm


Reinstall Device Drivers
If the problem persists, then the problem may be because the SSD drivers have become corrupted. To fix this, reinstalling the device drivers may help solve the issue. Restart your device and check if the SSD is now showing in Disk Management
- Open Run and type
devmgmt.mscto open the Device manager - Right click on the SSD that is not showing in Disk Management and click Uninstall Device
- You will be asked for confirmation. Click on Uninstall again
- Restart your PC after the removal process completes
- Windows will automatically install the necessary drivers for the SSD during the restart process
- Check if the SSD is now showing in the Disk management


Uninstall the Standard SATA AHCI Controller
If uninstalling the disk drivers did not resolve the issue, then the problem may be because of the SATA AHCI controller of your device. SATA AHCI controllers help users control their AHCI storage device and establish communication with the OS.
- Open the Device Manager and search for IDE ATA/ATAPI controllers. Double click to expand it
- Inside it, search for Standard SATA AHCI Controller and right click on it.
- Check if the driver is disabled. Click on Enable to enable the device
- Click on Uninstall to uninstall the driver
- Repeat the process if your device has multiple Standard SATA AHCI Controllers
- Restart your device after the process completes
- Windows will automatically reinstall the SATA AHCI Controllers in your device after rebooting
