
Whenever you get the “This site can’t be reached” error on Chrome, it’s usually because of a weak internet connection or the URL that can’t reach the server. But, there can also be other causes depending on the type of error.
Usually, this message always comes with a specific error code on the screen. These codes denote the closest cause and suggested fixes to resolve it.
However, most of the errors that fall under this generic one are due to issues with the domain name system (DNS) server. When you want to access any website, the DNS server translates the site domain name to your IP address. So, if there is a misconfiguration or the DNS Client is acting abnormal, this error can frequently pop up.
Probable Causes of This Issue
Here’re some of the common reasons for this error message:
- DNS cache files build up
- Faulty network connection
- Outdated browser versions
- Misconfigured settings
- Faulty extensions
- Outdated drivers
How to Fix the “This site can’t be reached” Error?
Upon noticing this error, the exact cause and solution are usually always apparent. This is due to a small text of the error code below the message. Every code denotes a different message and you can apply the targeted fix.
Some of the error codes are as follows:
- Err_HTTP2_Inadequate_Transport_Security: Compatibility issues between HTTP2 on Windows server and Chrome
- DNS_Probe_Finished_NXDOMAIN: DNS server not working properly
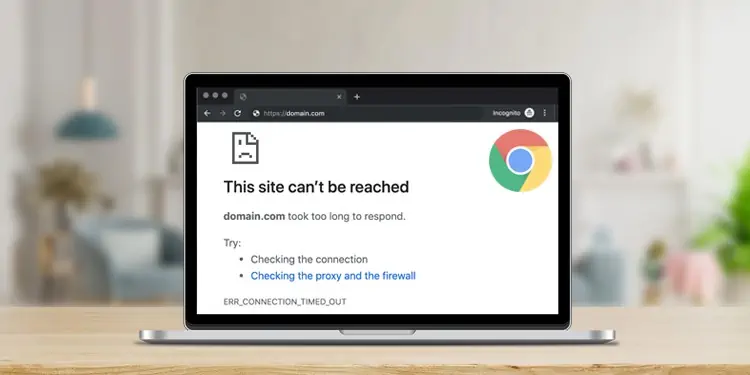
- ERR_Connection_Timed_Out: The website took too long to respond
- Err_Connection_Reset: Issues with the TCP session and the website
- Err_Name_Not_Resolved: Issues with the TCP settings
- Err_Address_Unreachable: Issues with DNS settings
But regardless of the error code, here are some solutions that work for most errors. Firstly, make sure your internet connection is working properly. If not, you can easily troubleshoot it on your PC or restart your router. Then, you can move on to these fixes:
Restart DNS Client
One of the first steps to fix the “This site can’t be reached” error is restarting the DNS Client. This service collects information from the cache files of recent searches. So, it’s helpful to give it a restart.
Here’s how you can do it:
- Open the Run dialog box by pressing the Windows + R keys.
- Type
services.mscin the text field. - You can now view a list of all the services.
- Locate the DNS client and then right-click on it.
- Click on Restart.


Configure DNS Via TCP
Another fix is to manually make the adapter access the DNS server if your network connection is not reliable. Here’s how you can do it:
If your network adapter cannot access the DNS server, you can provide the adapter with the address to the server manually. Follow the steps mentioned below to set the address to a DNS server.
- Open the Run dialog box by pressing the Win + R keys.
- In the text field, type
ncpa.cpl. Doing so will open Network Connections. - Double-click on your network like Wi-Fi or Ethernet.
- Then, go to Properties.
- Check the box and double-click on Internet Protocol Version 4 (TCP/IPv4).
- Select the option that says Use the following DNS server addresses:
- Preferred DNS server: 8.8.8.8
- Alternate DNS server: 8.8.4.4


Erase Browser DNS Cache
Piled-up DNS cache files can also cause this common Chrome error. So, it’s best to remove Chrome’s internal DNS cache. Here’s what you’ll need to do:
- Launch Chrome and type
Chrome://net-internals#dnsin the URL address bar. - Then, click on Clear host cache.
- Now, remove the DNS cache.

Finally, you can restart Chrome.
Clear Browser Cache
Cache data include your browsing information and helps websites load faster. However, it’s important to clear them from time to time as they can get corrupted. Such files can invite common errors as the browser doesn’t support such corrupted files. So, here’s how you can erase cache files from your Chrome browser:
- Launch Chrome and click on the three-dotted menu in the upper-right corner.
- Click on Settings.
- Next, click on Privacy and Security.
- Then, go to Clear browsing data. In this window, you can select items, like browsing history, cookies, and others, according to your preference.
- You may also select your desired timeline range.
- Lastly, click on Clear Data.


Reset Chrome Settings
You may also face frequent errors on Chrome if there have been unwanted changes to your Chrome settings. If you’re not sure what the changes were, you can reset all the settings entirely. Doing so will reset the settings back to the default ones. Here’s how to do it:
- Go to Settings by clicking on the three dots in the upper-right corner.
- Then, go to Reset and Clean Up.
- Now, click on Restore settings to their original defaults.
- Click on the Reset Settings option to confirm your action.


Troubleshoot Network Connection
Chrome can also display such error codes if the network connection is unstable. You can easily troubleshoot your network in this manner:
- Open the Run dialog box and type
ncpa.cplin the text area. - You’ll now notice the Network Connections window.
- Right-click on your networks, like Wi-Fi or Ethernet.
- Then, click on Diagnose.
- If you notice that the issue is “DHCP is not enabled for wireless network connection”, you’ll need to repair it as an administrator.
- Select Try these repairs as an administrator and then click on Apply.
- Now, restart your computer.

Update Network Adapter Driver
Along with troubleshooting your network connection, you can also check if the network adapter driver is in good condition. For instance, if it’s outdated and not working properly, it can be why Chrome is displaying various error codes.
Here’s how you can update your network driver:
- Press the Windows key + X.
- Go to Device Manager.
- Click on Network Adapters and then choose your Network Adapter name.
- Right-click on the adapter and click on Update Driver from the drop-down menu.
- You can choose to either Search for new drivers automatically or manually. Click on one and proceed.
- Restart your computer.


Uninstall Unnecessary Extensions
Some extensions do more harm than good as they can have bugs, corrupted files, or even viruses. This can lead to Chrome crashing and showing such error codes. So, we recommend getting rid of any suspicious extensions.
- Click on the Extensions logo from the menu bar.
- Go to Manage Extensions.
- Find any extension that you think could be at fault. Then, click on Remove.

Additionally, it also helps when you check the ratings, reviews, and downloads of a specific extension. You can also find more details about the credibility of an extension by checking its owner/developer.
Update Chrome to its Latest Version
An outdated version of any app, like Chrome, can become more sensitive to errors and bugs. So, one of the final steps is to update it entirely. This is because new updates come with significant bug fixes and improvements relating to security protocols as well. Doing this can help you get rid of the error.
Although Chrome often updates itself automatically, you can also check it manually.
- Go to the three-dotted menu and then click on Help.
- Then, go to About Google Chrome.
- Click on any available software updates.
