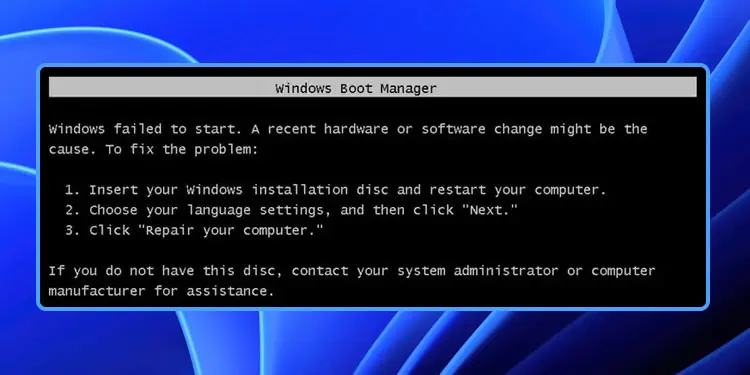
If you have enabled Windows Boot Manager or use an older Operating System where the UEFI bootloader is not available, you will encounter the error message: “Windows failed to start. A recent hardware or software change might be the cause.” It appears when the Boot Manager can’t access the boot device.
It will also display a possible cause, such as, “A required device isn’t connected or can’t be accessed.” This issue mainly happens because of the corruption of the boot files necessary to start the OS. But it is also possible that the necessary boot device is not connected properly.
Remove External Devices
Depending on your Boot priority order, your system may be trying to boot from another media, such as a USB or a network device. So, before trying other possible solutions, try removing all unnecessary external devices.
This way, only the normal OS storage device or installation media is available as the current boot device.
Check BIOS Settings
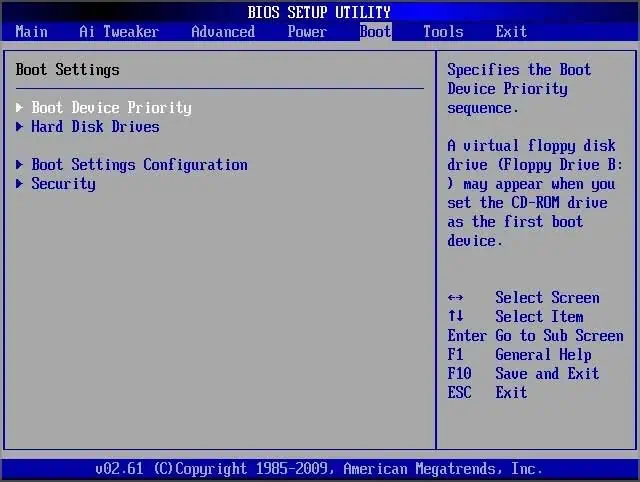
Before you begin repairing the potentially corrupt boot files, you need to ensure that your computer is detecting the OS drive and interfacing with it properly. Also, you need to check the boot order list to make sure that the OS drive is the first priority.
- Start your computer and press the BIOS key immediately after you see the logo to get to BIOS.
- Go to Boot or a similar tab and select something like Boot Priority.

- Make sure your OS drive (generally C Drive) is at the top of the list. If the drive does not show up, it is not connected properly, and you need to reinsert it in this scenario.
- If you are trying to boot from a Windows installation media, you have to move the media to the top instead.
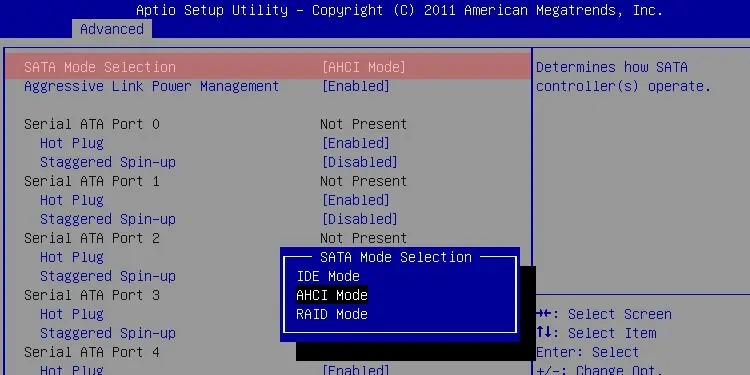
- Now, look for the SATA mode option. You can usually find it under Advanced or Storage Controller settings.
- If you are using older operating systems, IDE is the preferred choice. And for newer systems, set it to AHCI. We recommend checking if the computer boots when enabling each option to ensure what mode you need.

- If you still encounter the error regardless of the mode, set the SATA mode to AHCI for now if you are using Windows Vista and later OS. After trying other methods, you can switch the SATA mode and check which works best for you.
Perform Startup Repair Using Windows Installation Media
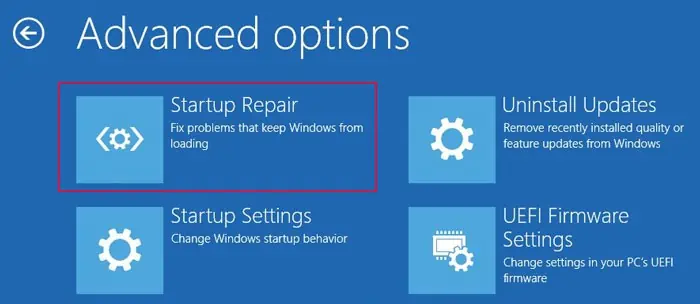
Windows includes the Startup Repair feature that automatically checks for errors with the boot configuration data or other boot files and attempts to repair them. You will get an option to perform the startup repair whenever you encounter the error.
However, if it can’t solve it, the source file for the repair may have some issues as well. In such cases, you need to use an installation media to use it as the source.
- Create a Windows installation media with the same version as your system on another computer.
- Boot using this installation media. If you have an MBR disk, you need to manually change the Boot order from the BIOS to prioritize the installation media.
For a GPT disk or UEFI system, you should get the choice to boot from the media. Or you may need to press a certain key to access the boot menu. Search official sources for such a key for your motherboard. - Set the language preferences and agree with any license terms.
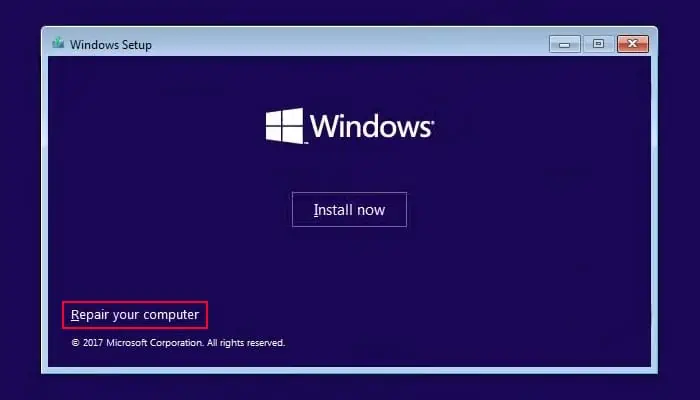
- Then, on the installation screen, click on Repair your computer.

- On newer Windows OS, go to Troubleshoot > Advanced options > Startup Repair. For older ones, you can directly select Startup Repair.

- Follow the on-screen instructions to finish the repair and then boot again.
- This time, boot using your original OS drive and then check if you still encounter the error.
Manually Repair Boot Files
Sometimes, the automatic startup repair utility can’t repair the boot files. In such cases, you need to manually repair them using the Command Prompt.
- Boot using the proper Windows installation media (see above solution).
- Specify your language preferences and click Next.
- On the Install screen, click Repair your computer.
- Select Command Prompt or Troubleshoot > Advanced options > Command Prompt.

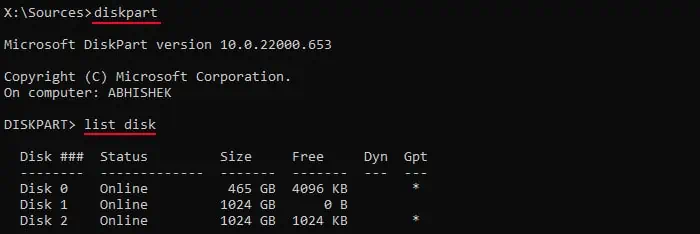
- Type the two commands below to check if you have a GPT partition system in your OS disk and press Enter after each:
diskpartlist disk(here, the Gpt column should show an asterisk (*) sign if you have a GPT partition on the disk)
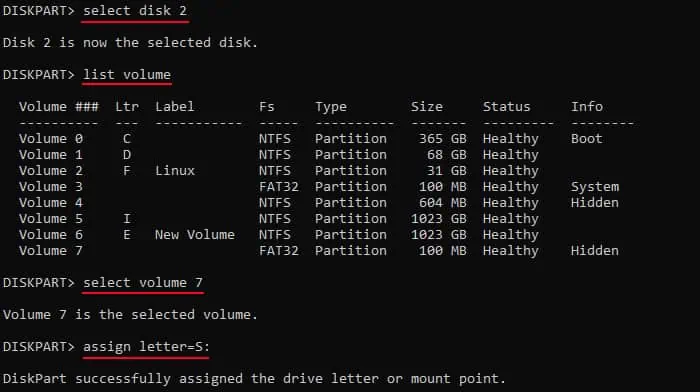
- Enter the commands below depending on the partition scheme of your system disk:
For GPT,
select disk #(replace # with the disk number of your OS disk)list volume(check the number of the volume with the FAT32 partition that is Hidden or System)select volume #assign letter = S:(or any unused drive letter)
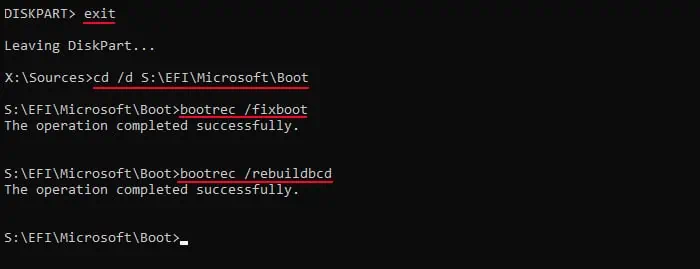
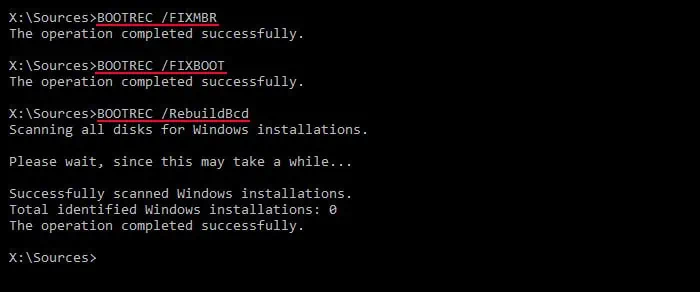
exitcd /d S:\EFI\Microsoft\Boot\(replace S: with the drive letter you used earlier)bootrec /fixbootbootrec /rebuildbcd
For MBR,
exit(to exit out of diskpart)bootrec /fixmbrbootrec /fixbootbootrec /rebuildbcd
Re-create Boot Files
If the boot configuration and file repairing commands don’t work, you must recreate these files from scratch using your operating system files.
- Boot using the proper Windows installation media and go to the Command Prompt (see above method).
- Type the two commands below to check if you have a GPT partition system in your OS disk and press Enter after each:
diskpartlist disk(here, the Gpt column should show an asterisk (*) sign if you have a GPT partition on the disk)
- Enter the commands below depending on the partition scheme of your system disk:
For GPT,
select disk #(replace # with the relevant disk number)list volume(check the number of the volume with the FAT32 partition that is hidden)select volume #assign letter = S:(or any unused drive letter)exitcd /d S:\EFI\Microsoft\Boot\(replace S: with the drive letter you used earlier)ren BCD BCD.old(to create a backup to account for unforeseen situations)bcdboot C:\Windows /l en-us /s S: /f all(here, replace C: with the drive letter of the operating system and S: with the letter you assigned earlier.)
bootrec /rebuildbcd(not necessary if you have a Windows version before Windows 10 Version 1709)
For MBR,
select disk #(replace # with the required disk number)list volume(check the number of the volume with where Info says System)select volume #assign letter = S:(or any unused drive letter)exitbootrec /fixmbrbcdboot C:\Windows /s S:(here, replace C: with the drive letter of the operating system and S: with the letter you assigned earlier.)
Clean Install Windows
If you cannot boot into your operating system after repairing the boot files, your final option is to clean install Windows. A clean install removes the partition containing the boot files as well as the OS partition. This way, you can reinstall all such files (but without corruption) to resolve your issue.
Clean installing Windows will delete all the data on the disk (of your non-system drives as well). So, first, try backing the data on the disk by booting with a Linux live disk or Windows-to-go disk.
- Create a Windows installation media of the version you want (using the same as the Windows in your disk is not necessary).
- Boot using this media and specify your language preferences.
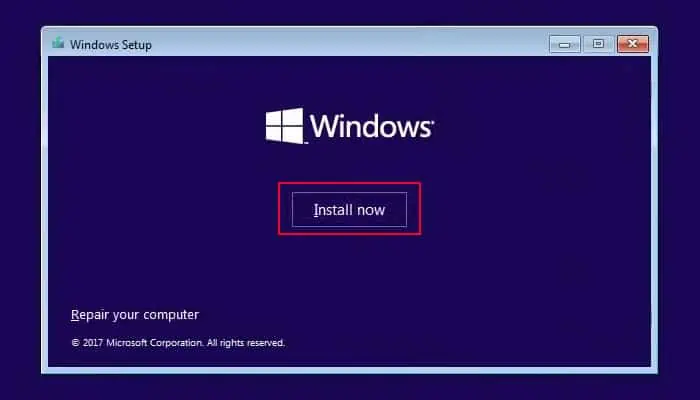
- Click on Install now on the Install screen.

- Enter your product key if you have it. If not, select I don’t have a product key as well as the Windows build you want (Home, Pro, etc.)
- Click on Next.
- Agree with the license agreements and select Next.
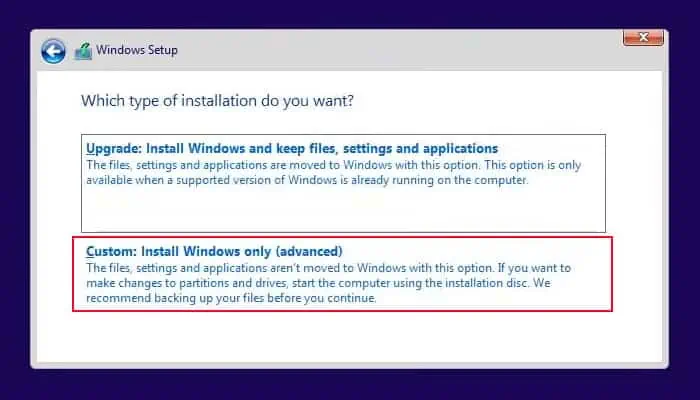
- Choose Custom: Install Windows only.

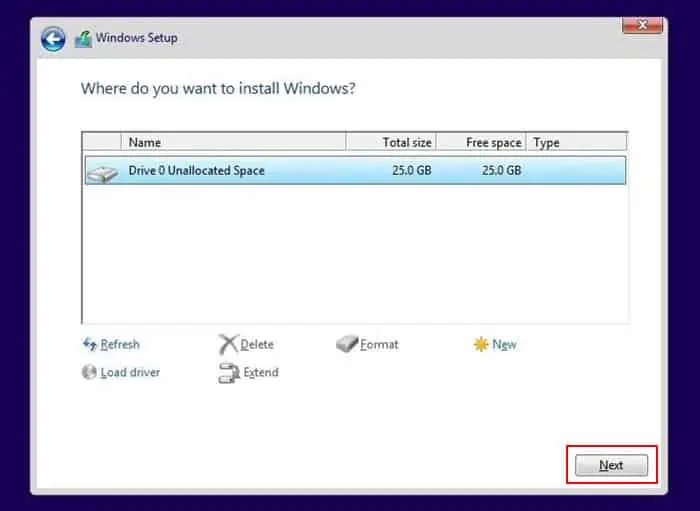
- Select all the partitions for your OS disk (Drive 0) and click Delete for each. Confirm your choice as well.
- After you only have the unallocated space for the disk, select it and click Next.

- Ignore the warning as the setup process will automatically create the necessary partitions.
- Click on the partition that says Primary and then Next.
- Follow the on-screen instructions to clean install Windows.
- After restarting, check if you can boot from the OS drive. Then, you will need to go through the initial account and privacy setup.
Use USB 2.0 Port to Install Older Windows
All computers that already have Windows 10+ may not support installing old OS like Windows 7 from USB 3.0 ports or flash drives. If you try doing so, you’ll get the above error while trying to boot from the installation media.
This is mainly because of the lack of USB 3.0 drivers on the installation media. But on some computers, you might still be able to install the OS. Regardless, it’s better to either use USB 2.0 or include USB 3.0 drivers in the Windows image on the installation media. You may also need to enable CSM or Legacy support on your BIOS settings.
Additionally, if you only have USB 3.0 ports, you have to enable USB debug mode on BIOS to use them as USB 2.0 ports.
