Using the network to access files on another computer or transfer files between them is a highly convenient method. You don’t need to use external media or cloud storage to share files. Additionally, if you are transferring the files, you can do so through the Ethernet, which has a high transfer speed compared to traditional USB devices.
However, the computer you want to access must share the files on the network before you can access them. You also need to know the user account credentials on the other computer so that the process doesn’t compromise security. In this article, we have listed many ways in which you can share and access such files for both Windows and Mac systems.
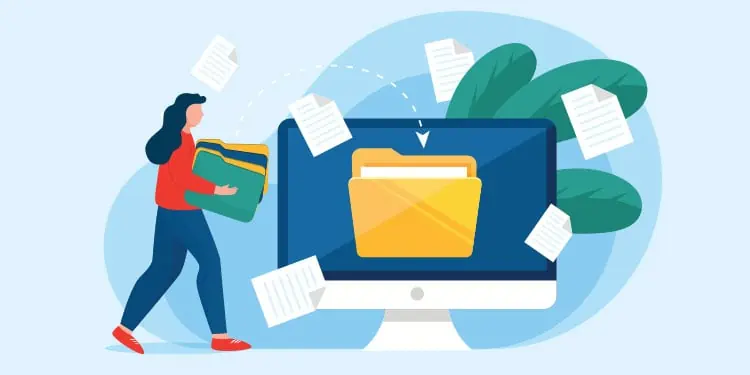
How to Access Files from Another Computer on the Same Network on Windows?
Windows includes multiple default ways with which you can access files from another computer on the same network. We have explained some convenient methods you can use down below.
Using Folder Sharing
The method most users are familiar with is to use folder sharing to transfer files between Windows computers on the same network. You need to enable some settings on both computers and create shared folders on one computer to be able to access them from another.
Here is the detailed step-by-step process to execute this method.
Turn On Network Discovery
The first thing you should do is make sure network discovery is enabled for both your computer and the computer you are accessing. You need it to discover and access the other computer. Here’s what you need to do:
- Open Run by pressing Win + R.
- Enter
control /name Microsoft.NetworkAndSharingCenterto open Network and Sharing Center on the Control Panel. - Go to Change advanced sharing settings.

- Expand Private and enable the following options:
- Turn on network discovery
- Turn on automatic setup of network connected devices
- Turn on file and printer sharing
- If you are using a public network to share or access files (which we don’t recommend), you need to check the same options under Guest or Public.
- Then, expand All Networks and check Turn on password protected sharing. This option is necessary if you wish to share the files with another computer that doesn’t have your user account and password stored on its system.
- Click Save changes.


In some systems, you may also need to enable Media sharing options to make your device accessible on the network.
Check Services
To share files over the network, you must ensure some services are running properly. Follow the steps below to check the necessary services and start then if they aren’t running:
- Open Run and enter
services.mscto open Windows Services. - Look for the following services:
- Function Discovery Provider Host
- Function Discovery Resource Publication
- SSDP Discovery
- UPnP Device Host
- Double-click on each service to access their Properties.
- Set Startup type to Automatic and click Start if they are not running. Do so for all the services.


Sharing the File/Folder
Next, the other computer needs to share the files you want to get. If you have access to the computer, use the steps below to share the file/folder. If not, ask the PC user to do so.
- Navigate to the folder you want to share and right-click on it.
- Select Give access to > Specific people or Show more options > Give access to > Specific people.
- Click on the arrow icon on the drop-down box and select the user you wish to share with. To share the folder with all users in the network, select Everyone.
- Click Add.
- Then, you can set the Permission Level to Read or Read/Write per your wish. Just setting it to Read won’t allow other users to make changes to the folder contents.
- Then, select Share.


You can also share a file using the same steps. However, it is only possible in either of the two scenarios below:
- The file is in your user profile folder.
- The file’s parent folder is already a shared folder.
Another way you can share a folder is as follows:
- Right-click on the folder and select Properties.
- Go to the Sharing tab and click Share under Network Path.
- Then, you can follow steps 3-5 from above to share the folder.

Accessing the File/Folder
On your end, you need to perform the following steps to access the shared files/folders:
- Press Win + E to open the File Explorer.
- Click on Network from the Navigation Panel on the left.
- Look for the computer name under Computer and double-click on it.
- If you don’t know which computer you need to access,
- On the other PC, enter
msinfo32on Run. - Look for the Value of the System Name.
- On the other PC, enter
- You can also use the IP address on the computer instead of the Computer Name to access it. You need to enter
\\<IP address>, for example,\\192.168.10.9, on Run to do so. - To find out the IP address of the computer sharing the file/folder,
- Open Command Prompt on that PC and enter
ipconfig. - Look for IPv4 address under Ethernet adapter Ethernet or Wireless LAN Adapter Wi-Fi.
- Open Command Prompt on that PC and enter
- Enter the username and password of the account used to share the files/folders.
- Then, navigate the folder to find the files you want to access.
- You can also copy the files to your drives using regular copy/paste operations.


You can also access the folders/files shared by a Mac computer on the network in the same manner.
Through File Sharing Using Windows PowerShell
You can also use command line tools such as Windows PowerShell to perform the above method quickly if you find it troublesome to navigate multiple GUI. Here’s how you can use PowerShell for this purpose:
On the Computer which you want to access, follow these steps:
- Open Run.
- Type
powershelland press Ctrl + Shift + Enter to open the Elevated Windows PowerShell. - Enter the command
net share SharedFolder=“D:\FolderToShare” /grant:everyone,fullwhile replacing the following:SharedFolderwith the name you want for the network location you are creating.“D:\FolderToShare”with the path of the folder you want to share.everyone with the user or groupfullwith change or read if you want more restricted permissions.
- You can use this command for all the folders you wish to share.
- Then, enter the command below to enable network discovery:
netsh advfirewall firewall set rule group=”Network Discovery” new enable=Yes


Now you need to find out either the computer name or the IP address to access this computer.
- To get the computer name, enter
hostnameon PowerShell. - To get the IP address,
- Enter
Get-NetIPAddress -AddressFamily IPv4 - Look for the network you are connected to. The InterfaceAlias should usually show Ethernet or Wi-Fi.
- Alternatively, you can directly enter
Get-NetIPAddress -AddressFamily IPv4 -InterfaceAlias Ethernet,Wi-Fi - Note down the Value of IPAddress.
- Enter


On your Computer, follow these steps:
- Open the Elevated Windows PowerShell.
- Enter the command
net view \\<hostname>ornet view \\<ip address>while replacing the <hostname> and the <ip address> using the values you found out earlier.
For example,net view \\user01ornet view \\192.168.10.9 - Now, you need to connect a drive letter to the network location of the files. You need to enter the command
net use Z: \\<hostname>\<path of folder>to use the drive letter Z: for the location.
For example,net use Z: \\user01\isoassigns a virtual letter Z: to the folder “iso” directly shared on the other computer. - Enter
Z:(or the drive letter with the colon) to change the Current Working Directory (CWD) to this drive. - You can use a combination of
dirandcd <folder>to list the contents of the CWD and navigate the network drive. - You can then use commands like
Copy-Item “.\file.iso” “D:\FolderToReceive”orMove-Item “.\file.iso” “D:\FolderToReceive”to transfer the file to your computer. Make sure to replace “D:\FolderToReceive” with the destination folder you want.


Using Remote Desktop Connection
It is also possible to use Remote Desktop Connection (RDC) to access files of a remote computer on the same network. By default, you can’t transfer the files to your PC, but you can enable such an option by changing some settings.
Here are the necessary steps to change such settings and access files on another PC using RDC:
- Open Run and enter
mstscto run Remote Desktop Connection. - Click on Show Options.
- Go to the Local Resources tab and then More.
- Check Drives and click OK.
- Go back to the General tab and enter the Computer and the User name. If you don’t know the computer name of the other PC,
- On that computer, enter
msinfo32on Run. - Check the Value of the System Name.
- On that computer, enter
- Click Connect > Connect and enter the password.
- Select OK and confirm with Yes if prompted.
- Here, open File Explorer and navigate to the files you want.
- If you want to transfer them to your PC, copy or move those files and then go to This PC in File Explorer.
- Under Redirected drives and folders, you will find the drives of your PC which you selected earlier.
- Open the drive you want and Paste the contents.


You can also transfer the file from your system to the remote computer in the same way.
How to Access Files from Another Computer on the Same Network on Mac?
Mac also allows accessing files from another computer on the same network using the Server Message Block (SMB) or Apple Filing Protocol (AFP) sharing protocol through File Sharing options. Here’s what you need to do on both the source computer and your destination computer:
Step 1: Sharing Folder from Source Computer
- Click on the Apple icon and go to System Preferences > Sharing.
- Check File Sharing and click on the + icon under Shared Folders.
- Navigate to the folder you wish to share and click Add.
- You can select the user you need to provide access to under Users. You can also pick Everyone to enable every user to access the shared folder.
- On the menu to the right, specify the permission level (Read & Write or Read Only) you wish for.
- You should also check the Computer’s name and the IP address above the settings.


Step 2: Accessing Files from your Computer
- Open Finder from the Dock.
- On the menu, select Go and then Connect to Server.
- Enter the
computer nameorsmb://<computer name>orsmb://<ip address>on the drop-down box while replacing the values you noted earlier. You might also need to useafpinstead ofsmb(check the Sharing Preferences on the source computer). - Click on Connect and then enter the other computer’s username and password.
- Navigate the folders to access the necessary files. You can transfer files to your device and vice versa using the built-in functions.


You can also use the same steps to access shared files from a Windows computer. However, you need to enter the email of the Microsoft account of the Windows user while entering the credentials for the network device.