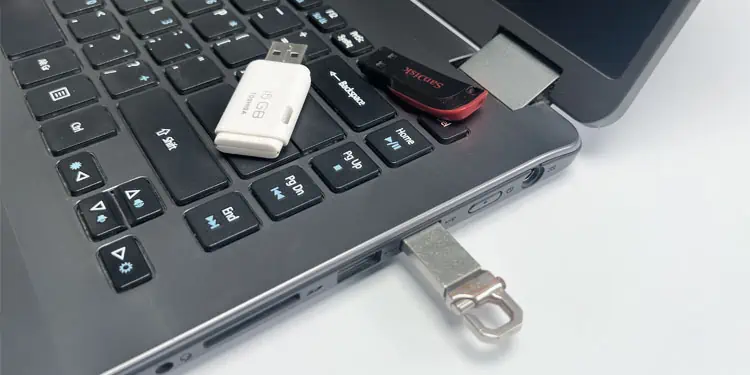
Any storage device, including a USB flash drive, has two components—storage areas where you can store your data and hidden partition data that defines the file system and storage locations in the drive.
Formatting a drive recreates the partition data while erasing all the contents inside the drive making it ready for future use.
Whenever you encounter any issues with a USB drive, such as malware infection or data corruption, formatting the drive is the best solution as it removes all the unnecessary data.
Types of Formatting
There are two types of formatting—a full format and a quick format. While a full format erases all data on the USB drive by changing its bits to 0, which takes a lot of time, a quick format only marks the space as empty without actually removing its contents, so it’s quicker.
It is possible to recover data after a quick format by using some recovery software. But, it’s always recommended to backup any necessary data somewhere else before performing either type of formatting.
A full format will decrease the lifespan on the drive. So, if you don’t really need to completely erase all the data on a USB flash drive, it’s best to always use a quick format.
But in some cases, like a malware infection, a full format is the best option.
How to Format a USB Drive on Windows?
Windows offers many ways to format a USB drive. You can use graphical interface like the Disk Management utility as well as command-line interfaces like CMD, PowerShell, etc., for this purpose.
Using Context Menu
The easiest way to format a USB drive on Windows is by using the right-click Context menu. It is a Graphical User Interface (GUI) method that’s easy to perform and doesn’t have complex steps.
But you won’t be able to reformat a USB drive that already contains multiple partitions into one partition with this method.
- Press Windows key + E to open the File Explorer.
- Go to This PC.
- Here, right-click on the USB drive and select Format.

- Set the File system and Volume label (name of the drive) per your preference.
- Check Quick format if you want to perform a quick format. Uncheck it otherwise.
- Click on Start and then OK.


Through Command Prompt
You can also use the format command on Command Prompt to directly format a USB drive. Like with the above method, it can only format USB drive volumes and not the whole drive.
- Open Run by pressing Windows + R.
- Type
cmdand press Ctrl + Shift + Enter. - Enter one of the commands below depending on your need while replacing the file system (fat32, exfat, ntfs, refs, udf, etc.) and the drive letter accordingly. Here, I will have considered the USB drive volume as E: and NTFS as the target filesystem.
format E: /fs:ntfs /qfor a quick format.format E: /fs:ntfsfor a complete format.
- Press Enter again. Type a Volume label you want (or leave it blank) and press Enter to begin the format.
- You can also use many other parameters. Enter the command
format /?On the Prompt to learn about them.

Through Diskpart Command-line Interface
The Diskpart Command-line interface offers several ways of managing your storage disks and partitions. Similar to the above, you can format a USB volume with this method.
However, it is also useful if you have partitioned the drive into multiple volumes and wish to format all of them at the same time into a single volume. You need to erase all the partitions, create a new partition and then format it.
To format a USB drive containing multiple partitions or volumes,
- Open Run.
- Type
diskpartand press Enter to open this CLI. - Type the commands below and press Enter key after each command:
list disk(check the disk number of the USB drive by comparing the size)select disk #(replace # with the above number)cleancreate partition primaryselect partition 1format fs=ntfs quick(you can replace ntfs withfat32orexfatdepending on your need. If so, use fat32 on drives smaller than 64 GB and exfat for 64GB and larger drives)exit
- The above commands will only perform a quick format. You can use
clean allinstead of clean or justformat fs=ntfswithout quick in those commands for a full format.

To format a USB drive containing a single volume,
- Open Run.
- Type
diskpartand press Enter to open this CLI. - Type the commands abelow and press Enter key after each command:
list disk(check the disk number of the USB drive by comparing the size)select disk #(replace # with the above number)list partition(check partition number in a similar way)select partition #(replace # accordingly)format fs=ntfs quick(you can use any other file systems likefat32orexfat. You can also omit quick to perform a complete format)exit

Using PowerShell
PowerShell works as an alternative for both Command Prompt and Diskpart. You can use it to directly format a drive volume or clean the USB drive by removing all partitions, create a new partition and then format it.
- Open Run.
- Type
powershelland press Ctrl + Shift + Enter to open the Elevated Windows PowerShell (v5). If you have PowerShell core (v6 and v7), you need to use thepwshcommand instead. - To format a USB drive partition or volume, use one of the following cmdlets while replacing the drive letter and the file system.
Format-Volume -DriveLetter E -FileSystem NTFSfor a quick formatFormat-Volume -DriveLetter E -FileSystem NTFS -Full -Forcefor a full format
- To clean all partitions of the USB drive and then format the drive,
- Enter
Get-Diskand note down the disk number of your USB drive. - Type
Get-Disk # | Clear-Disk –RemoveDatawhile replacing # with the disk number and press Enter. Press Enter again. - Enter the cmdlet
New-Partition -DiskNumber # -UseMaximumSizewhile replacing # accordingly. - Then, type
Get-Partition -DiskNumber # | Format-Volume -FileSystem NTFS(replace the disk number and the file system accordingly) and press Enter to perform a quick format. - If you want to perform a full format, enter
Get-Partition -DiskNumber # | Format-Volume -FileSystem NTFS -Full -Force
- Enter


With Disk Management
Another GUI method to format a USB drive on Windows is through the Disk Management MMC snap-in. It is basically like the graphical alternative of Diskpart CLI, so it allows most of the functions of Diskpart.
To format a USB volume using this program,
- Open Run.
- Type
diskmgmt.mscand press Enter to open Disk Management. - Right-click on the volume or partition of the USB drive and select Format.
- Choose the Volume label and File system as you wish.
- Check or Uncheck Perform a quick format depending on your need and click OK.
- Confirm with OK.


If the USB drive has more than one volumes and you want to format all of them to create a new volume,
- Right-click on each partition and select Delete Volume > Yes.
- Right-click on the Unallocated space and select New Simple Volume > Next > Next > Next.
- Set the formatting options per your need and click Next > Finish.


How to Format a USB Drive on Mac?
You need to use the Disk Utility on Mac to format a USB drive. Here, Apple uses the name Erase instead of Format for this process.
After inserting a USB drive into your Mac,
- Open Applications and go to Utilities > Disk Utility.
- Look for your USB drive you wish to format. If the USB drive has multiple partitions, you need to delete them first.
- Select a partition or the drive.
- Click on Partition from the top menu.
- Click on the minus (-) sign under the pie chart until only a single partition is remaining. Then, select Apply > Partition.
- After the process finishes, select Done.
- Click on the USB drive and choose Erase.
- Specify the Name and Format per your need. Newer Macs all use APFS, older Macs (before High Sierra) and drives for Time Machine need Mac OS X Extended. FAT32 (for 32GB and below drives) and ExFAT (for 64 GB and above drives) are compatible with both Mac and Windows.
- Click Erase and then Done after the process completes.

