Although keycaps on a laptop are placed securely, a small force applied on the right part of the keys may detach it from the key socket. It is also visually unappealing when we lose a key on a keyboard. Even though you can use the key without a keycap, it will slow your typing pace.
So, if you’re facing this problem, you can follow our article on how to place the keycaps back on your laptop.
Components Holding Keys on a Laptop
Most laptops, including Apple products, use similar components to secure the keys on a keyboard. However, Chromebooks and laptops with mechanical keyboards may use a different strategy.
Although there are multiple ways manufacturers place the keycap on the key socket, the basic principle is simple. Here are two basic ways keycaps are placed in the key socket:
Key Socket With Two-piece Retainer
Keycaps on most laptop keyboards are held together by two pieces of small plastic components.
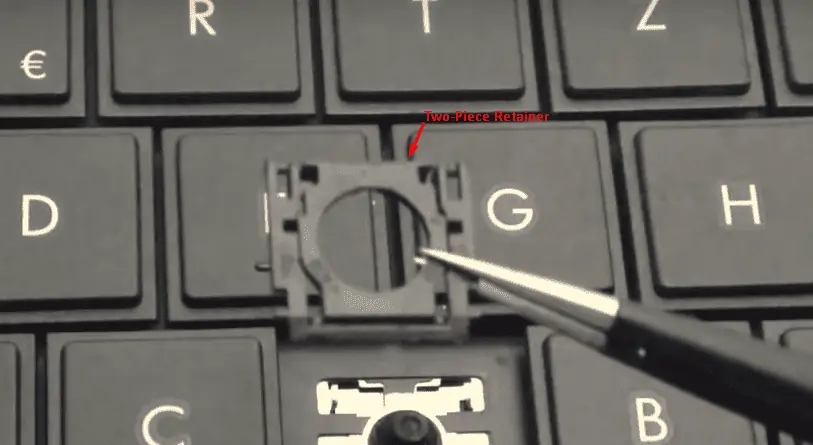
These two-component work as a retainer. The retainer helps the keycap to push back when we press it. The retainer sits on the key socket and the keycap is then buckled onto the retainer.
In the center, there is a rubber that acts as an input source and is connected to the circuit, so when we press the button, the computer recognizes which button we press.
Wide keys like Backspace or Shift key will have multiple retainer plastic components. In these keys, the small rubber is located between the two retainers. It may have two small retainers or a single wide retainer. These key sockets will also have a thin metal component placed horizontally, stabilizing the wide keys.
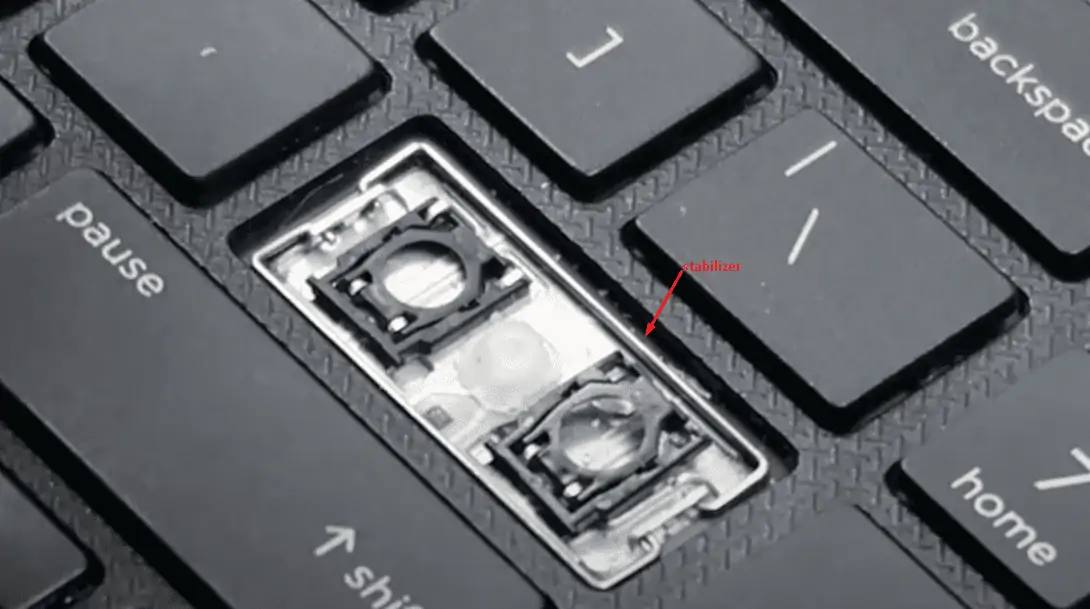
The stabilizer is placed so that when we press the corner of a wide key, the other end gets pressed too. The stabilizer metal bar may be located under the keycap or on the key socket.
The spacebar key will have two to three metal stabilizers and two retainers. The metal stabilizers will be located under the keycap and in the key socket, and retainers will be located at two ends of the spacebar socket.
Key Socket With One-piece Retainer
Most laptops use the two plastics to push back the keys that we press. However, for some laptops, we only have a single piece of plastic, which works as a retainer.
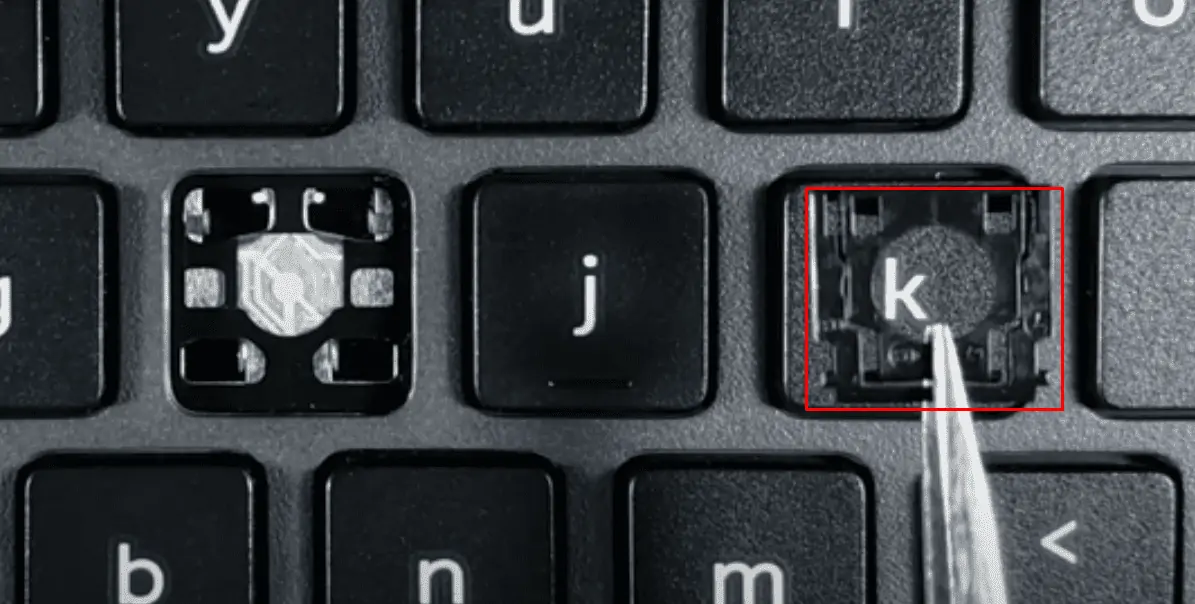
QuikFix Laptop Keyboard Keys
The key orientation for all wide keys, including the spacebar, works with the same principle as explained above. However, here the retainer will only have one piece of plastic.
How to Put a Key Back on a Laptop?
Now that we know the components inside a keycap, now let us see how we can re-insert them.
Before we start, let us warn you that these components that hold the keycap in the key sockets are plastic parts and are very fragile. Although we slightly have to press on this component to set them in place, it may break if we insert them incorrectly.
So, it’s best to be gentle and make sure you read the steps very carefully before applying pressure when inserting the keycap.
Key Socket With Two-piece Retainer
If the keys on your laptop keyboard have two plastic pieces, we first need to attach them before inserting them in the key socket. The smaller plastic piece goes inside the larger one. The smaller one will have two thin areas of plastic, like a hook, on two opposite sides. This hook goes on the two inner opposite sides of the larger plastic component.
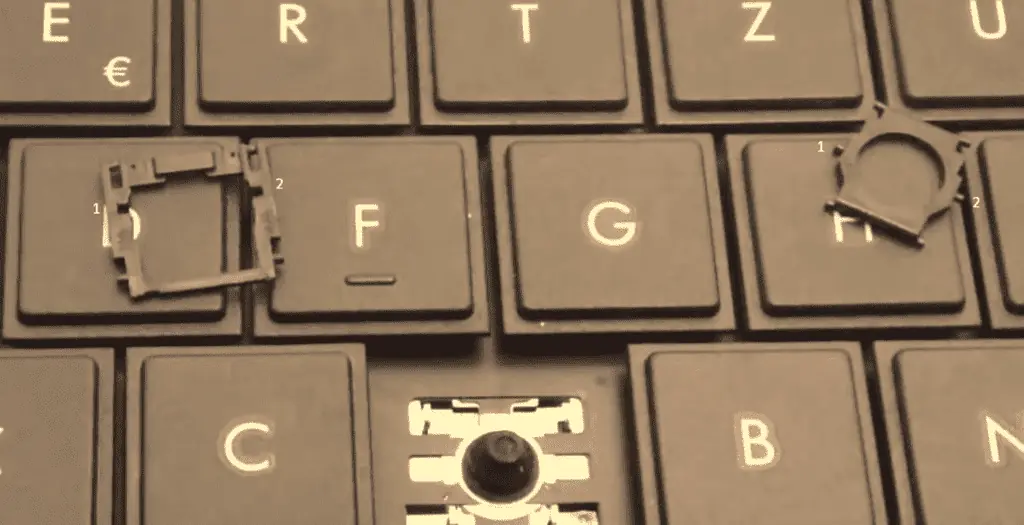
These parts can only attach to each other in a specific way. So, if you are having trouble inserting this component, try inverting the pieces and inserting them again.
Once connected, this will act as the retainer that pushes the keys back up when pressed. When connected properly, we should be able to rotate the inner plastic to some extent.
Now that you have completed this step, other steps are rather simple. We just need to analyze the component in the socket and the keycap and insert them.
Check for four small opening/slots on the retainer. We use these small openings to align the retainer with the key socket. The key socket will also have four small hooks to attach to the retainer.
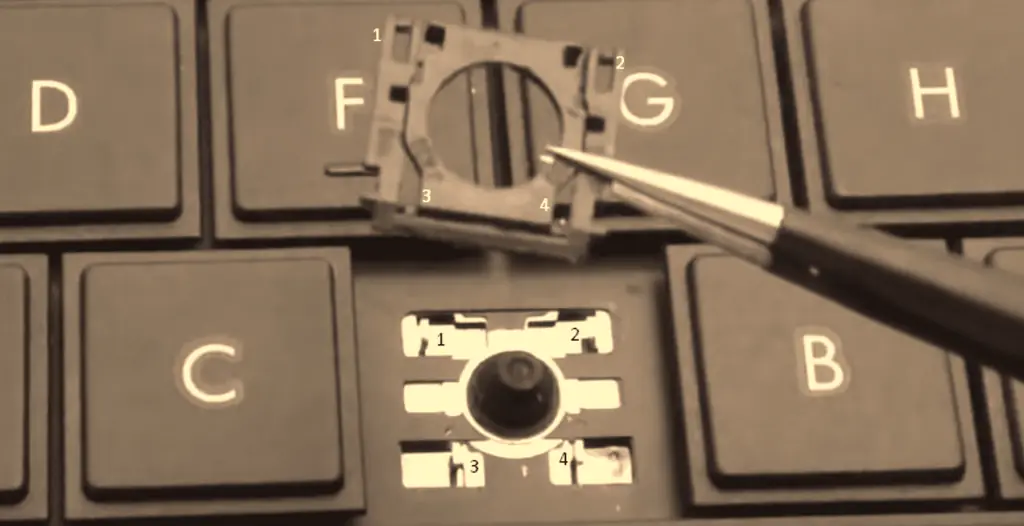
When inserting the retainer, slide the bottom part to the hook first. Once it is secured, align the opening from the retainer to the hook on the socket and press until you hear it click.
Again, we can only insert the retainer one way. So, if you have trouble inserting the retainer, invert it, then try again.
Here is what it should look like once we insert retainer onto the key socket.
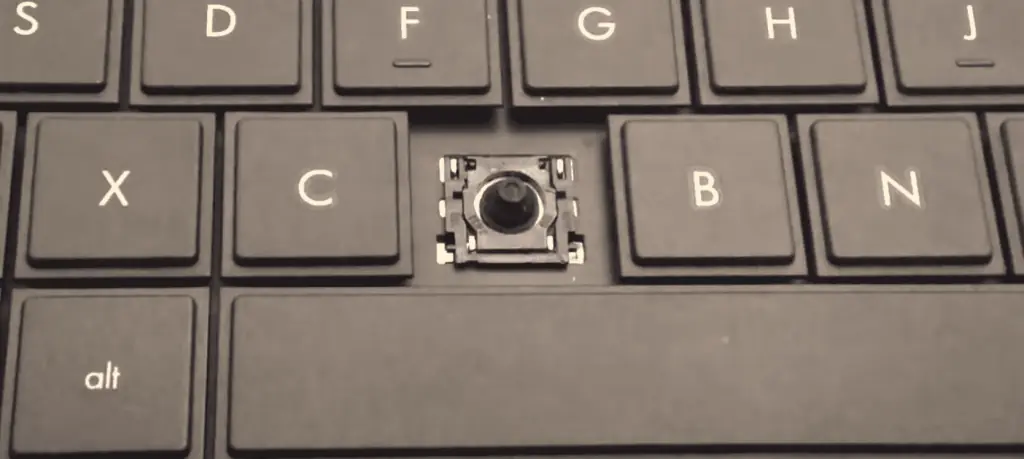
For Wide Keys
For the wide keycap, we should insert the stabilizer in the key socket before inserting the keycap. First, insert one stabilizer pin, then push another side onto the slot until you hear it click. When inserted, the key socket should look like the figure below.
Once all components are secured in the socket, it is now time to insert the keycap. To insert the keycap on the key slot, gently place the keycap above the key socket. Apply firm pressure to the keycap. If everything is correct, you will hear four to five clicks.
Key Socket With One-piece Retainer
If your keys use a retainer with a piece of plastic, we can easily align the slots from the retainer to the hooks on the key socket, as explained above. Here, we also have to slide the bottom part of the retainer slot to the hook first. Then, apply slight pressure on the top side of it, the retainer, until you hear it click.
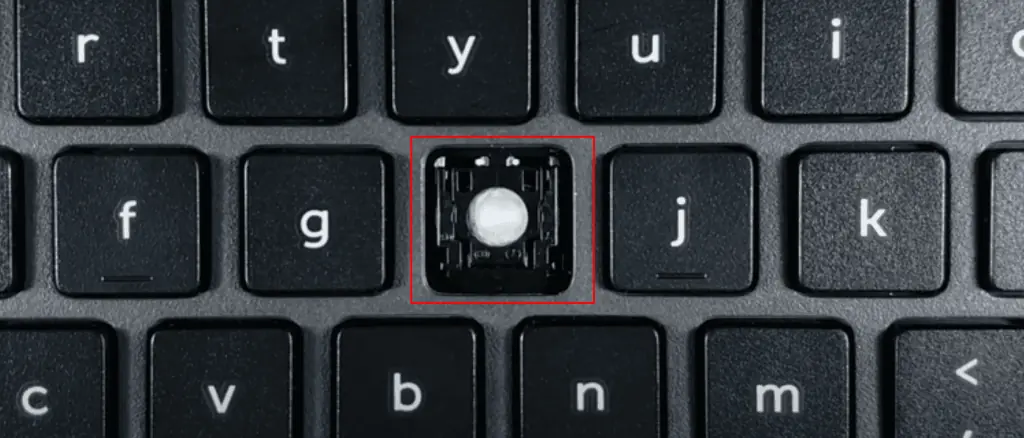
For wide keys, follow the same process as above by inserting the stabilizer on the slots. Once everything is secured on the slot, it is now time to insert the keycap. Place the keycap gently above the key socket and press until you hear four to five clicks.
After completing everything, try to wobble the key that you just inserted. If there is too much motion, there may be some parts that are not inserted properly. Remove the key using a flat screw and repeat the process so that the keys are rigid.

