
Maybe you plan to replace your Mac keyboard keys, or you look forward to cleaning them. Either way, you have to remove the keys from the keyboard before you start to do anything. But fortunately for you, this procedure can be easily accomplished from the comfort of your home and with some regular household tools.
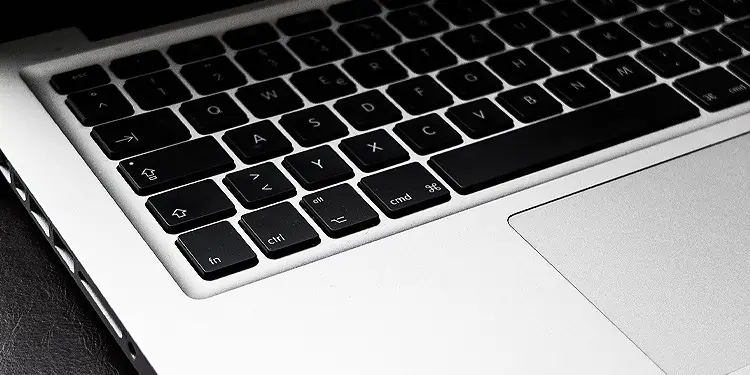
Your Mac keyboard is designed with an idea that best serves the macOS. The keyboard is slick and it has a good feel to it. The keys do not pop up much as compared to other keyboards and hence, removing the keys can seem a bit tricky.
Nevertheless, rest assured because we are here to guide you through each step with a brief explanation. Once you get the basics, the process is pretty straightforward and you might not even need a guide the next time you decide to remove your Mac keyboard keys.
Types of Mac Keyboard
The core working mechanism of Mac keyboards mainly differs on the type of switches used. Generally, when talking about a Mac keyboard, we usually think of either a keyboard with butterfly switches or a keyboard with scissor switches.
Underneath a butterfly keyboard’s keycap, there’s a hinge located at the center of the components, ultimately resembling the shape to that of a butterfly’s wings. This type of architecture was designed to minimize the key travel and to make the keyboard look thinner.
But, unfortunately, the butterfly keyboard keys are known to get jammed with dirt and debris getting accumulated underneath the keycap. Macbooks designed between the years 2015 and 2019 were usually incorporated with this butterfly switch.

Although scissors keyboards have been around for a long time, Apple decided to opt for butterfly keyboards for a thinner look. However, the limitations of the butterfly keyboard gave a chance for the scissor design to rise back up. Hence, new Macbook models use the scissor-switch concept.
The keys in a scissor keyboard are attached to two individual components that are interlocked together in the shape of a scissor. So, when the key is pressed, the switch depresses and makes contact with the circuit board.
How to Remove Mac Keyboard Keys
Macbooks have been known to be a bit more difficult in the customization field than their counterpart, a Windows PC. However, that doesn’t mean that you can’t apply some methods to work around the issue you’re facing. Macbook keyboard keys can easily be removed, cleaned and replaced, if you know how to do it the right way.
And, if you do not, that’s what we are here for. So, let’s shorten the talk and get right to the point.
Pry Out the Keycap
A dirty key doesn’t feel right when pressed. All the dirt allocated underneath the button makes it sticky, unresponsive, and downright unsatisfying. So, the first thing you have to do is to think of a way to pry out the keycap.
This can be easily done with a toothpick, guitar pick and if you get your hands on it, a keycap puller. It is also possible to do so with your fingernails as well. So, once you have the necessary tool ready for use, here are the steps to pry out a keycap without breaking it:
- Try to insert your prying tool to one side of the key.
- Once you feel that you’re firmly underneath the key, slide the prying tool towards the top or the bottom corner of the key.

- Then gently, pull the keycap up and outwards until you hear a pop.
The keycap is firmly attached to your keyboard, so popping it out might feel daunting. But, gradually increase the force and you’ll notice that the key pops out just fine. - Now, slowly pull out the keycap from your keyboard.

Remove the Switch
Once the keycap is out, you’ll now see a switch that was previously underneath the cap. If your aim is to only replace the keycap with something new, you don’t have to follow this step. However, if you plan to clean the unresponsive keys, removing and cleaning the switch is a crucial step. So, whether it’s a butterfly switch or a scissor switch, here are the steps on how you can remove the switch from its place.
- Use a toothpick and insert it underneath one of the bottom corners of the switch.
- Now, with a gentle force, push the latch inwards until it pops up.
- Take your toothpick and repeat the same process to pop up the latch on the other side of the bottom corner.
- Once the two sides are up, you can simply pull out the switch with your finger.

Clean the Keys (if Necessary)

If you want to clean the keys, now is the time to do so. You have to clean the dirt off the backside of the keycap and wipe out greases from the switch.
If you have access to one, a can of compressed air is a good solution to blow the dirt away from hard-to-reach places on the keyboard membrane. A piece of microfiber cloth dipped in a solution of isopropyl alcohol and distilled water is a good cleaning agent to clean the keycap and the switch.
Once the cleaning process is complete, be sure you let the components dry first before rearranging everything back together.
Removing Keyboard Membrane
Macbook’s keyboard membrane cannot technically be removed or replaced. This is because the membrane is riveted underneath the logic board and cannot officially be bolted out. It can however be pushed out with an immense force, which might very well damage the steel plate and the touchpad. So, it’s not a good idea to try to remove the keyboard membrane of a MacBook. In case of an emergency, it’s best to hand the matter over to a professional.
However, that being said, if you’re using an external keyboard (let’s say, Apple’s magic keyboard), removing the PCB membrane is possible. The process is not too complex and will take you around 10-15 minutes if you know what you’re doing. So, for this,
- Start screwing out the screws from the back side of the keyboard.
- Once this is done, lift up the back portion and remove the screws from the metal plate.
- Now, gently pull the backside of the keyboard along with the metal plate.
- You’ll now see the rubbery membrane along with the domes (key nodules).
- Gently pull out the membrane taking note of the circuitry incorporated onto it.

You can wipe the dirt within the membrane using a baby wipe or a slightly damp cloth. But, make sure that you air dry the membrane before you put it back. And, if you plan to replace the membrane, this is now the place to do so.
Once you’ve done what you must, revert the steps you took to rearrange everything back as it was before.