Taking a screenshot essentially captures the current instance of your screen. The steps to do this are quite simple, and the feature itself is absolutely useful for most—if not all, PC users.
On a Toshiba laptop, the steps to capture the snapshot of your screen are similar to any other PC. You can press the Windows key and PrtSc key simultaneously to take a screenshot of the entire screen.
In addition, you also have the option to take a screenshot of an active window or a partial screen.
Below, I have discussed all the possible ways to capture different types of screenshots.
Screenshot Entire Screen
Let’s first start with taking a screenshot of the entire screen using the PrtSc (PrintScreen) key. This key is located in the top-right area of the keyboard.
- Locate the PrtSc key and press the Windows and PrtSc key simultaneously. In some Toshiba keyboards, the PrtSc key might be embedded with other keys like the Home or End key. In such a case, press Windows + Fn + PrtSc key.
- The screen should snap, indicating that the system took a screenshot of the screen. Some Toshiba laptop models may not display any visual indication of a screenshot.
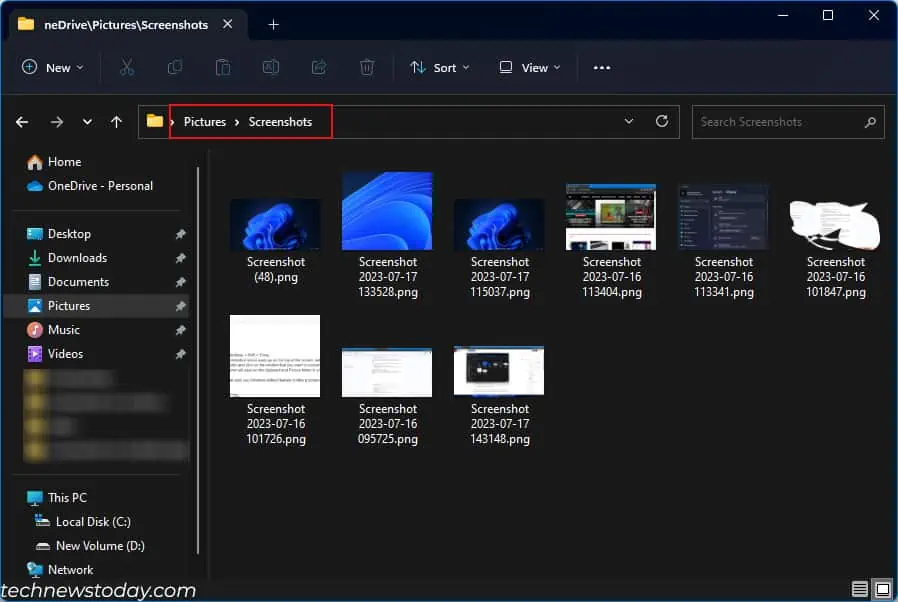
- Once it takes the screenshot, by default, the image is saved in the Picture > Screenshots folder in your user account.

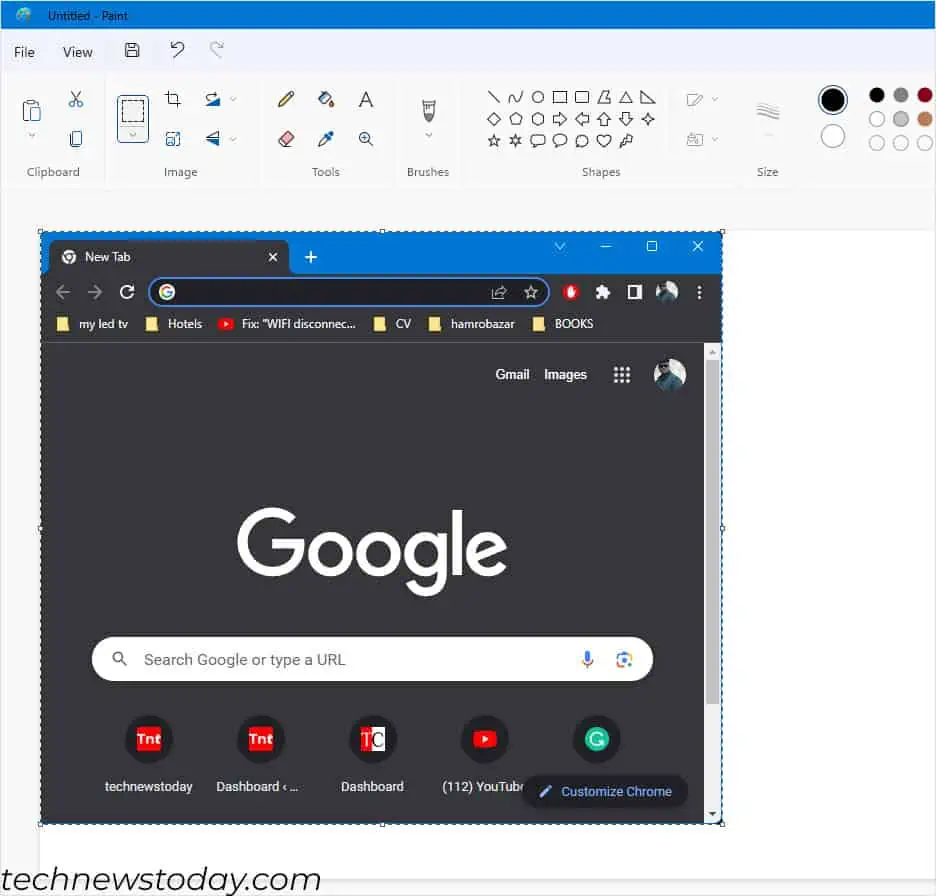
- The screenshot is also stored in a clipboard so you can easily paste the image on a graphics editor like Photoshop or Paint.
Windows + PrtSc also works if you have multiple monitor setups. However, it only works if you have extended your screen. If the display type is set to duplicate, it will only take a screenshot of one screen.
Alternatively, you can also take a screenshot of the entire screen by using the Snipping Tool.
- Press Windows + Shift + S.
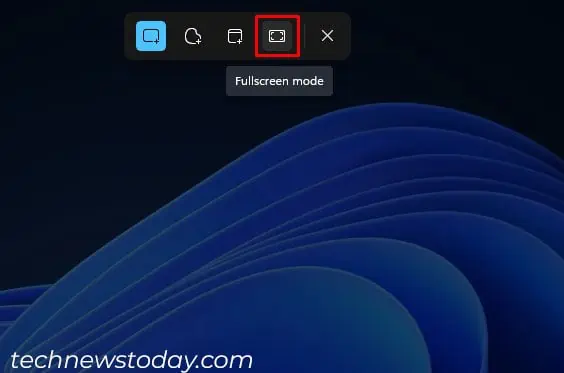
- Select the fourth option (Fullscreen mode) when the screenshot option pops up.

- The screenshot will now save on the clipboard. You can now paste the image according to your requirement.
Screenshot Selected or Active Window
Taking a screenshot of an active window is also possible on a Toshiba laptop or any laptop that runs Windows OS. The easiest way to take a screenshot of the active window is through the Snipping Tool that comes preinstalled on Windows OS.
- Press the Windows + Shift + S key.
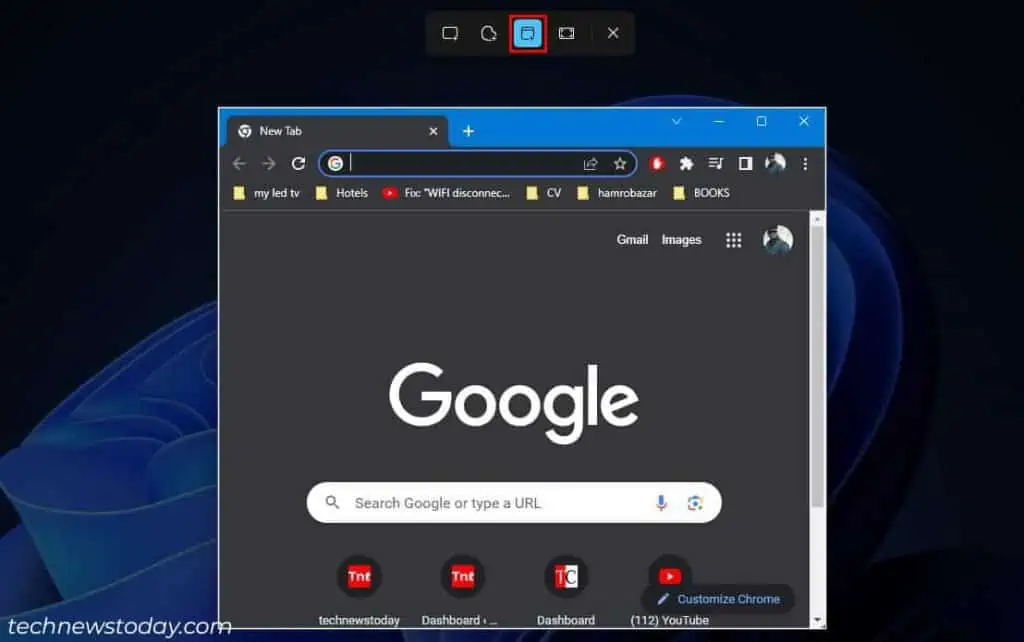
- Once the screenshot option pops up on the top of the screen, select the third option (Window mode) and click on the window that you want to screenshot.

- The screenshot will save on the clipboard and Picture folder in your user account.
Alternatively, you can also use the Windows default feature to take a screenshot of the active window.
- Press Alt + PrtSc. The active window will now save on the clipboard.
- Now, Open Paint.

- Press Ctrl + V to paste the screenshot.
- Press Ctrl + S to save the screenshot to your desired location.
Finally, there is a third option if you want to take a screenshot of the active Windows, and that is through the XBOX game bar. For this, you will need to enable the XBOX Game Bar and game mode.
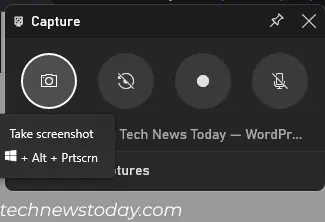
- Press Windows + Alt + PrtSc keys simultaneously to take a screenshot of the active window.
- To access them, Press Windows + G to open XBOX Game Bar.
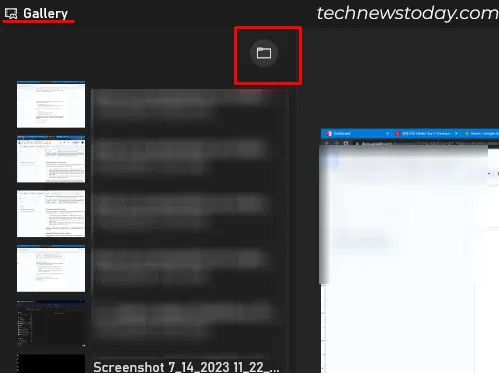
- Click on the folder icon in Gallery.

- Select Continue. The folder containing the screenshot will open.
If the above method does not take a screenshot, the shortcut keys might be different. To check the screenshot key on XBOX Gamebar.
- Open the game bar by pressing Windows + G.
- Under Capture, hover over the camera icon.

- The keys to the screenshot will appear.
Take a Partial Screenshot
Sometimes, you will only require to screenshot a certain part of the screen. In such cases, you can again use the Snipping tool to select the portion of the screen that you want to screenshot.
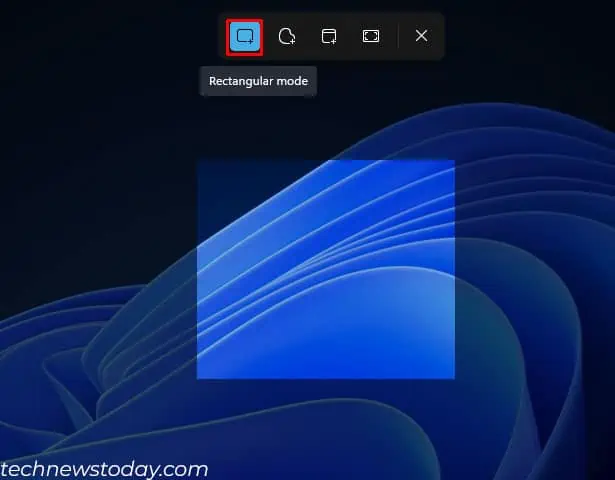
- Press Windows + Shift + S.
- Select the first option, Rectangular mode.

- Now, click and drag the portion of the screen that you want to screenshot.
- The image will now save on the clipboard. Also, you can access it on Picture > Screenshots in your user account.
- You can also take a screenshot in Freeform mode in the Snipping tool. This mode gives you the ability to move the mouse freely when taking a partial screenshot.
Other Alternative
Windows offers some simple yet effective utilities/features to take a screenshot. However, if you want some added feature to draw on your screenshot instantly, change its extension, or add text to it, you can try some third-party applications like Lightshot, ShareX, and Greenshot.

