
If you’re looking to sell your working computer, just deleting the files or performing a quick format on the hard drive isn’t enough. This is because the data is not actually erased and can be recoverable using specialized software. It means the buyer can potentially gain access to your previous files.
Fortunately, there are different ways to completely wipe a hard drive, which permanently erases the files. This way, your data becomes unrecoverable or at least makes it difficult to recover.
Before You Begin
First, let’s begin by understanding a few technical terms—delete, erase, wipe, and shred. The words might appear synonymous, but they are different concepts when talking about hard drives.
- Deleting: It refers to temporarily hiding the items. This means it’s not at all difficult to get them back. A common example is recovering deleted files from Windows Recycle Bin.
- Erasing: It refers to permanently deleting all the data from the drive. However, it’s still possible to recover data using advanced recovery tools.
- Wiping and shredding: It means erasing data such that they become unrecoverable. The former works by overwriting every sector of the HDD with zeros or random bits, while the latter refers to the physical destruction of the drive.
Important: Make sure you back up all the important files and folders before proceeding forward. Since we are going to wipe the drive completely, your data will be permanently deleted and there won’t be an option to retrieve them later.
With that, let me guide you through every possible way of wiping the data ensuring the minimal possibility of data recovery.
Full Format Your Hard Drive
Before moving on with the necessary steps, you need to know that two options are available here—Full and Quick format. Usually, most of us rely on the latter method believing it removes all the files and folders in a much shorter time.
However, this is a myth as normal formatting only deletes the address files that point to the actual data location (meaning data is not erased). Clearly, this will not wipe the hard drive completely as you can recover the items using appropriate software.
On the other hand, full format erases the address files and fixes the bad sectors. Most importantly, it wipes all the data by rewriting every sector with zeros making it unrecoverable using normal techniques (but still possible when advanced software is used).
Note: You cannot format the hard drive containing the live Windows. If you’re actually looking to wipe this drive, directly move to the third or fourth option where I’ve discussed how to do so using system reset and Windows Installation Media.
- Use Windows + X and select Disk Management from the list.
- Get to the target disk and right-click on each partition and select Format. If you only have one partition, you may simply format that one.

- In the Format dialogue box, make sure the ‘Perform a quick format’ option is unchecked before hitting Ok.
- Press Ok in the confirmation prompt to start the full format. You can even check the Status field to examine the progress.
- Once all the drives are formatted, right-click on each partition again. This time, choose Delete Volume.
- Click on the Yes button to confirm your action.
- You should now be left with a single unallocated partition. Right-click on it and pick New Simple Volume.
- In the New Simple Volume Wizard, hit Next to continue.
- Specify the volume size and press Next.
- Assign the drive letter and click Next.
- Again, make sure the ‘Perform a quick format’ option is unchecked and hit Next.
- Press Finish and your wiped hard drive should now be ready to use.


Additional Tip: If you’re looking for a Command Prompt command to wipe your HDD, you may use format <drive>: /P:2. This will perform two phases of zero-writes ensuring you can’t recover the data using simple recovery techniques.
Using Diskpart Utility
This command-line disk partitioning utility gives you overall control of your storage drive with simple and easy-to-use commands. While we had to format and delete each partition of the HDD one by one in the earlier method, the Diskpart command will perform all these tasks in a single line.
Note that two options are available to erase the files and partitions—clean and clean all. While the former erases the partitions and data, the latter wipes out everything from the drive, ensuring each sector on the disk is zeroed.
- Open Command Prompt and execute the
diskpartcommand. - Press Yes in the UAC prompt to launch the Diskpart command-line utility.
- Now, start running the below Diskpart commands in succession:
list disk[lists all the drives in your computer]select disk <disk_number>[specifies to select the disk as per its number]clean all[wipes all the data inside the disk drive including the partitions]create partition primary[creates a primary partition on the current disk]format fs=ntfs[formats the partition into NTFS]convert MBRorconvert GPT[optional]assign[a letter will be automatically assigned]exit[exits from the Diskpart CLI]


Factory Reset With Clean Drive
If you’re looking to give away your PC, factory resetting is a must. But very few are aware of the appropriate procedure. Most remain unaware of the hidden “Clean Drive” feature.
If you don’t enable it during the resetting process, your data will only be deleted but not wiped. I definitely recommend it as Microsoft also confirms that this makes data recovery harder.
- Open the Settings app using Windows + I shortcut.
- Next, go to System > Recovery.
- From the Recovery Options section, press the Reset PC option.
- Once the Reset PC window opens, select Remove Everything.
- Next, pick Local Reinstall.
- In the Additional Settings window, click on Change Settings.
- Enable the Clean data option. As it states, this will take hours to complete the Windows installation. But it makes sure your data becomes hard to recover, which is exactly what we are looking for.
- Once that’s done, hit the Confirm button.
- Then, press Next.
- Finally, hit the Reset button and this will start the factory resetting process.


Using Windows Installation Media
If you’re looking to wipe out the drive containing live Windows, it’s not possible to fully format or clean it using the aforementioned techniques.
The only way to achieve this is by creating a Windows Installation Media (a bootable USB flash drive will do) and clean installing the operating system.
- Boot your computer using a Windows Installation Media.
- In the Windows Setup screen, select your language, time, currency format, and input method. Then, hit Next.
- In the next screen, press the Install Now button.
- After the setup starts, you should get a screen to activate Windows. Enter your product key and press Next.|
- Next, pick the OS you’re going to install and click Next.
- Accept the license terms and click Next.
- Now, here comes the important step. In the Installation Type, make sure you choose the custom option.
- Now, start formatting all the partitions.
- Then, delete all the partitions.
- Once only the drive with unallocated space remains, click on New.
- Then, enter the size and hit Apply.
- Once the confirmation prompt pops up, press Ok to continue.
- After Windows assigns additional partitions, they should pop up on the screen. Press Next to move forward. While you’re at this, ensure you’ve picked the primary partition.
- Finally, wait for the Windows installation to complete.


Using Third-Party Hard Drive Wiping App
All the options we explored above zero fill the hard drive making it difficult to recover old data. However, there are specialized applications that work by overwriting existing data with random bits multiple times making it impossible to retrieve them.
These are called data destruction or data sanitization software. Here are some popular ones to try out—DBAN, KillDisk, Secure Eraser, Disk Wipe, Hardwipe, etc. For some of these data-wiping tools, you require creating a bootable USB.
Secure Erase in Manufacturer Software

Whether you’re using an HDD or SSD, your manufacturer provides a dedicated application that lets you erase data much more conveniently. The Secure Erase option is mainly for SSDs as it has limited write cycles, and the overwriting technique would be a bad idea.
Since the traditional approach will hamper its lifespan, it’s better to use the Secure Erase feature provided by your manufacturer. All you have to do is download the app from the official website (if you haven’t already).
For example, Samsung offers its users with Samsung Magician program. Likewise, Western Digital’s Dashboard allows you to erase the drive using Sanitize or User Erase. However, if you’re trying to wipe the boot drive, you require a bootable USB drive.
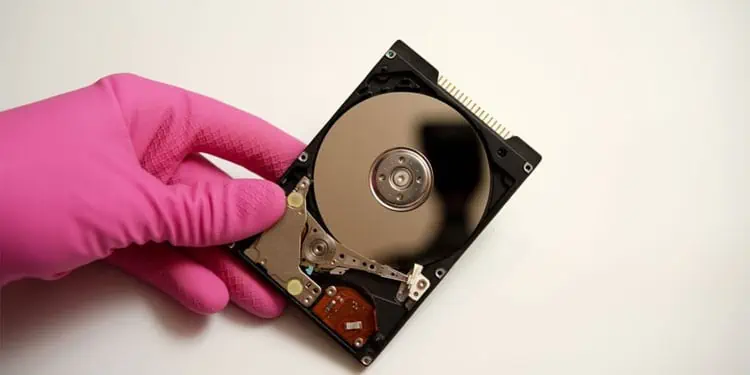
Physically Destroy the Drive

Even though all the options I’ve mentioned above are great ways to wipe the hard drive, data recovery can still be possible using sophisticated data recovery algorithms. Since wiping is never 100% accurate, the final option would be physically destroying the drive.
Well, there are different techniques to achieve this. Some users have tried exposing the magnetic platters to powerful magnets, heat, and even water immersion! However, you can’t be 100% sure this method will wipe the data. Additionally, you would have to give extra effort, which could be time-consuming.
That being said, the best option would be completely destroying the platters using a hammer. Once you shred the HDD into pieces, getting the data back becomes impossible.
However, the physical destruction of the mechanical drive is not the best approach and should always be your final choice (only when you’re not going to use the HDD again).