The touch screen problem is seen as more prevalent in the Lenovo Flex models. The touch panels on these models either do not appear to register touch inputs at all or do so randomly from time to time. On some Lenovo devices, it is also seen that the multi-touch and pen inputs stopped working all of a sudden.
This touch screen not working issue is often linked to touch screen drivers and misconfigurations in the settings. The problem can also occur in devices with defective screen digitizers.
Enable the Touch Drivers
Most of the time, the touch screen does not work if its associated drivers are disabled. These drivers are responsible for managing the communication between the touch panel and the system.
If the drivers are disabled, then the panel won’t respond to the touch inputs.
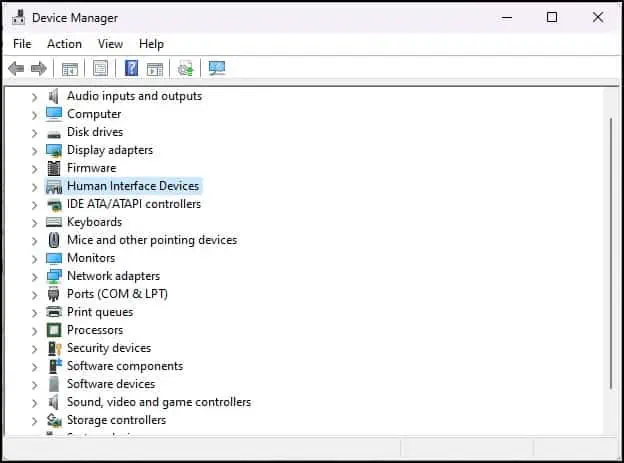
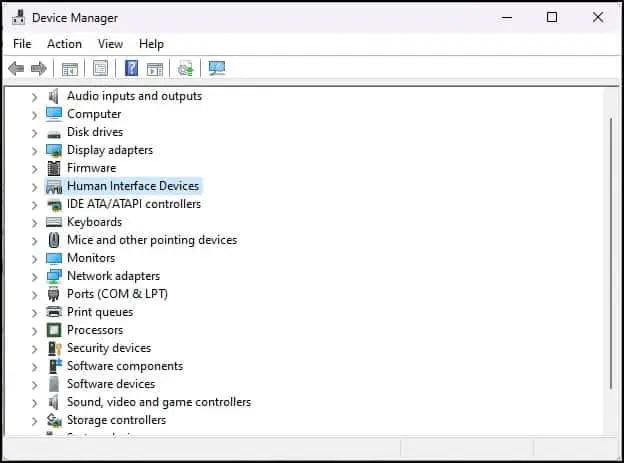
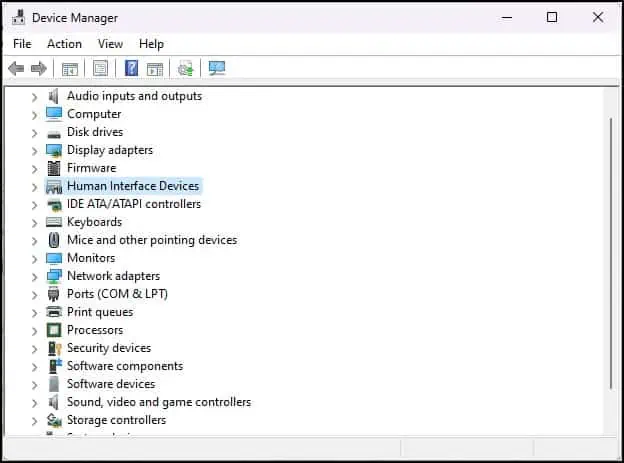
- Press Windows Key + X and open the Device Manager.

- Click on Human Interface Devices.
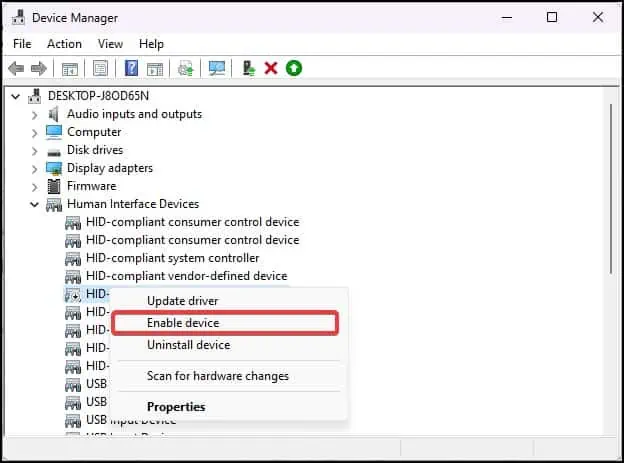
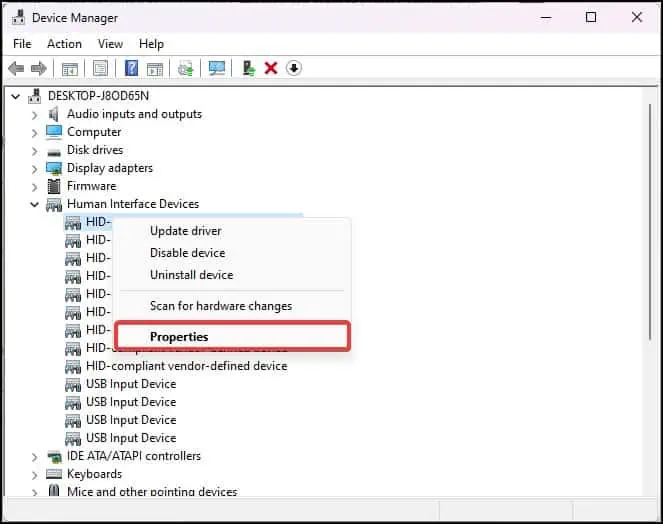
- Right-click on the HID-complaint touch screen and then select the Enable device option.

- Now, check if the touch in the device works as intended.
If this does not work for you, try enabling the touchscreen services from the registry.
- Press the Windows key + R, type
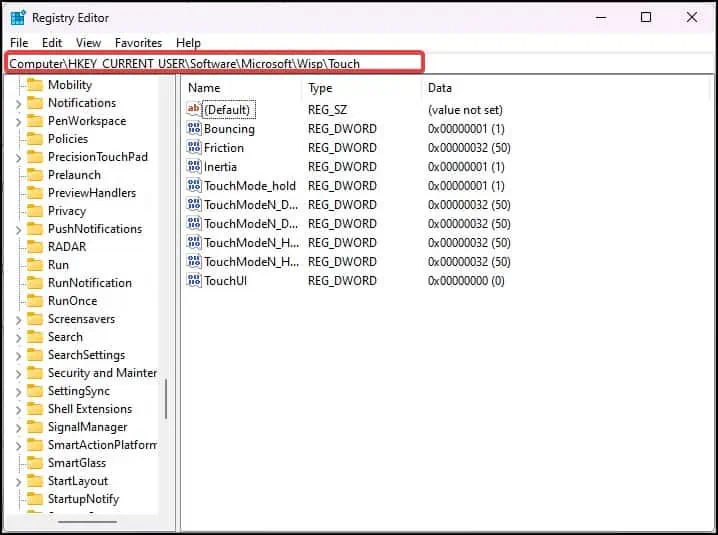
regedit, and hit enter. - Navigate to this registry location:
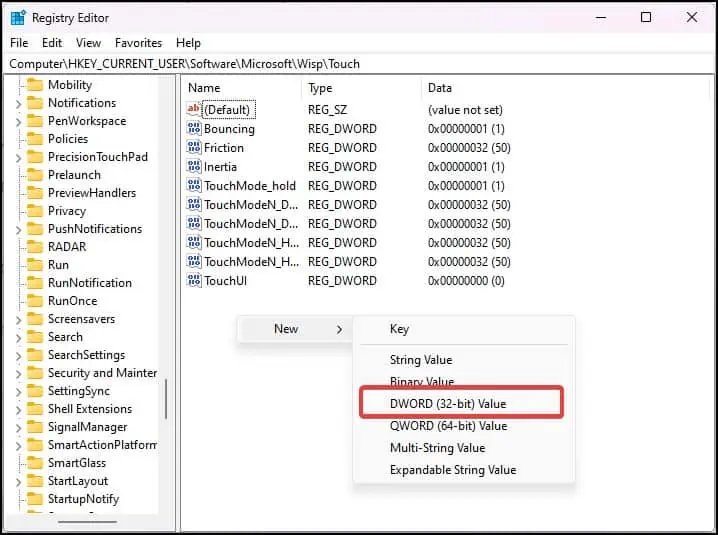
Computer\HKEY_CURRENT_USER\Software\Microsoft\Wisp\Touch
- Right-click on the empty space of the registry editor.
- Select New > DWORD (32-bit) value.

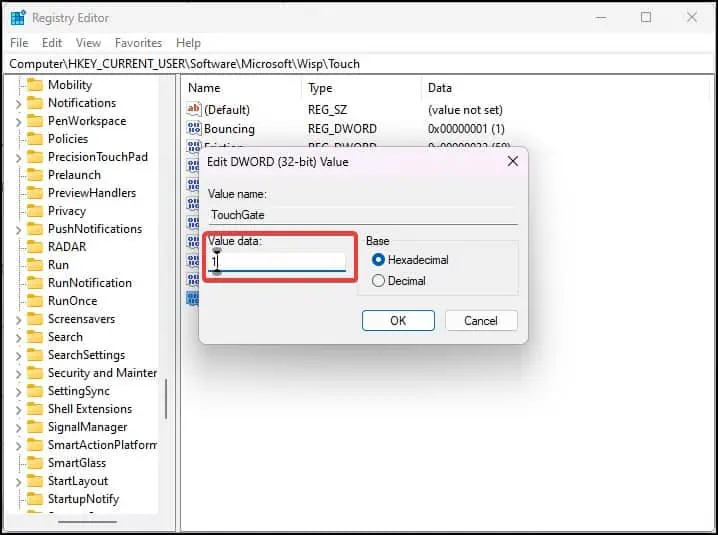
- Create a New key named TouchGate.
- Open the key and assign a new value 1.

- Click on Ok to save the registry changes.
Restart the computer and see if this makes the Touch screen work.
Enable Multi-Gesture Touch
If you are able to use the touch, but the multi-gesture is not working properly then this can mean the touch settings have not been set configured for it. You can enable the multi-gesture touch and then check the touch functionality on your Lenovo device.
- Press Windows Key + R, type
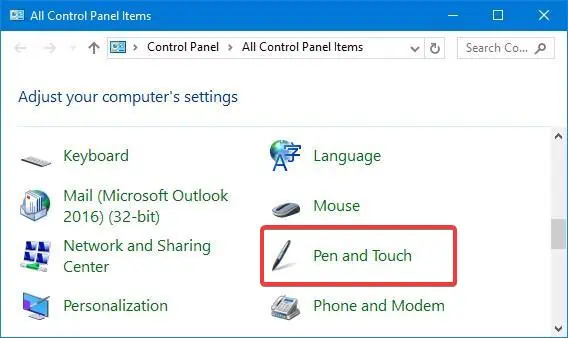
control, and hit enter. - Go to Hardware and Sounds > Pen and Touch.

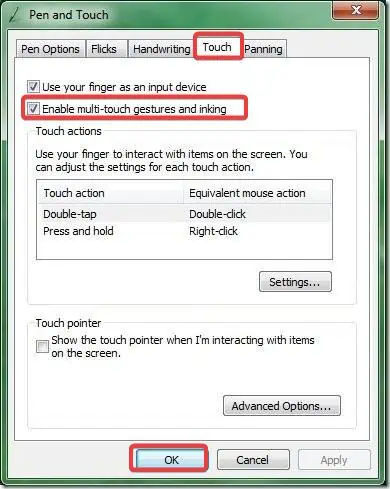
- Go to the Touch tab.

- Make sure the Enable muti-touch gesture and inking option is checked.
- Click on Apply to save the changes.
Calibrate the Screen
If you have recently upgraded the operating system to Windows 11, the touch screen might not function properly. You can calibrate the screen to register the touch more precisely and effectively. This might even bring your Touch screen function back to normal.
- Press the Windows key + R, type
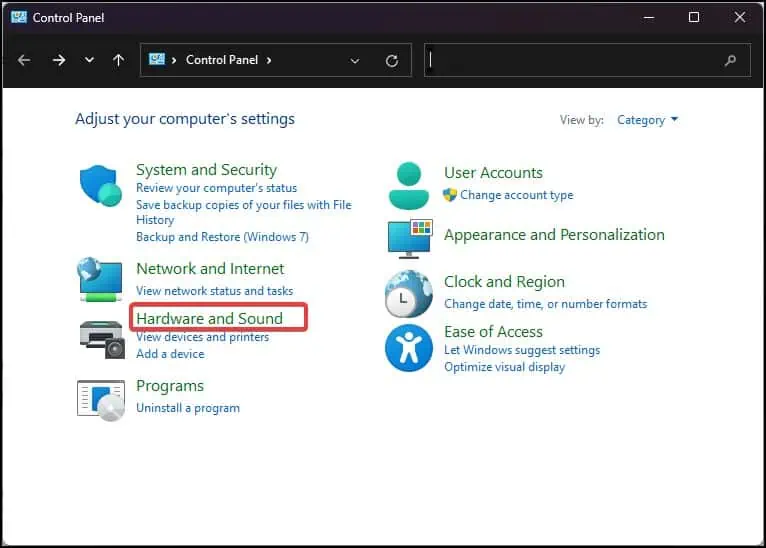
control, and hit enter to open the Control Panel.
- Go to Hardware and Sounds.
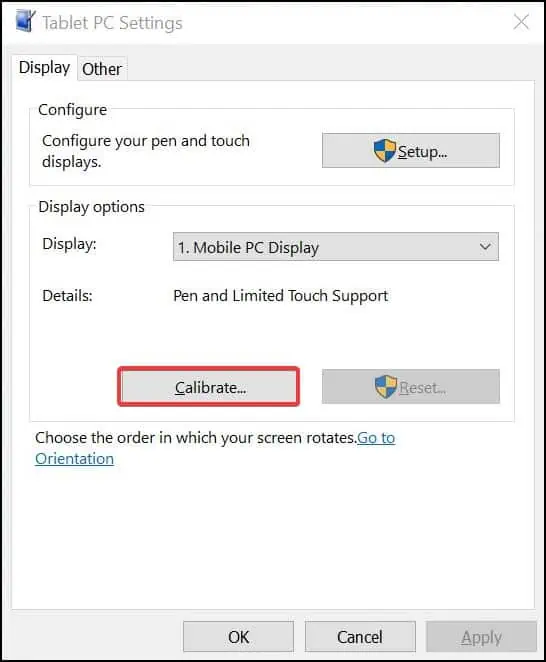
- Navigate to the Tablet PC settings and click on Calibrate the screen for pen or touch input.
- Go to the Display Tab.

- Click on Calibrate button and follow the on-screen instructions.
- Click on OK to save the changes.
Reinstall the Touch Drivers
When you uninstall the driver from the Device Manager, Windows reinstalls the generic version of such drivers. This will get rid of the issue if the touch screen has malfunctioned due to driver corruption or misconfigurations of its settings.
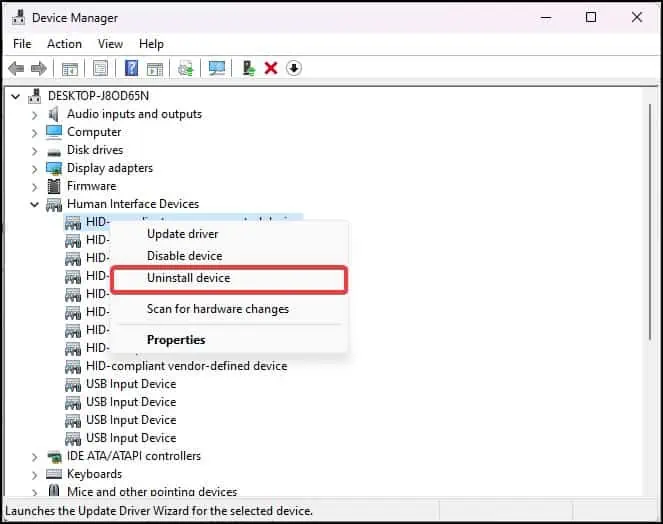
- Open the Device Manager.
- Expand the list of the devices under the Human Interface Devices.

- Right-click on the HID-compliant touch screen and then select Uninstall.

- Restart the Device. When the system boots up, Windows reinstalls the touchscreen drivers.
- Finally, check the Touch screen to see if it is functioning normally.
Update the Touch Drivers
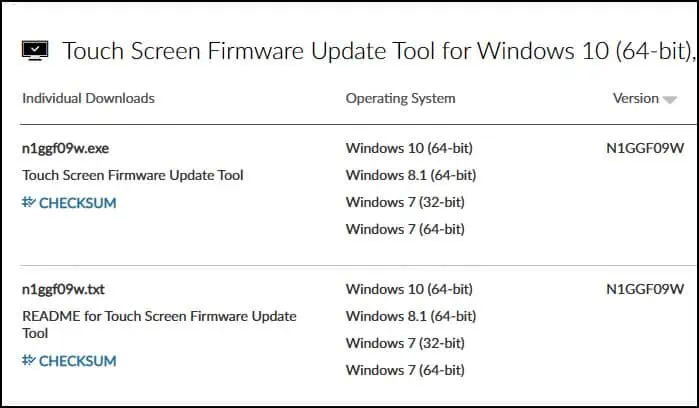
The touch drivers are responsible for establishing communication with the touch panel and the system. Therefore, these touch drivers must be updated to their latest version to eliminate the bugs and also improve their performance. For the update, You can also use Lenovo’s Touchscreen firmware update tool.
- Go to the Lenovo download center.

- Download the relevant Touch screen Firmware Update tool according to your system’s specifications.
- Run the Update tool and update the touch firmware.
Disable Power Management Settings
Because of some Power management configurations, Windows turns off the touchscreen services on some devices when it is kept idle. You can reconfigure the settings and disable this feature to make the touch feature work even when the device is not active.
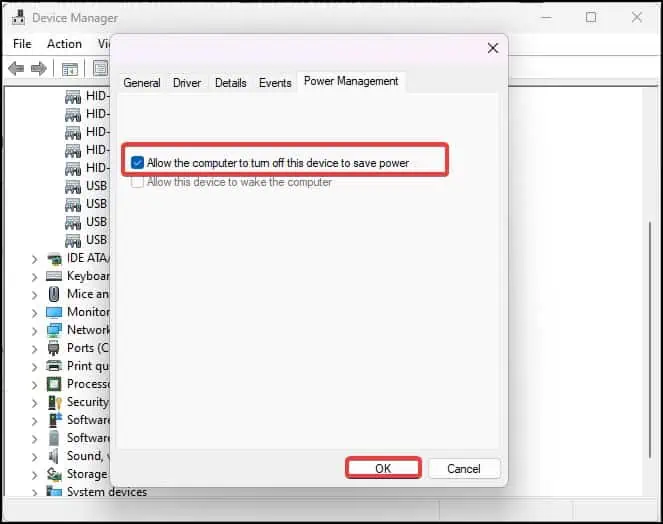
- Open the device manager and navigate to the Human interface devices.

- Right-click on the HID-complaint devices and select the properties.

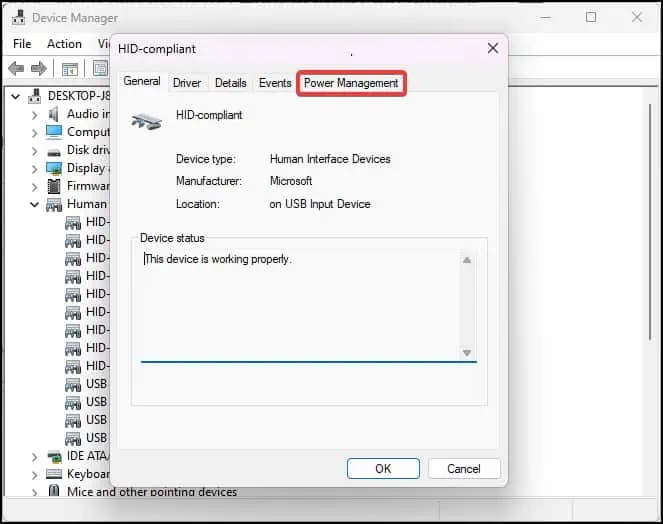
- Go to the Power Management tab.

- Uncheck the Allow the computer to turn off the device to save power.

- Click on OK to save the changes.
Perform System Restore
If you are experiencing the issue with your touch-enabled device only recently, you can also revert the system to a previously set restore point. This can take the system back to the time period when the touch screen worked perfectly on your device.
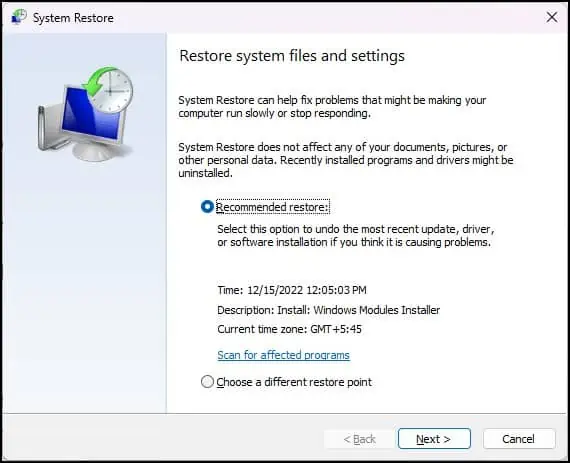
- Press Windows Key + R, type
rstrui, and hit enter to open the System Restore utility.
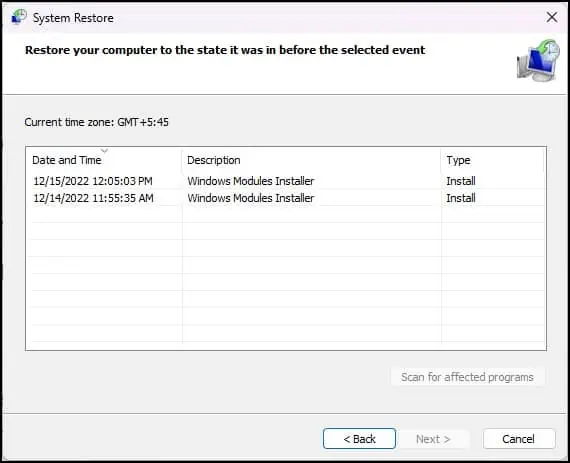
- You can choose the Recommended Restore if you have a suspicion about the recent Windows/ driver update or any software installation.
- You can also choose your preferred restore point by choosing the option Choose a different restore point.

- Click on Next and follow the prompt.
System Reset
The last resort from the software side is to perform the System reset. This will change the configurations of Windows to its default factory state. If you have made any changes to the registry, the touch settings, or the drivers, resetting the windows will also reset these.
- Press the Windows key + R to open Run.
- Type
systemreset –factoryresetand hit enter.
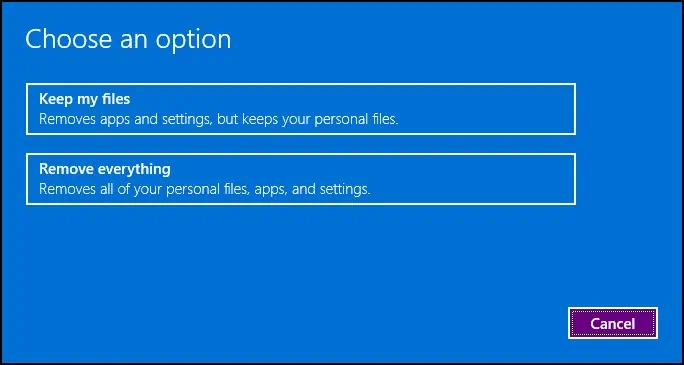
- You will be asked to choose to Keep your Files or Remove Everything. If you have backed up your files, it is recommended to choose the Remove Everything option.
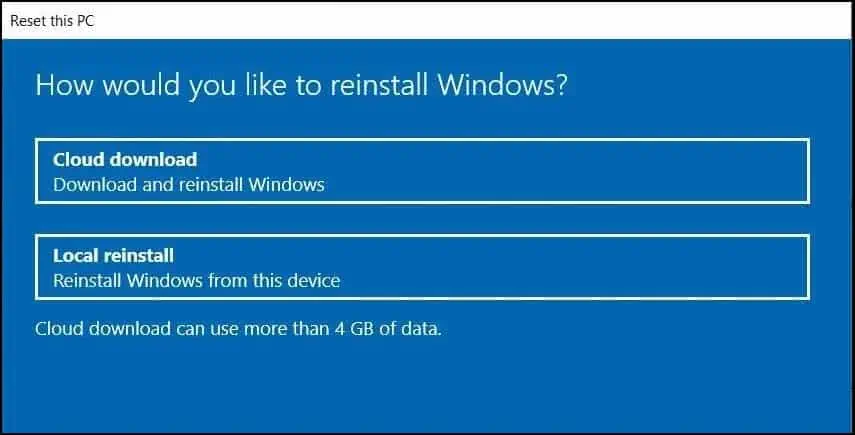
- Then Choose Local reinstall if you want a faster system reset. However, for the latest windows update, choose Cloud Download.

- Now, follow the given instructions and complete the reset process.
For even better results, you can manually clean install the Windows using a Bootable media.
Visit the Service Center
If none of the suggested fixes work, the issue might be linked with the physical unit of your Lenovo device. The Screen digitizer is fragile and can get damaged because of many reasons.
You can take the Lenovo device to the service center and find the answer to what might be the actual reason behind this issue.

