
Have you ever had a computer turn on automatically even after you put it to sleep? If yes, it probably is due to the MoUSO Core Worker Process. It is a process that runs automatically in the background whenever we check or install a Windows update.
The MoUSO Core Worker Process also has the ability to turn on a computer from sleep if it detects any issues while downloading or installing an update.
Microsoft added this process that runs in the background from Windows 10 version 1903. You can find this process from the task manager once you Check for updates or Install Update.
What is the MoUSO Core Worker Process, and What does it Do?
MoUSO Core Worker Process is an Update Session Orchestrator (USO) that Windows uses to manage update sessions. Managing the Update session includes solving any issues that can halt the Windows update process. This process also keeps the Windows safe from any threats when performing a Windows update.
The MoUSO Core Worker Process runs in the background and does not affect any other process that a user is running. However, this process can use a high memory in some cases due to some errors in downloading or installing an update.
MoUSO Core Worker Process along with some other executable files uses DLL (Dynamic Link Library) and runs in the background during a Windows update. Some of these DLL and executable files are as follows.
- USOCoreWorker.exe
- USOClient.exe
- USOapi.dll
- USOcoreps.dll
- USOsvc.dll
All files mentioned above are system files and are located in C:\Windows\System32. 
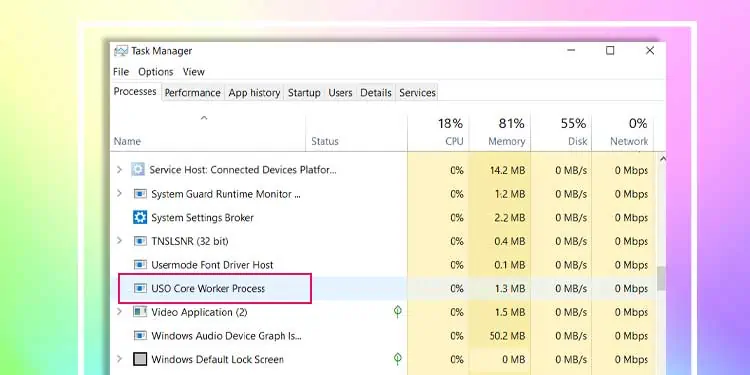
Once we install or check for updates, we can see this process run in the background from the Task Manager. The following steps will help you locate MoUSO core Worker Process in Task Manager.
- Press the Ctrl + Alt + Delt Key simultaneously.
- Select Task Manager.
- In the Processes tab, under Background processes, search for MoUSO Core Worker Process.
If you do not have an update running, you can end the process to release some memory.
Why Does MoUSO Core Worker Wakes Computer from Sleep Mode?
As the mouse Core Worker Process is responsible for scanning updates in the background, it also checks the update status while in sleep mode. Therefore, this process is known to wake a computer if it is not able to find out about update status while in sleep mode.
If an update is queued for a long time and does not install automatically, the MoUSO Core Worker Process will use the system resources to turn on the computer and install the pending update.
How to Fix MoUSO Core Worker Process from Turning on PC?
To solve this issue, we can always ensure that all updates are installed, and there are no pending updates. Besides this, here is a list of solutions we can try to fix the issue.
Disable Wake Timers
The Wake Timer feature from the power option lets the Operating System turn on the computer from sleep mode by itself. You can follow these steps to change this feature.
- Press the Windows key and open the Control Panel.
- Make sure that the View by is set to Large icons and click on Power Options.

- Under Choose or customize a power plan, click on Change plan settings.
- Click on Change advanced power settings.
- Scroll down and expand Sleep by clicking on the + icon.
- Expand Allow Wake Timers and set it to Disable
- If you are on a laptop, set both On battery and Plugged in as Disabled.


Disable UOS Service
The Update Orchestrator Service needs to be running for the MoUSO Core Worker Process to function. Therefore, if we disable Update Orchestrator Service, we can stop MoUSO Core Worker Process from turning on the computer.
- Press the Windows key + R simultaneously.
- Type “services.msc” without the quotation mark and press Enter.
- Scroll down and double-click on Update Orchestrator Service.
- On Startup, type select Disabled.
- Click on Apply, then OK.


However, disabling this service will stop all Windows Update, and thus we don’t recommend it. We will need to set the Startup type to automatic to allow automatic Windows updates.
Is MoUSO Core Worker Process Safe?
Yes, the MoUSO Core Worker Process is absolutely safe. However, this process can sometimes consume a lot of physical memory and system resource. Please continue reading this article to know its causes and their solutions.
Besides them, it is also known that malware is named MoUSO Core Worker Process, which injects trojan horse virus to your system.
What Causes MoUSO Core Worker Process to take High Memory?
Usually, when Windows checks or installs Windows update, the MoUSO Core Worker Process normally takes 8MB of physical memory. However, sometimes when running a Windows Update, the MoUSO Core Worker Process can take a lot of physical memory, causing your system to run out of available RAM.
Here is a list of reasons that can cause this process to take more than usual system memory.
- Pending download or installation if Windows update
- Unknown errors in Windows Update services
- Malicious Software
To check how much memory MoUSO Core Worker Process uses, Open Task Manager, and under Background process, search for MoUSO Core Worker Process. Now, check the Memory column. If the numbers are high, you can try the fixes mentioned below.
How to Fix MoUSO Core Worker Process from taking High Memory?
If you face high memory consumption from MoUSO Core Worker Process, it can be because the Windows update component is using resources.
Although malware can cause this issue, the Windows Defender will warn you beforehand if some files can harm your computer.
Here are some solutions explained in detail if this process takes a lot of memory. We can try any one of these fixes to see if it works. However, we recommend performing these fixes one after the other.
Install/Download All Pending Update
As this is an issue with the pending download or installation of Windows updates, we can first try to install it. You can follow these steps to install the latest updates on Windows.
- Press the Windows key and open Settings.
- Scroll Down to Windows Update (Update & security > Windows update for Windows 10).
- Now, click on Check for updates or Install update.
- Once the installation is complete, restart your computer.

End Background Task
If installing pending Windows Update does not work, we can stop MoUSO core Worker Process to free the computer from excessive memory usage. We can use the Task Manager to end its process in the background.
- Open Task Manager by pressing Ctrl + Shift + Esc.
- Under Processes, scroll down and click on MoUSO Core Worker Process.
- Click on End Task.

However, this process will run again automatically once the computer checks for an update. Once it runs, it may or may not take high memory.
Restart Update Orchestrator Service
Sometimes, an issue with the Update Orchestrator Service (UOS) can cause the MoUSO Core Worker Process to take excessive physical memory. We can try restarting this service to see if it fixes our issue.
Please follow these steps to restart the Update Orchestrator Service.
- Press the Windows Key and R Simultaneously.
- Type “services.msc” without the quotation mark and press Enter.
- Then, scroll down and double-click on Update Orchestrator Service.
- A dialog box named Update Orchestrator Service Properties (Local Computer) will open.
- Here, under Service status, click on Stop. This will stop all downloads and installation of Windows Update.
- After some time, Start the service again by clicking on Start.
- Click on Apply, then OK.

While we have the Services dialog box open, we can also restart the Windows Update service. As this process also handles the Windows update and the update of other programs, restarting them can solve the issue we face.
To restart Windows Update service, double-click on Windows Update in the Services dialog box. If the Service Status indicates running, click on Stop. This process will automatically run once the Windows update starts.
Run Windows Update Troubleshooter
If the above solutions do not decrease memory usage, we can use the troubleshooter feature to pinpoint and fix any issues with Windows updates. You can follow these steps to run the Windows Update Troubleshooter.
For Windows 11:
- Press the Windows + I key to open Settings.
- Go to System > Troubleshoot > Other troubleshooters.
- Here, run the Windows Update Troubleshooter.

For Windows 10:
- Press the Windows + I key to open Settings.
- Go to Update & security > Troubleshoot > Additional Troubleshooter
- Run Windows Update Troubleshooter.
It may take some time to detect any issues with Windows Update. If it finds and solves any problems, the troubleshooter will automatically make changes to your system to fix the issue.
Uninstall Recently Installed Updates
If you start to have high memory problem after a Windows update, it is most probable that some error with the update is causing the issue. So, we can try uninstalling recent Windows update to fix the issue.
You can follow these steps to uninstall recent updates.
- Press the Windows Key + I key.
- Go to Windows update (Update & security > Windows update in Windows 10) > Update History.
- Scroll down and click on Uninstall updates.
- Here, right-click on the latest Windows update, and click on Uninstall.


