
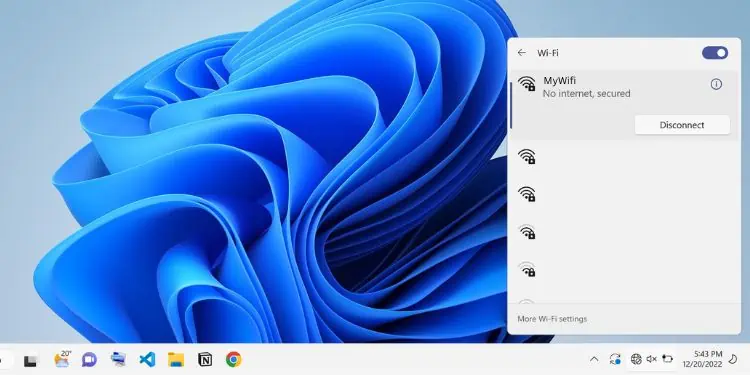
The “No Internet, Secured” error pops up on your Wi-Fi network when you have a secured connection, but the device cannot access the internet. Reportedly, the internet works completely fine on other devices except some.
The error pops up on a specific computer, sometimes accompanied by a yellow exclamation sign or no access at all. This is a common issue among most Windows users, and the major problem lies within the network adapters.
We recommend getting closer to the router for stable connectivity. Before you begin, we also advise you to perform generic fixes like forget the wireless network and reconnect, power cycle your networking devices, perform Windows update and also contact your ISP regarding the availability of internet connection.
Configure Network Adapter Properties
If the Wi-Fi network still shows the same error, ensure all the components of your wireless adapters are up and running. If one or more network protocols are missing, your PC won’t be able to communicate with the Wi-Fi network and possibly throw the “No Internet, Secured” error.
Here’s a quick guide to configuring network adapter properties on Windows 11:
- Use Windows + R hotkey to launch the Run utility. Here, execute the following command to navigate to the Network Connections window in Control Panel:
ncpa.cpl - Right-click on the wireless network adapter and choose Properties.

- Under the Networking tab, get to the “This connection uses the following items” section. Here, ensure that all the installed features are checked.
- Finally, hit the Ok button and check if the problem persists.


By default, the Reliable Multicast Protocol is not available on Windows. Installing this protocol will improve the reliability of all the multicast applications:
- In the wireless network properties window, press the Install button.
- Once the Select Network Feature Type dialogue box pops up, select Protocol and hit the Add button.
- In the new pop-up, choose Reliable Multicast Protocol and press Ok.
- Now, the protocol is installed and selected automatically. Simply click the Close button and check if the network error is now solved.


Note: Some Windows users claim to have fixed the “No Internet, Secured” error after disabling TCP/IPv6. As such, you can try this to see if it works for you.
Reset Your Network Components
If configuring network adapter properties didn’t help, the Winsock API or the TCP/IP stack is probably corrupted. Basically, it is an API based on TCP/IP protocol that allows Windows to connect to the internet. Here’s a quick workaround to this fix:
- In the command-line interface (CMD or Powershell), execute the following command to reset Winsock:
netsh int ip reset resetlog.txt - Now, restart your computer and reconnect to your wireless network.
- Then, check if this solves the “No Internet, Secured” error.

Also, we recommend flushing DNS, releasing the IP address, and renewing it on your Windows terminal:
- Execute the below command line to successfully flush the DNS Resolver Cache:
ipconfig /flushdns - Next, execute the following command to release the current IP address:
ipconfig /release
Note that you’ll completely lose your internet connection while doing so. - Now, run the below command line to renew or fetch a new IP address from the router:
ipconfig /renew


If resetting the Winsock catalog didn’t do the trick, we recommend resetting all the network adapters to the factory settings. This will delete all the networking-related data on your device and might fix the issue:
- Use the Windows + I hotkey to open Settings.
- Move to Network & internet and select Advanced network settings.
- Under More settings, choose Network reset.
- Now, hit the Reset now button.
- In the confirmation prompt, press the Yes button.
- Now, you’ll lose your internet connection and get a message that the PC restarts in 5 minutes.
- After Windows boots, reconnect to your wireless connection; this time, you shouldn’t get the “No Internet, Secured” error.


Note: If Network Reset didn’t work, we recommend resetting your router. This erases all the customized settings and also helps solve internet connectivity issues.
Enable DHCP
An incorrect static IP assignment eventually leads to the “No internet, secured” error. To solve this, you can simply enable DHCP from Windows Settings. This will automatically assign an IP address, ensuring no conflict between two or more devices:
- In the Settings app, go to Network & internet > Wi-Fi.
- Get to the Properties section.
- Click the Edit button next to the IP assignment.
- Select Automatic (DHCP) from the drop-down and hit Save.
- Reconnect to the wireless network, and you should no longer get the error message.


Disable the Firewall Component of Your Antivirus
Most third-party antivirus has a dedicated firewall setting to protect your network from possible malware. Therefore, any issues with the program may also trigger the “No internet, secured” error.
Reportedly, Windows users claim to have fixed this by disabling the dedicated setting on COMODO, AVG, and similar antivirus programs. For demonstration, here’s how to turn off the firewall settings on COMODO:
- Expand the Security Settings.
- Then, move to Firewall > Firewall Settings.
- Now, uncheck the Enable Firewall (Recommended) option.
- Hit the Ok button to save the settings.
- Finally, reconnect your network, and this should solve your problem.
If nothing works, we recommend completely uninstalling the antivirus program. Likewise, if you have VPN enabled, turn it off and see if it helps.
Disable 5 GHz Mode
In some computers, the network adapter doesn’t support the 802.11ac radio channel. If that’s the case, yours won’t be compatible with the 5 GHz mode.
Moreover, most users claim to have faced network problems after a system or driver update. Therefore, we suggest switching to the 2.4 GHz band, and here’s the right way to do it:
- Firstly, open any web browser and navigate to your router’s dashboard.
- Under Basic settings, move to the Wireless option.
- From the Wireless Settings section, uncheck the 5 GHz option and save the changes.

Note: Some routers support Smart Connect, which shares the 2.4 GHz and 5 GHz networks. If any issues occur, your wireless device will automatically switch to the appropriate band.
Run Windows Network Diagnostics
Windows Network Diagnostics is an excellent built-in utility that lets you troubleshoot network faults and resolve connectivity issues. Here’s a quick guide on how to run it on Windows 11:
- Open the Network Connections window using the
ncpa.cplcommand in Run. - Right-click on the wireless network and select Diagnose.
- Wait until the diagnostics scans and fixes possible bugs and errors.
- Once the troubleshooting is completed, you should get a report of all your problems.


Run Dedicated Troubleshooters
If the Windows Network Diagnostics tool can’t identify the problem, you can run other built-in troubleshooters. Kindly follow the below steps to fix network problems using Internet Connections, Incoming Connections, and Network Adapter troubleshooters:
- Go to Settings > System > Troubleshoot.
- Select Other troubleshooters.
- Under the Most frequent section, hit the Run button next to Internet connections.
- Now, select Troubleshoot my connection to the Internet.
- Wait until the problems are detected.
- If the wireless connection still shows the “No internet, secured” error, move back to the Other troubleshooters window.
- Here, run the Incoming Connections troubleshooter.
- In the ‘What are you trying to do?’ section, select Find this computer on the network and click Next.
- Wait until the problems are found and resolved in the network gateway configuration.
- If you still encounter the error, run the Network Adapter troubleshooter.
- Select Wi-Fi and hit Next.
- If the troubleshooting finds possible issues, you’ll get the results in the final window.
- Now, check the wireless connection to see if the problem persists.


Reinstall or Roll Back Network Drivers
Sometimes, the issues might lie within the network drivers. But before moving forward, we recommend booting Windows in safe mode (with networking) to identify whether this is true. Now, follow the below guide fix issues with these device drivers:
- First, open Device Manager from the Quick Link menu.
- Expand Network Adapters, right-click on your driver, and choose Uninstall device.
- In the confirmation prompt, press the Uninstall button.
- Now, select Yes and restart your PC. This will reinstall the necessary network driver on your PC.
- Manually reconnect to your wireless network.


Some Windows users have faced the “No internet, secured” error after updating their drivers. In this case, we suggest rolling back your network driver:
- In the Device Manager window, right-click on the wireless network driver and choose Properties.
- Next, switch to the Driver tab.
- Now, click on Roll back driver.
- Select a reason and hit Ok. This restores the network driver to its previous version.
- Restart your computer and check if the network error prevails.


If reinstalling or rolling back the drivers didn’t help, you need to install the latest driver from another working PC. All you have to do is navigate to the manufacturer’s official website and download the newly released driver. Then, use a flash drive to move and install it on your primary computer.
Additional Tip: You can also perform a clean boot to identify whether a non-Microsoft service or some third-party services are tampering with your wireless network. If you find one, boot in normal mode and remove the troublesome programs.