Among the two user accounts in Windows, Standard, and Administrator, the latter has full authority over the system.
An Administrator account has all the privileges from installing or removing applications to accessing, modifying, or deleting the system files. They also can create other user accounts and modify or grant permissions to other accounts.
In this article, we will see how we can add an administrator account in Windows through different methods.
How to Add an Administrator Account in Windows
While an Administrator account is already created by default during the windows installation, adding another one might be useful sometimes.
For instance, suppose the Administrator account you frequently use encounters some error or you forget the password for that account. In that case, you can use another Administrator account to troubleshoot the issue.
Here are some of the few methods you can use to add an Administrator account in windows.
Through User Account Settings
There are various ways to access the user account settings in Windows. The most common ways are from the Settings app and the Control Panel.
To access the user account settings:
- Press Windows Key + I to open the setting.
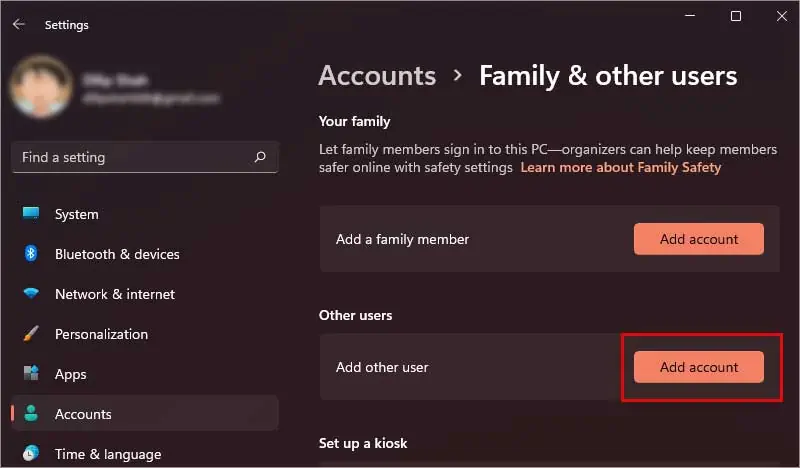
- Click on Accounts and select Family and other Users.
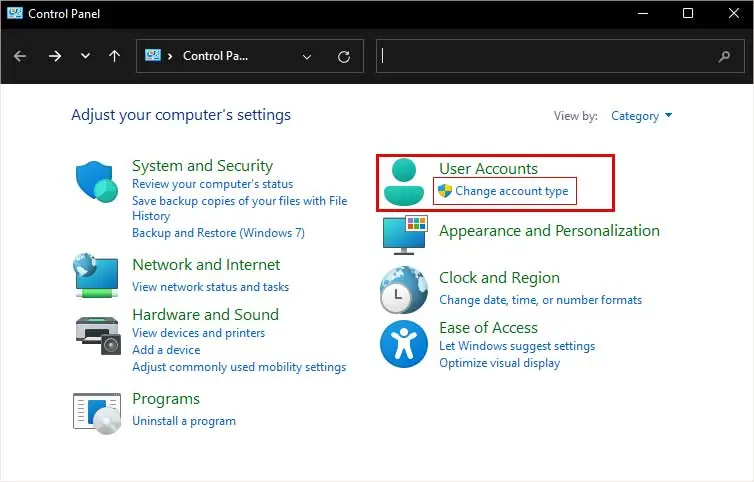
To access the user account settings via the Control Panel:
- Press Windows Key +R. Type and enter control panel to open it.
- Click on Change account type under User Accounts.

- Click on Add a new user in PC settings. The User account settings pop-up window will open.
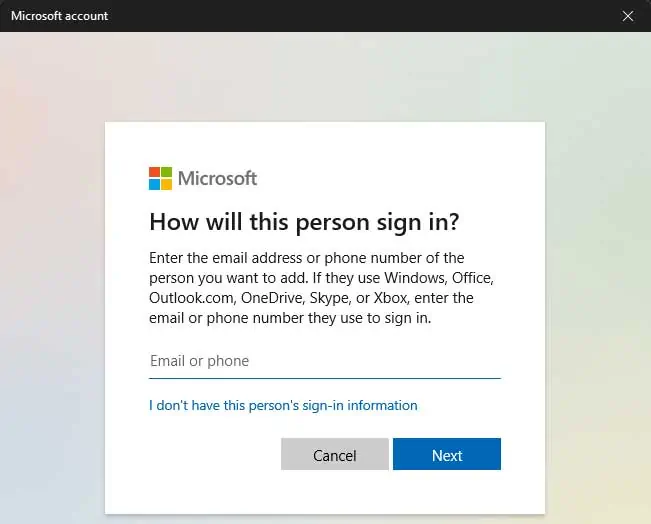
- Click on Add account in the Other users submenu. Another pop-up window will open, asking you to sign in to your Microsoft account.

- Enter the Sign-in details.
- Click Next to create an account.

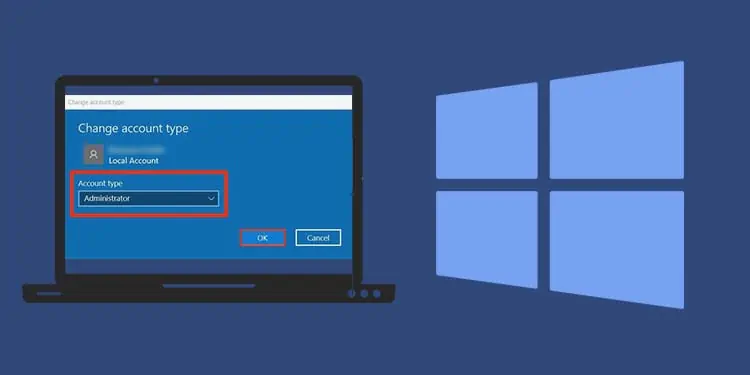
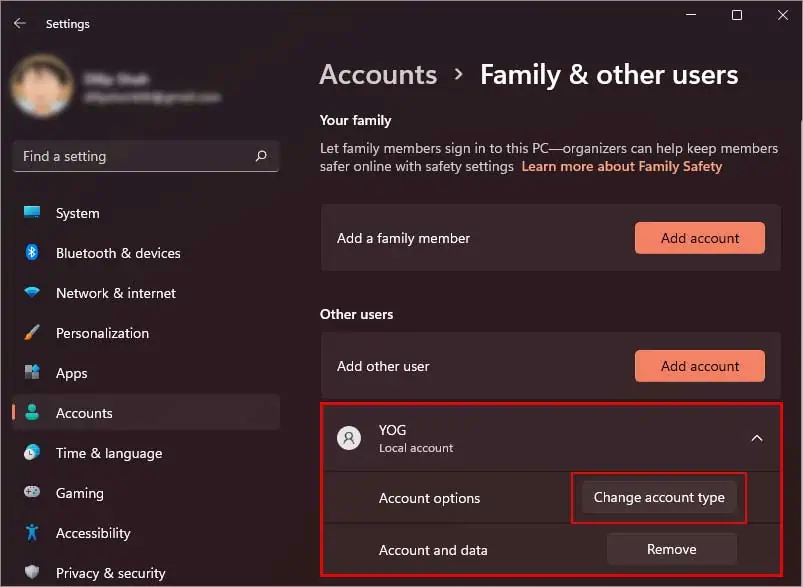
Your new account will be standard by default. To change it to the Administrator account,
- Go to Settings and select Accounts
- Click on Family & other users
- Then click on the New account to bring a drop down menu
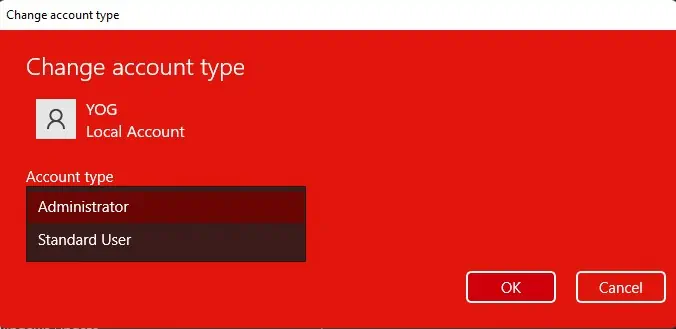
- Now click on Change account type

- Select Administrator and click Ok.

Via Netplwiz
Netplwiz is a built-in Windows utility tool responsible for managing user accounts. To add an Administrator account via Netplwiz:
- Press Windows key+ R to open the Run.
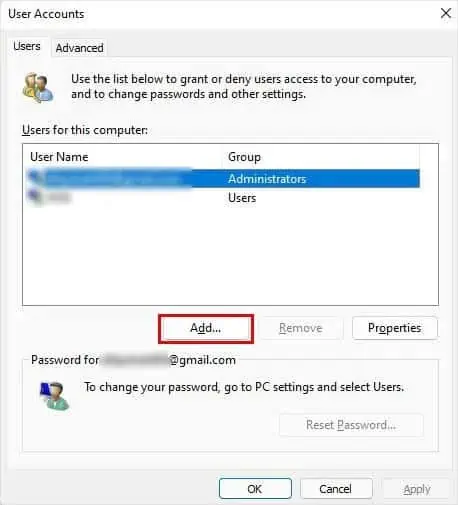
- Type netplwiz in the bar and click Ok. It will open a pop-up window.
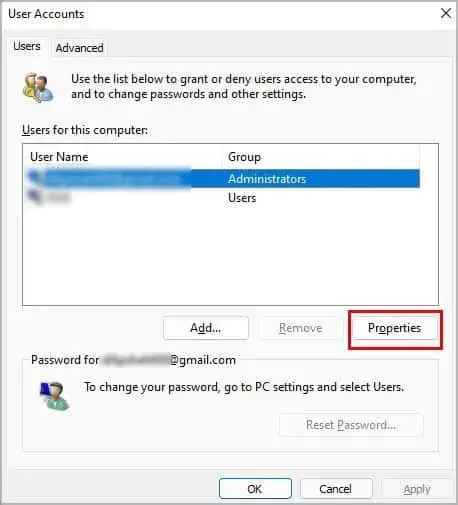
- Now click on the Add option.

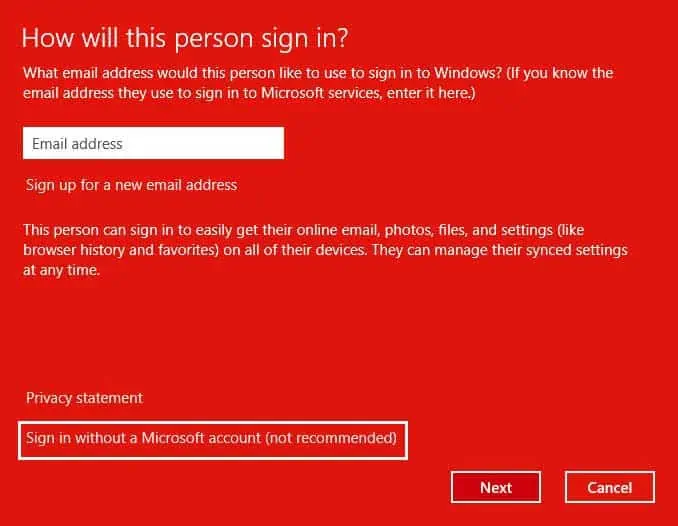
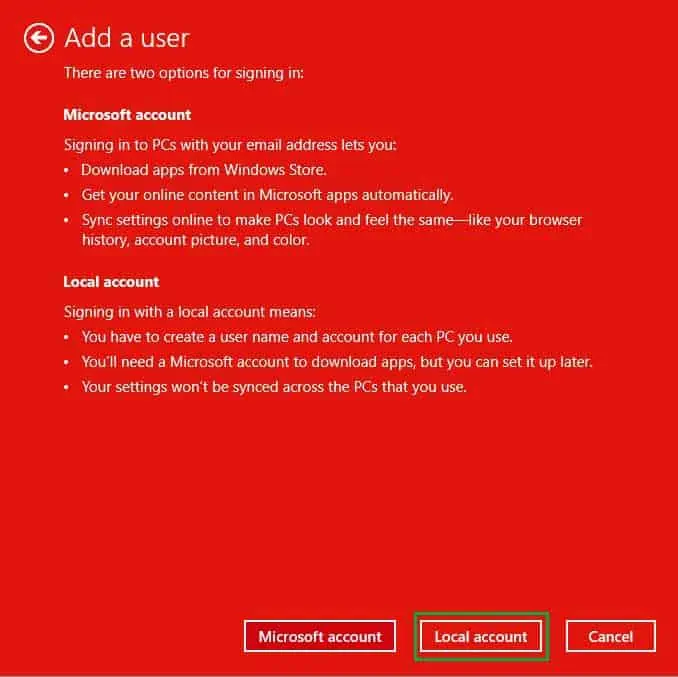
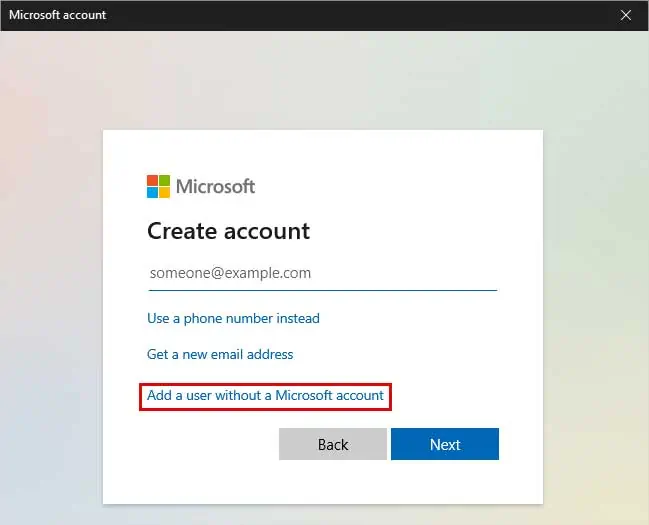
- Here you can use a Microsoft account to create a new user account. But if you don’t want to use a Microsoft account, then click on Sign in without a Microsoft account

- Select Local account.

- Enter the account name, password and hint and click Next. Leave the field empty if you don’t want to set a password.
This will create a new local account. Now, to change the account to an Administrator:
- Select the account you just created and click on Properties.

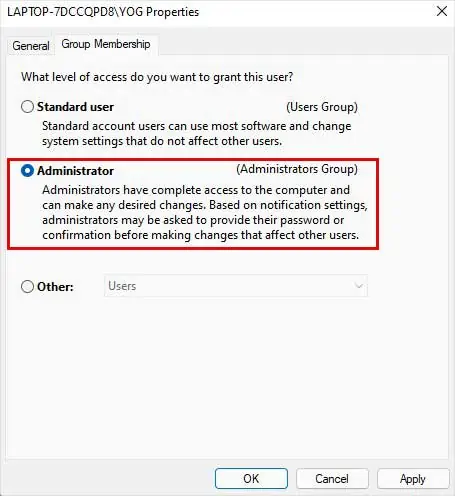
- Switch to the Group Membership panel.
- Change the access from standard user to Administrator and click Ok.

Now the account is added to the administrator groups. Click Apply to save the changes
Via Command Prompt
Command prompt is a text-based user interface that allows you to interact with your operating system. Command Prompt might be the easiest way to create a new administrator account among all the other methods.
- Go to Start and search for cmd.
- Right-click on the program and click the Run as administrator option.
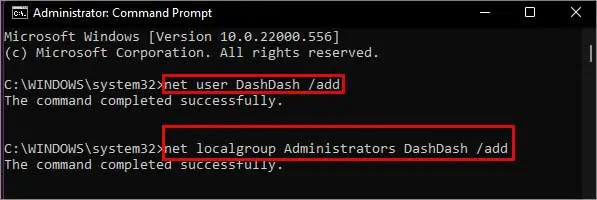
- Now on the command prompt, enter the following command:
net user "name of the account"/add
- This will create a new local account on your windows. Now to assign administrative privilege to it, enter the following command:
net localgroup Administrators "name of the account"/add
Now you’ve successfully added a new administrator account.
Using Local Users and Groups Console
If you’re using other versions of Windows except for the Home Edition. In that case, there’s an additional method through which you can add an Administrator account. For this, you need to access the Local Users and Groups console.
- Press Windows key + R to open Run.
- Then type
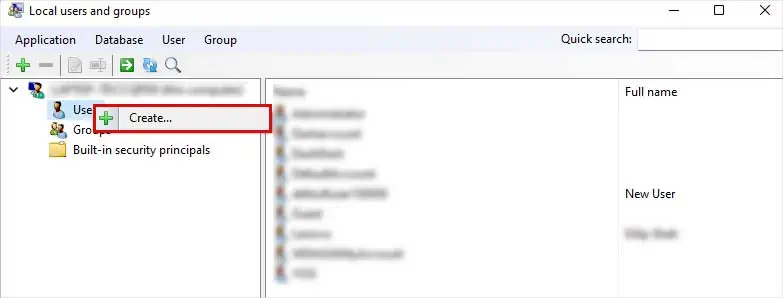
lusrmgr.mscand hit Enter. - After the console opens, right-click on the Users and select New User.

- Now enter the account’s name and password, and don’t forget to uncheck the User must change password at next logon option.
- Click Create and close.
Now you’ve created a new user account which you can see on the right pane.
But similar to the previous method, the account created is a local one. To convert it to an administrator account, you need to add it to the Administrators group.
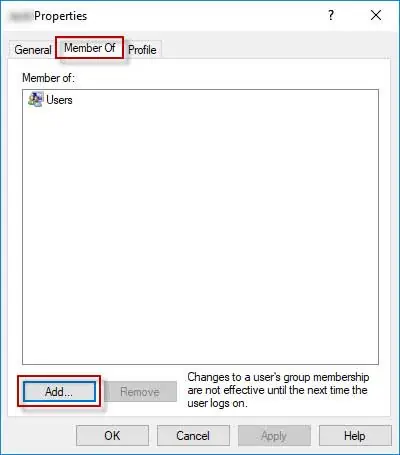
- Double click on the New account. It will open a properties panel.
- Click on the Add button.

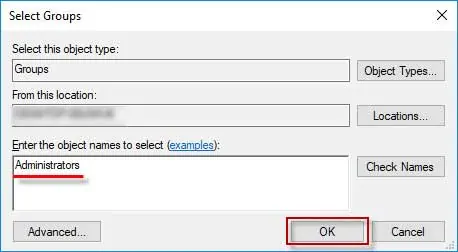
- In the Select Groups window, type Administrators as the object name and click Ok. Now your account is added to the Administrators group.

- Click Apply to save the changes.
Now reboot or shut down the system. And the next time you log in, you can use your administrator account to access the admin privileges.
Related Questions
I Don’t Have a Microsoft Account. Can I Still Create an Account?
If you don’t want to use the Microsoft account, you can still add an admin account. To do so,
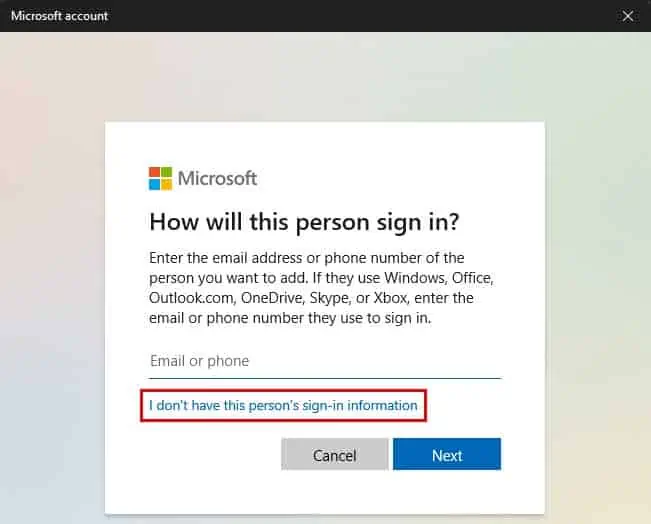
- Click on I don’t have this person’s sign-in information.

- Now click on Add a user without a Microsoft account.

- Fill out the name, password and password hint, and click next.
How to Add an Administrator Account in Macos?
While the process of adding an administrator account in macOS is different, the utility and the significance are the same as the Windows. Adding or editing user accounts in macOS is the same in almost every version. But you need to be logged in as an administrator to do so.
Follow the steps below to add an administrator account to your macOS:
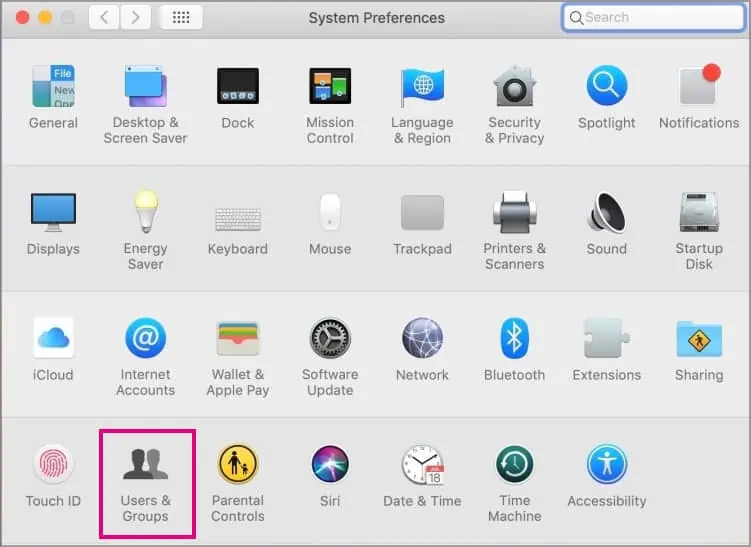
- Go to the Apple menu and click on system preferences.
- Select Users and groups

- Click the lock icon on the bottom left corner of the panel and enter the current admin account detail.
- Now click on the Add button right above the lock icon to create a new user account.
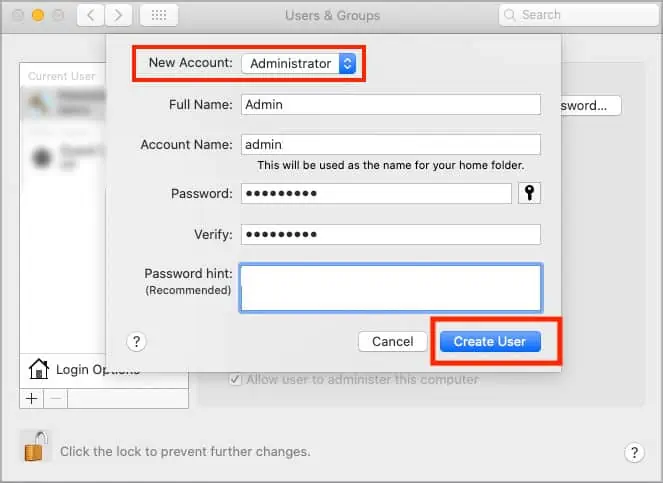
- Click on the new account to open a submenu and choose Administrator.
- Fill out the new administrator account user info and click on Create user.

Can I Change an Already Existing Standard User Account Into an Administrator Account?
Suppose you don’t want to go through the process of creating a new user account and assigning administrator rights to it. In that case, you can convert an existing standard user account into an administrator account.
For this process, you need to open the User Account Settings. After you’ve opened it,
- Click on Family & other users
- Click the user account you want to add as an Administrator.
- In the submenu Account options, click on Change account type.

- Now click on the standard user and select Administrator.

- Click Ok to apply the change.
How to Enable the Local Users and Groups Console in the Windows Home Edition?
There’s no authentic way to enable the Local Users and Groups Console in the Windows Home Edition. What you can do is install the other edition of Windows.

