
Secure Boot is a safety feature that allows the system to only boot using recognized software that has a digital signature. It ensures that the system does not use unsigned software during boot, preventing malware from hooking into the boot loader.
You need to enable Secure Boot to run several applications, including Windows 11 Installation. You can enable Secure Boot on your MSI Motherboard through the BIOS settings. But, there are a few things to consider before you can access the Secure Boot option.
How to Enable Secure Boot on MSI BIOS?
If you are enabling Secure Boot to clean install Windows 11, you first need to set the drive’s partition style to GPT and change the BIOS mode to UEFI. Otherwise, you may get an error message prompting you to change the disk partition style to GPT.
However, if you just want to enable Secure secure boot to protect your system, you can simply start from Enable Secure Boot section.
Convert Partition Style to GPT
Partition style tells the system how the operating system interprets the partition table. GPT or GUID Partition Table is the latest one and more efficient compared to Master Boot Record.
If you have a disk that uses an MBR partition style, you need to upgrade to a GPT partition to install Windows 11.
First, start by checking your current partition Style.
- Open Run by pressing Windows + R key.
- Type in
diskmgmt.mscand press Enter. The Disk Management window should open.
- Right-click on the disk where you want to install the OS.
- Select Properties to open Disk Properties.
- Go to the Volumes tab and check the Partition style.


If the Partition Style is GPT, you can jump to Change BIOS Mode. If the partition style is MBR, you need to change it to GPT.
- Click on the Start menu and press the Power icon.
- Press Shift and click on Restart.
- Once the system boots into Advanced Startup, navigate to Troubleshoot > Advanced options > Command Prompt.
- Type
diskpartand press Enter. - Type
list diskand press Enter to get the status of all your disk. If you have more than one disk, note the number on the disk whose partition style you want to change. That is Disk 0, Disk 1, or Disk 2. - Type
select Disk Xand press Enter. Replace X with the disk number. - Type
Cleanand press Enter to delete all partitions on the Disk. - Now type
convert GPTand press enter.


Enable Secure Boot
MSI BIOS may not give you the option to access Secure Boot settings by default. First, you need to set the BIOS mode to UEFI. Since Secure Boot is only available for UEFI firmware.
CSM or the Compatibility Support Mode allows your system to run older hardware that is not compatible with newer systems. But the BIOS will not have a setting named Secure Boot if the BIOS mode is set to CSM.
To fix this, you first need to change BIOS mode to UEFI. To check the motherboard’s BIOS mode,
- Open Run.
- Type
msinfo32and press Enter to open System Information. - Click on System Summary on the left panel.
- Now on the right panel, check the value corresponding to BIOS Mode. It should say UEFI.


If your BIOS Mode is CSM, you first need to set it to UEFI. If the BIOS mode is UEFI, you can access Secure Boot options in the BIOS.
- Turn on your system.
- Repeatedly press the BIOS key to enter the BIOS. Usually, the BIOS key for the MSI motherboard is the Delete key. If you are on a laptop the BIOS key could be any of the Function keys as well.
- Press F7 to get into EZ Mode.
- Click on Settings and select Advanced.
- Select Windows OS Configuration.
- Set BIOS UEFI/CSM Mode to UEFI.
- Press F10 and select Yes.
- Restart your PC.


Once you have set BIOS mode to UEFI, you can now access and change the Secure Boot option.
- Enter the BIOS by repeatedly pressing the BIOS key during startup.
- Press F7 to go into EZ mode.
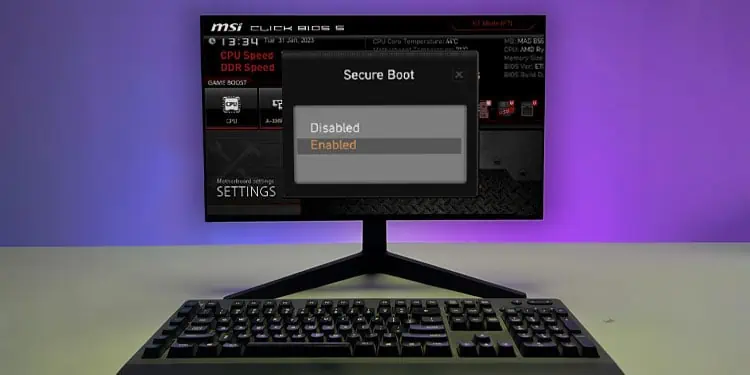
- Navigate to Settings > Advanced > Windows PC Configuration > Secure Boot.
- Here, select Secure Boot and set it to Enabled.
- Press F10 to save changes and exit the BIOS.


If the BIOS displays a message that says System in Setup Mode, you need to be in User mode. To do this, you first need to set Secure Boot Mode to Standard.
- Select Secure Boot Mode and set it to Custom.
- Press F10 to save changes and restart the PC.
- Again, navigate to Settings > Advanced > Windows PC Configuration > Secure Boot.
- Set Secure Boot Mode to Standard.
- Click on Yes if the BIOS asks for confirmation.
- The BIOS will again ask for confirmation that says Reset without saving. Click on No.
- Now, select Secure Boot and set it to Enabled.
- Press F10 to save and exit the BIOS.

How to Check Secure Boot State in Windows?
Once you have enabled Secure Boot in BIOS, you can also check whether the OS detected changes made in the BIOS. You can do this using System Information.
- Open Run.
- Type
msinfo32and press Enter. - On the right panel, check the value corresponding to Secure Boot State.
