
Generally, we use ethernet to get a comparatively more stable connection than WiFi. This is because a cable transmits data in electronic form and has fewer chances of getting lost.
However, most users report that their ethernet doesn’t work properly or keeps getting disconnected. Moreover, netizens claim that their ethernet was initially working fine but got disconnected all of a sudden.
Well, you might be facing this problem due to poor connection or cable breakage. Moreover, your PC may have been affected by malicious programs that interfere with your ethernet connection. Or, it could be when the ethernet on your wall doesn’t work or the ethernet cord malfunctions.
If your ethernet keeps disconnecting, you’re at the right place. In this article, we will discuss why you’re facing this issue and the possible methods to fix it.
Why Does My Ethernet Keep Disconnecting?
Honestly, there can be several reasons why you’re unable to use ethernet properly. Despite being one of the most reliable ways to use the internet, there are a few flaws you might have to deal with. Here are some of the major reasons why your ethernet keeps disconnecting:
- Your ethernet cable might be loose
- An issue with your internet service provider
- Some malicious programs within your PC
- Outdated network adapters
- Your router’s ethernet port isn’t working
- The ethernet cord is not working
Ethernet Keeps Disconnecting – 11 Ways to Fix It
Before moving on with the major fixes, we recommend restarting your computer first. Well, this fixes the general network issues within your system and might make the ethernet work properly.
Next, you can try updating your Windows and check if this resolves your issue. If not, you can follow the easy steps mentioned in this section. However, if none of them works, you might have to contact your ISP.
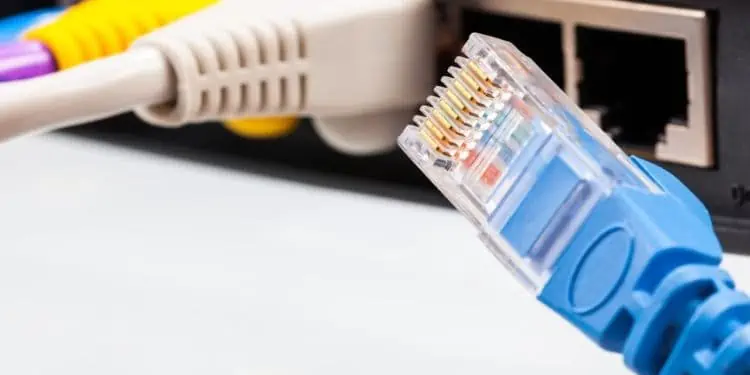
Check Ethernet Cable Connection
Sometimes, you might not see the LED blinking if the cables are left loose. This is an indication that you have been disconnected from the internet.
Moreover, your ethernet cable keeps falling out if the LAN port has been damaged. In this case, you’ll need to take your laptop or CPU to the nearest workshop.
Furthermore, using damaged cables is also responsible for frequent ethernet disconnection. Hence, we recommend checking the following parts:
- Ensure the lights on RJ45 connectors on both your PC and router are blinking.
- Make sure you do not stretch the ethernet cable. Instead, use a longer wire, if available.
- Check for potential port damage on both PC and router.
- Also, check if the ethernet cable’s copper wires, insulation, or jacket are damaged.
- Lastly, properly insert the RJ45 connector on your ports to ensure a proper ethernet connection./li>
Restart Your Router or Modem
If you contact your ISP, they’ll likely ask you to restart your router or modem. This is because your network device cannot keep up with frequently changing IP addresses in many devices. So, restarting will help clear memory and reset everything that wasn’t working properly.
To restart, all you have to do is press the power button of the router or modem. Then, wait for a few minutes and turn it back on.
If restarting doesn’t solve your problem, you can press the reset button and configure the router settings from scratch. However, this might consume a lot of your time. So, we suggest trying out other fixes from below.
Enable Automatic DHCP
Sometimes, it’s best to let the DHCP server assign IP addresses automatically. This is because the static IP address doesn’t change and can threaten your network security. So, here’s how you can enable the Automatic (DHCP) option in Windows 11:
- Navigate to Settings > Network & Internet > Ethernet.

- Next, expand Network and click on the Edit option next to the IP assignment.
- Now, choose Automatic (DHCP) and press the Save button.


Configure Power Management Option in Network Properties
By default, when your computer turns off or goes to sleep, it disables the network adapter too. So, you often notice that your ethernet is disconnected when you power on your PC again. Nonetheless, tweaking dedicated settings in Network properties will solve this problem:
- Search for Device Manager from the Start Menu.
- Expand the Network adapters drop-down and right-click on your adapter to choose Properties.
- Next, go to the Power Management tab. Here, uncheck the Allow the computer to turn off this device to save power option.
- Finally, click on the Ok button and check for the changes.


Disable Advanced Options on Network Properties
When connected via ethernet, features like Energy-efficient Ethernet, Wake on Magic Packet, and Green Ethernet is enabled by default. Here’s what each of these advanced options does:
- Energy-efficient Ethernet: This feature is useful for saving power when connected via ethernet. However, your network performance might degrade because of the additional latency.
- Wake on Magic Packet: This feature wakes your network adapter when your PC receives a ‘magic’ packet. So, certain malfunctions when sending or receiving packets may cause internet issues.
- Green Ethernet: This is a great feature to disable the LED and save power consumption. This way, the internet speed can be improved when connected to ethernet.
Indeed, disabling all these options can fix the ethernet issue. Here’s what you need to do:
- Press Windows + X keys and run Device Manager as an admin.
- Expand the Network adapters option and right-click on the appropriate ethernet driver to choose Properties.
- Now, navigate to the Advanced tab.
- Under Property, find and click on Energy-efficient Ethernet.
- Then, move to the Value section and select Disabled from the drop-down.
- Similarly, choose Wake on Magic Packet and select Disabled.
- Again, click on Green Ethernet and disable it.
- Finally, press the Ok button and check if your ethernet is now working fine.


Turn Off Proxy Server For Your LAN
Many users adopt proxy servers for their LAN to add additional security when surfing the world wide web. However, these web filters and firewalls can prevent certain functions of the ethernet connection from properly functioning. So, we recommend turning off this setting temporarily:
- Launch Control Panel from Start Menu and go to Network and Internet.
- Then, choose Internet Options.
- Once the dialogue box appears, click on the Connection tab and press the LAN settings button.
- Under Proxy Server, uncheck the Use a proxy server for your LAN option and hit Ok.


Uninstall VPN Software
Any VPN software allows you to connect to a different server to protect your IP address. However, your internet speed can significantly slow during the encryption process, whether connected via ethernet or WiFi.
Hence, this could be why your ethernet is disconnecting from time to time. So, if you have setup VPN in Windows 11, you can simply uninstall them:
- Press Windows + R and type ‘control’ to launch Control Panel.
- Under Programs, click on Uninstall a program.
- Now, find the VPN software from the list and right-click on it.
- Choose Uninstall and wait until the program is removed from your computer.


Disable Microsoft Defender Firewall
The major role of the Microsoft Defender Firewall is to block unrecognized network traffic on your PC. So, there’s a probability that your ethernet can face issues. So, we recommend disabling this option:
- Open Settings using the Windows + I keys.
- From the left panel, choose Privacy & Security and go to Windows Security.
- Under Protection areas, click on Firewall & network protection.
- Once the Windows Security launches, click on Domain network.
- Next, toggle off the button under Microsoft Defender Firewall.
- Then, go back and choose Private network. Turn off the Microsoft Defender Firewall for this network as well.
- Again, go back to choose Public network and turn off the feature.


Run Network Adapter Troubleshooter
If none of the above fixes worked, you could try troubleshooting the underlying network issues. This should resolve anything stopping you from using your ethernet connection properly. Here’s how you can run the dedicated troubleshooter on Windows 11:
- Navigate to Settings > System > Troubleshoot.
- Next, tap on Other troubleshooters.
- Find Network Adapter and click on the Run button.
- Wait for several seconds for the troubleshooter to detect issues.
- Now, choose Ethernet and click on Next.
- Again, wait for several seconds for the troubleshooter to look for problems.
- Once the problem is identified and fixed, close the troubleshooter and check for your ethernet issues.


Update Your Network Adapter Driver
If troubleshooting didn’t resolve your issue, it’s probably because of an outdated network adapter driver. Go through the general steps below to update it:
- Press the magnifying glass and search for Device Manager.
- Once the window launches, expand Network adapters and right-click on your ethernet driver.
- Now, choose the Update driver.
- Next, click on the Search automatically for drivers option.
- Wait for a few seconds, and your driver should be updated.
- Also, try searching for the latest driver on Windows update.
- Finally, close the troubleshooter and check if the problem still exists.


Perform Network Reset
Well, the final method is to perform a network reset. This will not just solve the ethernet issues but also resets the entire network and resolves all your network-related problems. The following guide will teach you the simple technique to do it:
- Go to Settings > Network & Internet > Advanced Network Settings.
- Under More Settings, choose Network Reset.
- Then, click on the Reset now button.
- Finally, choose Yes, and your PC will be restarted. This removes all the network adapters and sets them to default.


