
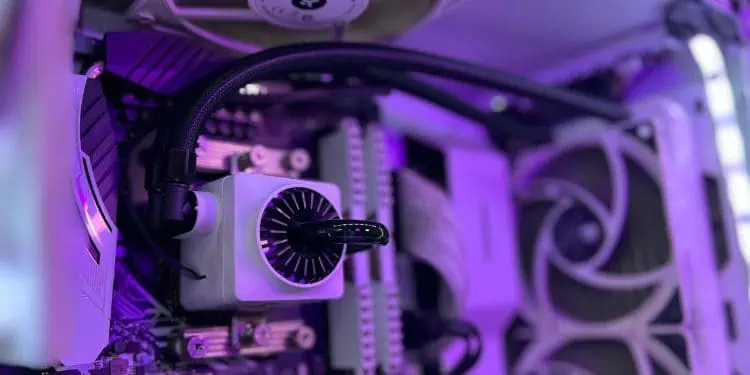
An AIO pump is responsible for circulating liquid throughout the cooler and needs to run at a constant rate. If it fails to work, you’ll notice a sudden rise in the CPU temperature. To prevent further damage, the heat sensors will cut the power and the PC will eventually shut down before you even enter the login screen.
Although an AIO (All-In-One) cooler is comparatively easy to set up than custom-built liquid cooling systems, beginners may find it challenging to recognize and manage the connections. Apart from that, unconfigured BIOS settings and mounting positions could also be responsible for a problematic pump.
Before anything else, we recommend adjusting the right fan mode and setting its speed to 100%. In case the AIO pump is not showing in BIOS, you can move ahead and examine the cables, headers, and their connectivity. Without further delay, let’s look into each of these fixes in detail.
Configure Fans in BIOS
You need to connect the pump cable to its dedicated AIO_PUMP header. Since this might be absent on some motherboards, you may opt for a fan header instead. In most cases, the pump works fine, but there can be times when you’ll need to manually change the fan speed.
While high-end motherboards support 4-pin headers, some only come with three pins. This means that the latter doesn’t support PWM. Regarding the same, if you’re attaching a 3-pin connector to a 4-pin header, you should opt for the DC mode. But for a 4-pin connector attached to a 4-pin header, you can set it to the PWM mode.
Depending on the pump connector’s pin configuration, kindly set the fan mode and speed in BIOS as narrated below:
- Start your computer and press the boot menu key as soon as you see the manufacturer’s logo. This should take you to the BIOS interface.
- Next, get to the Hardware Monitor section.

- Under Fan Control settings, check whether the pump is detected. As shown below, if there’s a connectivity issue, you’ll notice 0RPM.
- If the speed is relatively low, kindly set the appropriate mode first. Choose PWM if your motherboard has a 4-pin header and DC mode if it has a 3-pin.|
- Now, set the RPM to maximum speed. If you do not have such an option in your BIOS, choose the All Full Speed (F) as demonstrated here.
- Finally, save this setting, and the AIO pump should now function.


Note: Since you’ve increased the speed, you may even start hearing bubbling or gurgling noises. If you’re not a big fan of this sound, kindly reduce the speed slightly.
Update Your BIOS
If you’ve installed AIO for the first time or recently replaced the pump, we recommend flashing a new BIOS. This adds compatibility to the new component and fixes any bug that could be tinkering with the pump.
Caution: Power interruptions during an update can corrupt your BIOS and in the worst case, brick the motherboard.
- Use another PC to download the latest BIOS version for your motherboard.
- Insert a USB flash drive of at least 8 GB capacity, and format it in FAT32.
- Now, transfer all the downloaded contents to your drive, and unplug it.
- Once done, restart your target computer, and get into the BIOS using the dedicated boot key.
- Insert the flash drive into this PC.
- As shown below, get to the M-Flash section.
- Hit the Yes button to get to the M-Flash interface.
- Here, select the update file and proceed with the on-screen instructions to complete the BIOS flash.
- Once the update is complete, your computer will reboot and the AIO pump should also start running.


Ensure Proper Connectivity

Sometimes, your PC won’t recognize the pump even after a BIOS update. If that’s the case, there are probably issues with the motherboard connection.
First, ensure the component is receiving enough power. Some AIO pumps have a 15-pin connector where you can appropriately plug an available SATA cable from your PSU. If you have a modular power supply, kindly plug a SATA cable into the respective ports securely. Note that this requires a little more force and should properly click into the slot.
Along with SATA, you also require plugging the tach cable (3-pin or 4-pin) into the dedicated AIO_PUMP header. The labels might be different based on your motherboard. For example, the ASRock X370 Taichi has a CHA_FAN3/W_PUMP label for your AIO pump connection.
Since such headers may not be embedded on all motherboards, it’s best to refer to your AIO manual to know the right one. Otherwise, you can utilize any fan header (CPU_FAN, SYS_FAN, CHA_FAN, CPU_OPT, etc.,) as all of them are capable of powering your AIO pump.
In case it doesn’t work or you experience other issues, try an alternative one, which should do the trick. In general, it’s best to use the CPU_FAN header for your radiators and an optional one for the pump.

Some even prefer connecting all the components to a FAN HUB. For example, most Corsair-based AIOs provide their users with Commander Core, where you can plug in all the pump, fans, and RGB cables. So, if it’s actually a power issue, the RGB and radiators will also stop working.
For this purpose, kindly ensure connecting the hub cables (SATA or Tach or both) to the respective motherboard headers. You may even join the power connectors like SATA or Molex directly to the PSU.
Note: Some AIO coolers also come with a Micro USB-B connector. This is responsible for controlling the RGB on the cooler. Thus, if you’re experiencing issues only with the AIO pump lights, ensure you’ve securely connected it to the dedicated USB header.
Examine Damaged Cables and Headers

When ensuring proper connectivity, you may notice that the tach cable or the headers might be damaged. In that instance, your PC may not recognize the components, and the AIO pump will simply not work.
To confirm this, kindly examine each header and cable. Look for worn-out wires or bent/broken pins on your motherboard. While you’re at it, also check whether the locking mechanism in fan headers is damaged.
If you find any of the things mentioned above, we advise changing the cable or using a different header. In case that’s not possible, the final option would be repairing or replacing the pump.
Remount Your AIO
Air bubbles may get injected inside if you haven’t mounted the AIO pump correctly. Clearly, this is a bad sign and in the worst case can permanently damage the component. In such scenarios, you might even hear a grinding or shredding noise from the pump.
A basic solution is to lay down the PC on one side for a few minutes and sit it up again. Repeat the process several times, hoping for the air bubbles to come out of the pump and for the void to be filled with liquid.

If the general technique doesn’t help, you’ve probably mounted the AIO inappropriately. So, we recommend reconnecting all the cables and reseating the pump. While doing so, kindly mount it conveniently such that no air bubbles get trapped inside. Also, do not forget to reapply the thermal paste when reseating the pump.
You may learn and adopt different positions for the pump, radiators, and tubings. Ensure you mount them appropriately considering the casing size. An ideal position is to place the radiators in front with the tubes down. Also, you may opt for the radiators at the top (above the pump) and tubes facing downwards.
Although there’s no rule to mounting an AIO cooling system, there are definitely a few positions you should avoid. Usually, we do not recommend placing radiators vertically or downwards with tubing at the top. Instead, you can opt for any of the mounting positions mentioned in your AIO manual for the best results.
Repair or Replace the Pump
If none of the solutions worked out, your AIO pump is probably dead due to different reasons. While it’s possible to repair the component, you may require professional skills for the same.
Also, this depends on the AIO pump’s construction. You might need to clean, reassemble, or even replace the heat plates, impeller, and other bearings. Therefore, it’s best to check the warranty and contact the hardware shop from where you got the AIO.