
Whether your fan is spinning too fast producing loud noises or is too slow leading to overheating issues, you’ve probably wanted to take control of its speed.
Since PC fans work in relation to the system temperature, you need to set appropriate voltages or pulses (depending on the type of your fan) in order to change their speed manually. Let’s go through the different ways to do that.
Use Fan Utility in BIOS
Let’s start with the most simple yet effective technique. If you’re trying to change your computer case fan speed or even adjust the CPU fans, you can achieve this directly from the BIOS utility. Just understand this way–only those connected to your motherboard can be controlled using the motherboard firmware.
I’m particularly talking about PWM (those with four pins) and DC (those with three pins) fans. The former offers much more precise control by adjusting the duty cycle (in percentage). On the other hand, DC fans work on varying voltage levels, which is comparatively difficult to control.
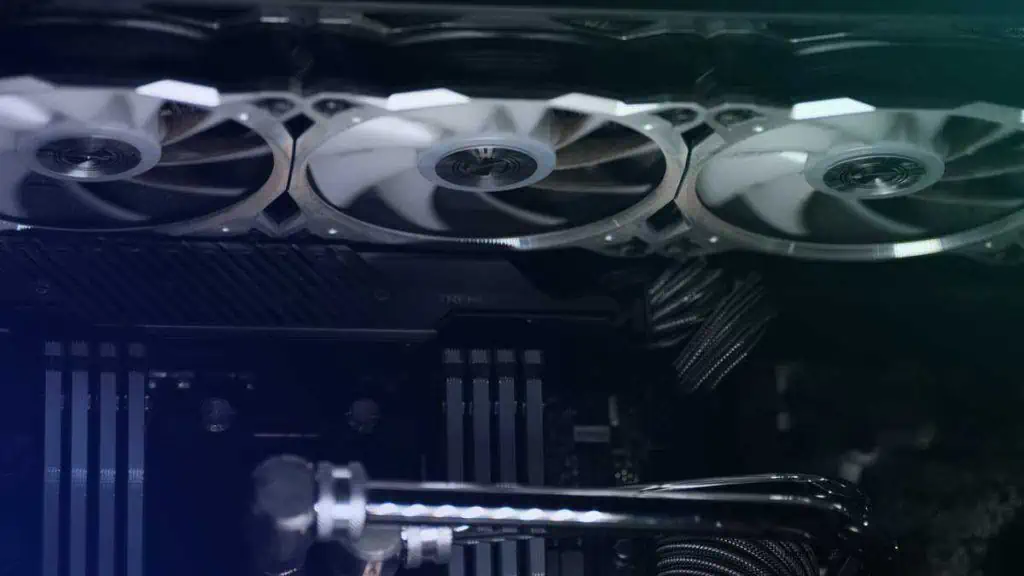
Before anything else, ensure that your PC fans are connected to the respective headers. Your case fans usually go in the SYS_FAN or CHA_FAN, and the CPU fans in the CPU_FAN header.
Now that you’re aware of the basics, let’s go through the following points to understand how to control the PC fans in BIOS. Do note that the exact steps vary on different motherboard manufacturers and their models. So, the following instructions will only give you a basic idea:
- First of all, start/restart your system and enter the correct key to access the BIOS interface when the PC is POSTing. It could be F1, F2, F7, Del, or Esc key depending on the manufacturer and model.
- Depending on your motherboard BIOS, find and get to the dedicated fan utility. This might be Smart Fan Mode, Hardware Monitor, QFan Tuning, Fan-Tastic Tuning, etc.

While different motherboards have separate names, they offer the same features–customizing fan speed, setting up manual fan speed curves, applying a specific control mode, or even setting a minimum duty cycle. - Once you’re on the dedicated page, you can now opt for automatic or manual fan speed control.
You may directly choose any one of these options–Normal/Standard, Silent, Turbo, or Full Speed based on your preference. The first two usually make the fans run slowly while the latter two will increase their RPM. - Some motherboards even support an automatic fan-tuning feature. For example, ASRock’s Fan Tuning lets you detect the lowest fan speed and set the minimum duty cycle automatically.
Interestingly, some modern Intel-based ASUS models (having Z690, B660, Z590, and Z490 chipsets) offer an option called AI Cooling. This sets the optimal settings based on the current temperature and system load. - To manage fan speed based on the source temperature, most modern motherboards support Fan Speed Curve.
You can tweak the nodes/points to plot a custom curve. While you’re at it, set the mode to PWM if your fan has four pins and DC if it has three pins. - If you’re seeking to change your fan speed to default values, there should be a dedicated option for that. Also, you should find individual fields to run your fans at full RPM or clear the recently set configuration.
- Once you have adjusted your fan speed settings, make sure you save them before exiting from BIOS.


We have already prepared dedicated guides that should help you tweak fan speed in some popular motherboards. Here’s a summarized table that includes the dedicated BIOS key, their fan utility, and recommended software (which I will discuss ahead).
| Motherboard | Possible BIOS Menu Key | Fan Utility in BIOS | Recommended Software |
| MSI | Del or Delete | Hardware Monitor (with Smart Fan Mode) | MSI Center, MSI Dragon Center |
| ASUS | Del, F2, F9 | Q-Fan Control (inside H/W Monitor), Q-Fan Tuning, AI Cooling, FanXpert | ASUS AI Suite, Armoury Crate |
| ASRock | Del, F2 | Fan Tuning, Fan-Tastic Tuning | A-tuning, ASRock Motherboard Utility |
| Gigabyte | Del or Delete | Smart Fan | Control Center, App Center, Easy Tune |
Tune Fans From Motherboard Application
Controlling the fan speed from your motherboard’s BIOS is always the best option and I suggest the same. But if you’re a normal user who isn’t comfortable tweaking the settings from the firmware level, you can always use your manufacturer’s recommended application.
While I’ve already mentioned the list of programs for the most popular motherboards (in the above table), they are not guaranteed to be compatible with all the available models. Your manufacturer could have released a separate application specifically for your model, which might not work on others.
For that reason, I always recommend downloading the installation file directly from the manufacturer’s website instead of opting for third-party solutions.
The specialty of motherboard applications is that you get access to most of the features that are available on your BIOS interface. Say, for example, if you wish to set a fan speed curve on MSI, MSI Center lets you do so with ease.
Apart from that, these apps can even provide advanced features for better hardware monitoring and optimal customization. In fact, some even allow you to change GPU fan speed, which is another discussion altogether.
Here’s a basic idea of how to control PC fan speed using motherboard software:
- First of all, navigate to your manufacturer’s website, search for your model, and get to its Support section.
- Look for the recommended software (should be under Drivers & Utility), download it, and complete the installation.
- Get to the dedicated fan control section. This differs for every software and for some, you may even require installing a dedicated feature (for example, User Scenario in MSI Center).
- Now, you may either choose an existing speed control mode or customize the fan speed curve. Interestingly, some even allow you to set a custom duty cycle. For instance, Gigabyte’s Control Center lets you set Start and Stop fan temperatures.
- Finally, save the changes (if required) and your fans should rotate per your customized input.


Set Up Fan Control Using OEM Software

If you’re still looking for a software solution after not finding a compatible motherboard app for your model, you can try your fan manufacturer’s software.
Trusted cooler brands, like Corsair, AMD, and Cooler Master all offer dedicated utilities that let you adjust the speed, control fan RGB, and other advanced features.
But do note that software meant for one brand isn’t compatible with the other. So, make sure you download the appropriate one, directly from the official website.
Once you have installed the program, navigate to the dedicated fan section to tweak the fan speed. As with the earlier methods, you should find both automatic and customized settings, including the option to set Fan Speed Curve.
- Corsair: Corsair iCUE
- AMD: AMD Software: Adrenalin Edition
- Master Cooler: MasterPlus+
- Zotac: ZOTAC Firestorm
Try Trusted Third-Party Programs

These days, you can find several third-party applications that let you fine-tune your fans, ensuring high performance with minimal noise. They utilize smart features that are sometimes even better than the options available in your BIOS or the manufacturer-recommended programs.
These are some of my favorites–Speed Fan, FanControl, Argus Monitor, and AIDA64. While there are various tools available, here’s a list of the ten best fan control software in detail.
Opting for software solutions (whether it’s recommended by the motherboard, OEM, or a third party) does offer advanced-level fan speed customization. However, it also has some drawbacks.
Since these applications require specific software drivers, the applied configuration will only work after the OS boots up. Therefore, if you’re experiencing issues on startup, they might not be the best choice.
Customize Cooling Policy in Windows

Another possible way to gain automatic control over your fan is through the operating system’s cooling policy. In Windows, you can do so by choosing either of the two options–Active or Passive.
If you set the field to Active, the PC fans start running faster before proceeding to slow down the processor. This way, you achieve better performance as the increased fan speed allows the CPU to cool down slowly. And in some cases, the policy doesn’t even have to bother slowing down the system.
However, if you want reduced fan noises, it’s wise to set the cooling policy to Passive. When doing so, you’re going to get a significant hit in the system performance as this will slow down the processor first before increasing the fan speed.
While this isn’t the direct way to control the fans, it certainly is a great choice at the software level. If you haven’t previously tweaked the System Cooling Policy, the option in your Control Panel is probably disabled by default.
So, you need to manually enable it by changing the registry value first. Here’s a simple guide on how to set up System Cooling Policy on Windows.
Get a Hardware Fan Controller

If your PC case has a built-in fan controller, you can directly adjust the speed via its dial/switch. Also, you may set it to automatic and this will auto-tune the RPM based on the current system temperature.
Since you do not have to bother about getting to BIOS or opening a certain application, this certainly is one of the fastest ways to control fan speed. Without a doubt, it’s highly accurate and can help in achieving optimal cooling performance as well as reduced noise levels.
Some hardware controllers, as demonstrated in the picture above, let you connect multiple fans. All you have to do is insert the 3-pin/4-pin fans into the respective headers.
Then, connect the controller’s fan cable to the motherboard header. It’s best to go for CHA_FAN, SYS_FAN, or even CPU_OPT (if it’s free). This way, you can control the speed of every fan in your PC in one go.
Even if your PC does not have a dedicated fan speed controller, you can install one quite easily. However, if you’re not willing to empty your pockets, you can stick with the prior methods.