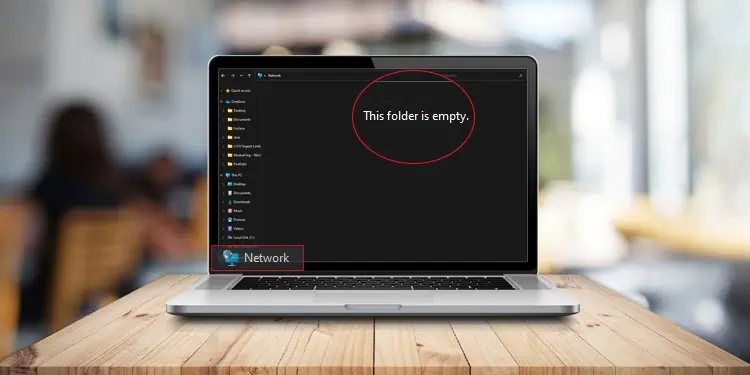
While networked computers offer flexibility in sharing resources, it can be a stumbling block when they do not appear in the network. Many users reported that they encountered the error after the v1803 and v1809 Windows updates.
But despite the Windows update glitch, there are several other causes, like misconfigured network discovery settings and crashed FDPHOST service responsible for the error.
The best way to overcome the problem is by changing network discovery protocol settings and automating FD provider host service. However, if it does not solve the problem, you need to explore further fixes in this article.
How to Fix Computers Not Showing Up on Network?
Before moving to the fixes section, you can first try restarting the computer and router. It helps wipe the glitches that may be preventing computers on the network from showing up.
Here, we have compiled a list of 9 fixes to help you solve the problem. Let’s get straight into them.
Roll Back Windows Update
As we already mentioned, many people faced this error after a recent Windows update. If you are one of them, you should try uninstalling the updates. The updates might probably be glitchy, and you are encountering the error.
- Hit Windows + R.
- Type
controland press Enter key. - While on the home page of Control Panel, navigate to Programs > Programs and features.
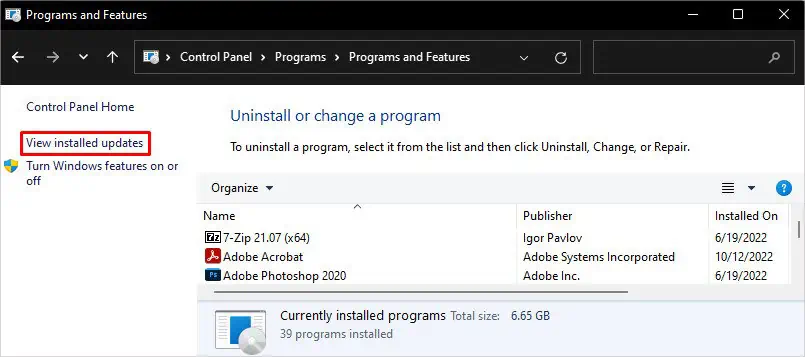
- On the left-hand side, click View installed updates.

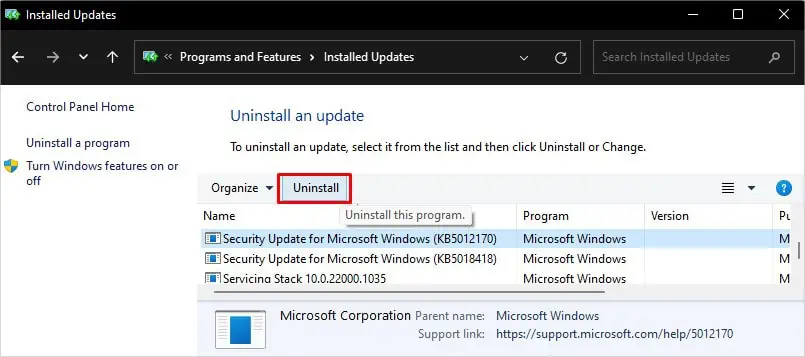
- From the list of updates, choose the most recent update and click Uninstall button on the top.

On the contrary, an outdated version of Windows can also cause the issue. You can check if your computer has any updates available and update it to the latest version.
- Press Windows + I keys at once.
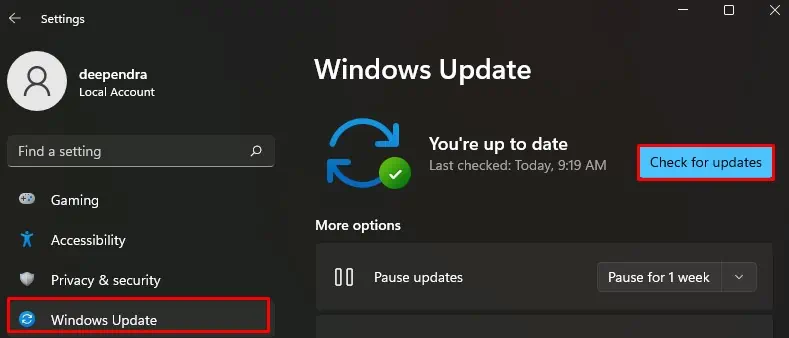
- Choose Windows Update from the left section.
- Then click Check for Updates button. If found, it will download and install the latest updates to your computer.

Ping a Networked Computer
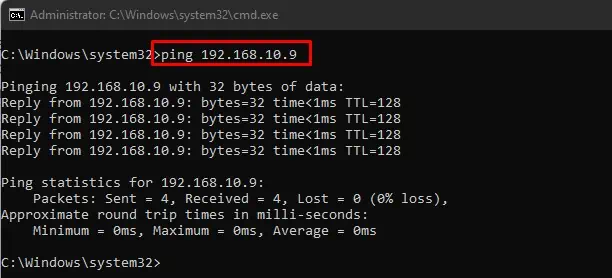
When devices on the network are not showing up on your computer, you can run a ping test to check the connection status. If the ping test returns the exact bytes you sent from your computer, the connection is alright; otherwise, there is an error.
- Get the IP address of the computer you want to ping, meaning grab the IP of the computer that is not showing up on your device’s network settings.
- First, go to the computer whose IP address you want.
- Open Run by hitting Windows + R.
- Type
cmdand press Ctrl + Shift + Enter to open elevated Command Prompt. - Click Yes in the UAC popup.
- Type
ipconfigcommand and hit Enter. Note down the address beside IPV4 address.
- Now come to the problematic computer and open Command Prompt similarly.
- Type
ping IP address. Example: “ping 192.168.10.9”
- Check the sent and received bytes. If they are the same, the connection is alright. Else, you need to move to the fixes below.
Run Network Troubleshooter
Windows integrates a Network troubleshooter that helps identify and diagnose any issue that persists within the network. If it detects the problem, it helps resolve the error without your intervention.
- Press Windows + I simultaneously.
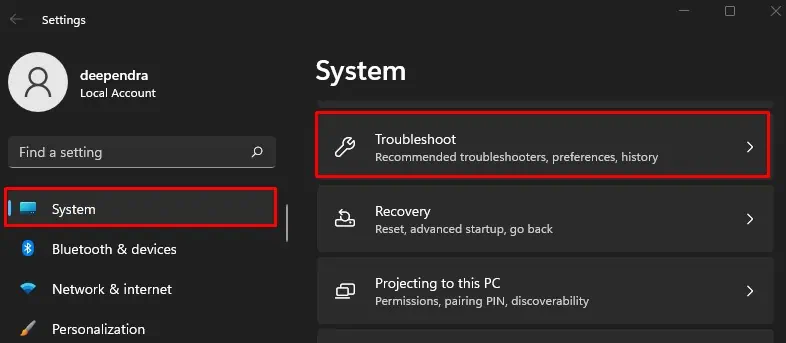
- Choose the System menu from the left and Troubleshoot from the right.

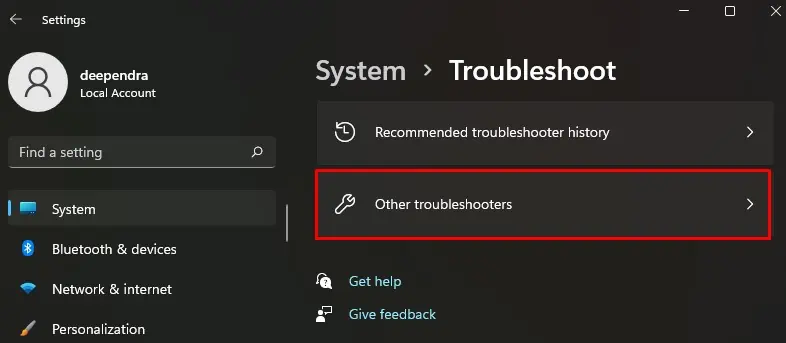
- Click Other troubleshooters.

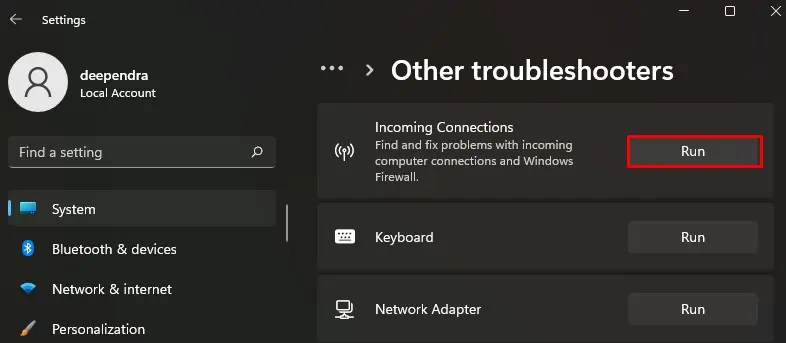
- Locate Incoming Connections and click Run button.

- Then follow on-screen instructions to resolve the issues.
Enable Network Discovery
You should enable Network discovery in order for your device to be detected on the network. If disabled, you can not see computers in the network, nor can others see you. They are, by default, disabled in Windows as a security concern. However, you should enable it to show up on the network.
- Open Run by pressing Windows + R.
- Type
controland press Enter. It opens Control Panel. - Navigate Network and Internet > Network and Sharing Center.
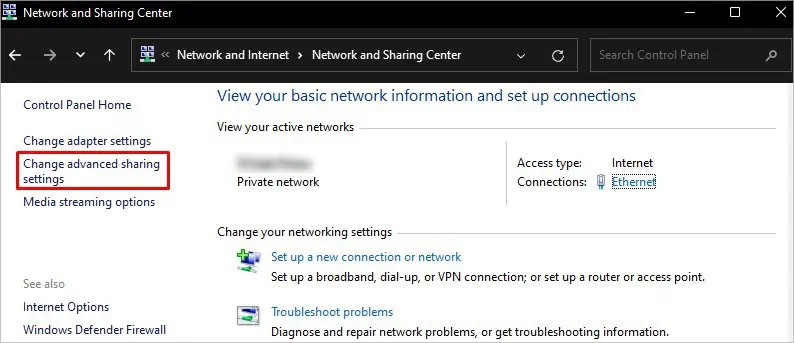
- Click Change advanced sharing settings on the left-hand side.

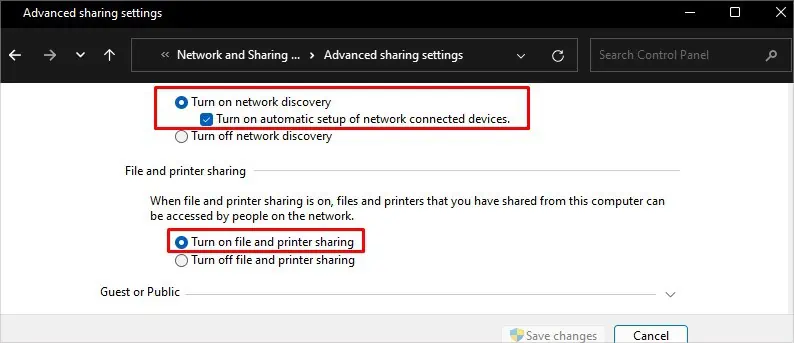
- Click on Turn on network discovery and Turn on file and printer sharing under both dropdowns: Private and Guest or Public.

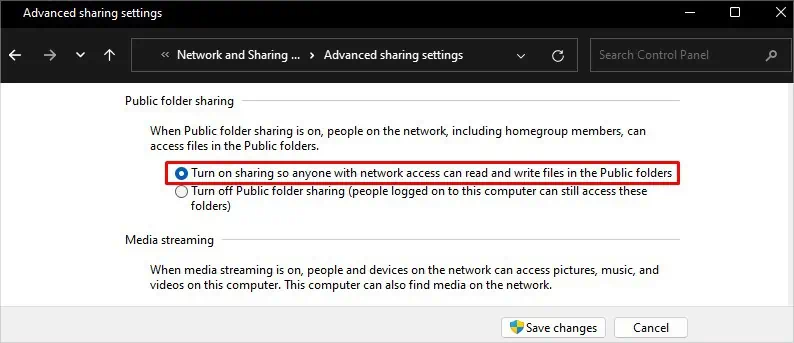
- Next, click the All Networks dropdown and check Turn on sharing so anyone with network access can read and write files in the Public folders.

- Click Save changes.
Allow Network Discovery Protocol Through Firewall
If turning on the network discovery did not work, don’t get disappointed. Sometimes, Windows Firewall blocks the network discovery feature, and you can not see computers on the network. Windows Firewall does so to protect your files and folders from any unauthorized access. But, this can cause problems, and you need to allow network discovery through Firewall.
- Open Control Panel.
- Choose System and Security > Windows Defender Firewall.
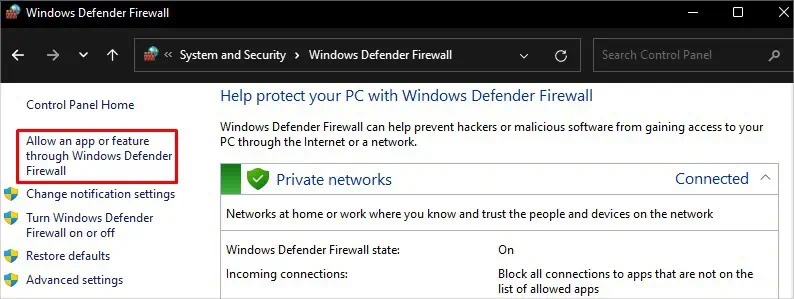
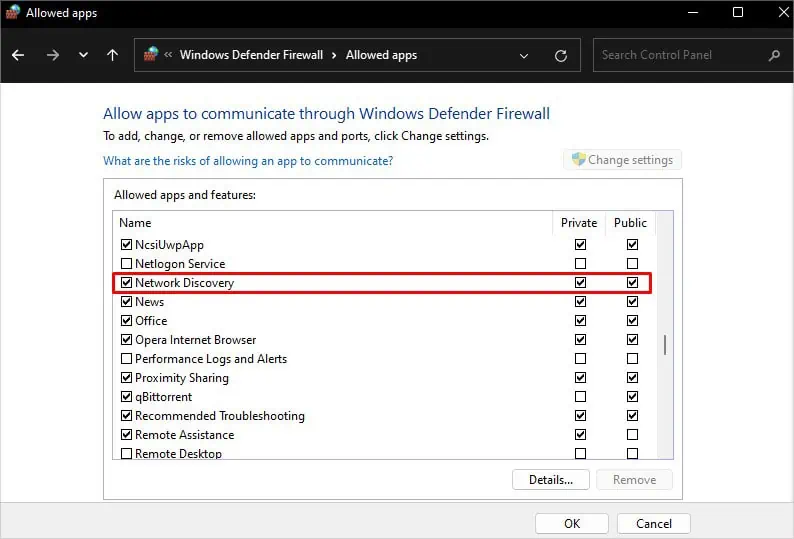
- Click Allow an app or feature through Windows Defender Firewall on the left pane.

- Click Change settings button.
- Scroll down to Network Discovery and check both, Private and Public.

- Click OK.
If you wish, you can also use a simple command to do the same that you just did in the GUI interface.
- Open Command Prompt with administrator privileges.
- Then copy and paste this command and hit Enter key.
netsh advfirewall firewall set rule group="Network Discovery" new enable=Yes
Add Your Computer to Workgroup
A computer must be added to a workgroup so that it can share and access resources like files, folders, and printers over the network. If networked computers are not showing up on your device, you may not have added your computer to the workgroup. Here’s how you can add it:
- Hit Windows + I.
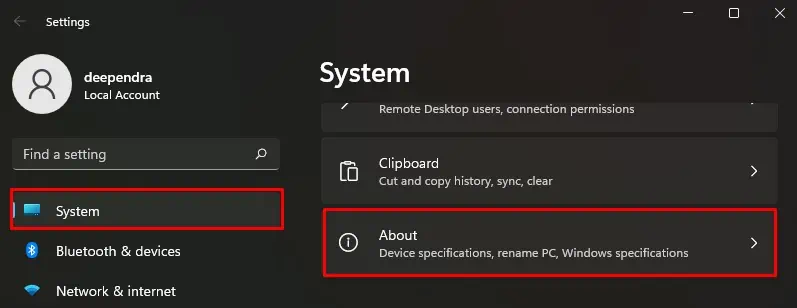
- Choose System > About.

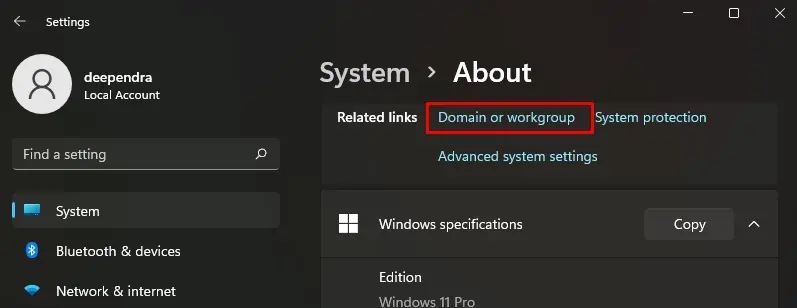
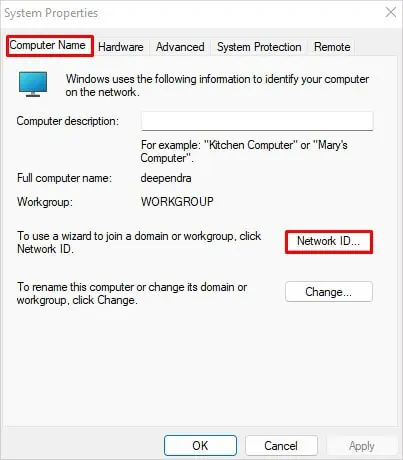
- Click Domain or workgroup. It will open System Properties window.

- Click Network ID under Computer Name tab.

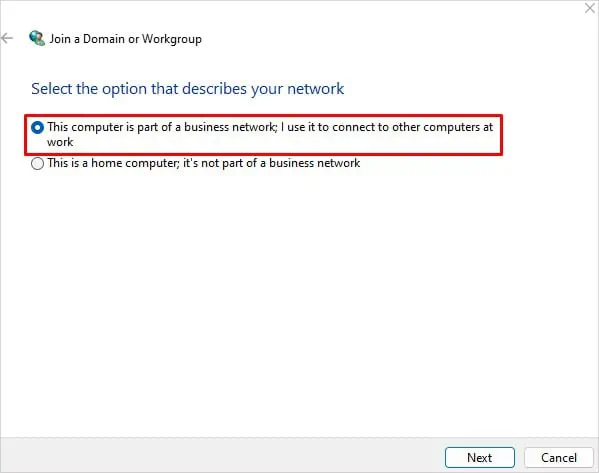
- Choose This computer is a part of a business network; I use it to connect to other computers at work and click Next.

- Then choose My company uses a network without a domain and click Next.
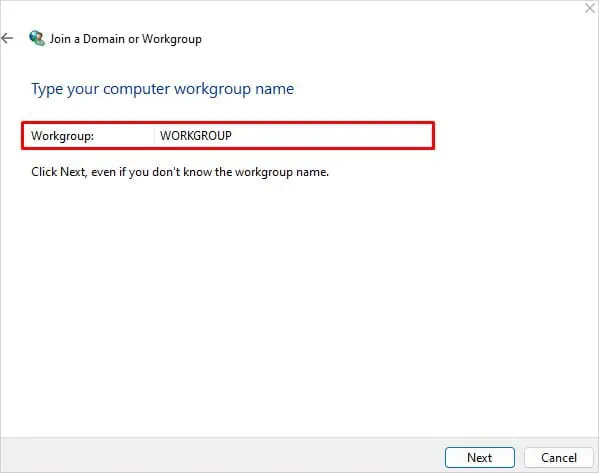
- Enter name of your workgroup and click Next > Finish. Your computer will restart and be added to the workgroup.

Automate FD Provider Host
The FDPHOST (Function Discovery Provider Host) service on Windows is responsible for handling the network discovery protocols. Sometimes this service crashes and stops itself, which can create issues with network discovery.
Moreover, this service is not set to start automatically after a boot, which requires you to start it manually to use the network discovery feature. So, putting the startup type to Automatic should solve the problem.
- Hit Windows + R.
- Type
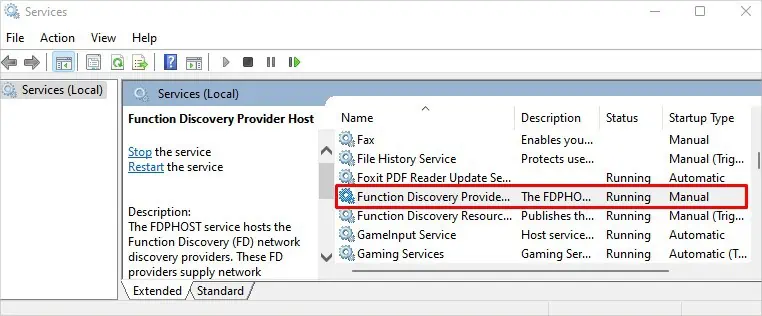
services.mscand hit Enter key. It opens the Services application. - Scroll down to Function Discovery Provider Host.

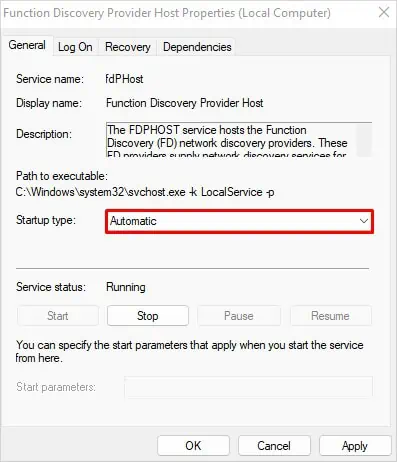
- Double-click over it and select Automatic on Startup type dropdown.

- Click Apply > OK.
Enable CIFS File Sharing
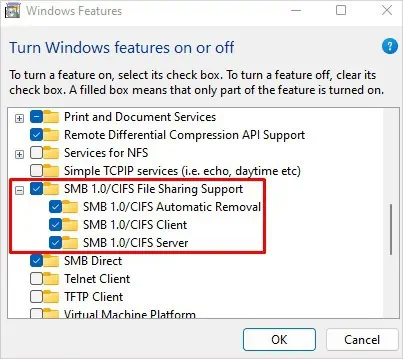
Common Internet File System (CIFS) is an IP-based protocol used for file sharing over the network. When this feature is disabled, you can not see computers on the network. This protocol must be enabled on your Windows feature settings so that you can share and give access to shared files over networked computers.
- Launch Control Panel on your PC.
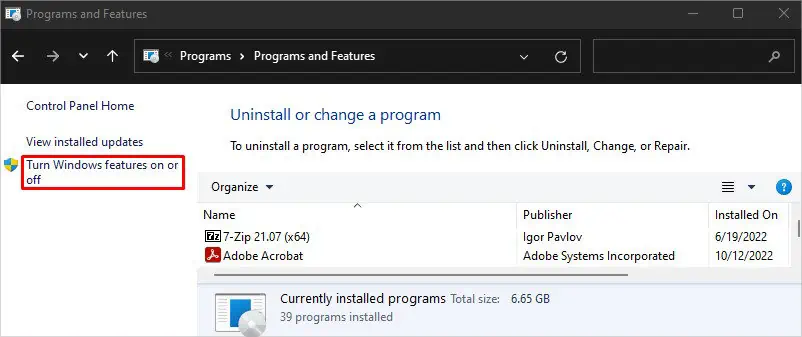
- Navigate to Programs > Programs and Features.
- Click Turn Windows features on or off option on the left of the screen.

- In the new Windows Features window, scroll down and check SMB 1.0/CIFS File Sharing Support.

- Click OK to save changes.
Reset Network Settings
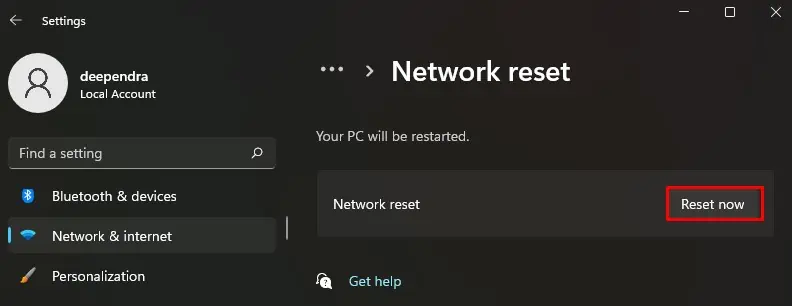
You can try resetting your network settings as a last resort to fix the problem. A network reset resets every customized network setting and resets and removes all the network adapters on your device. Network and connectivity issues will be fixed after resetting the network settings and restarting your computer.
- Open Settings by pressing Windows + I keys at once.
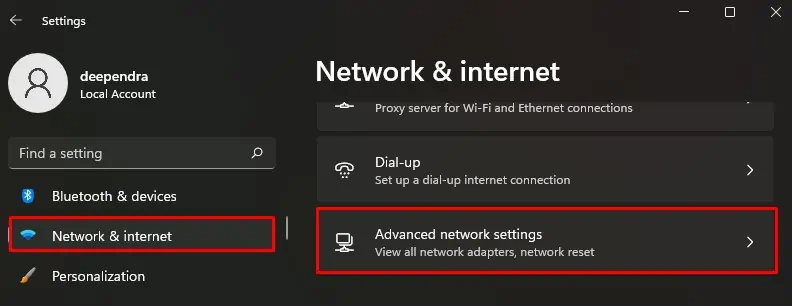
- Select Network & Internet menu on the left.
- Choose Advanced network settings.

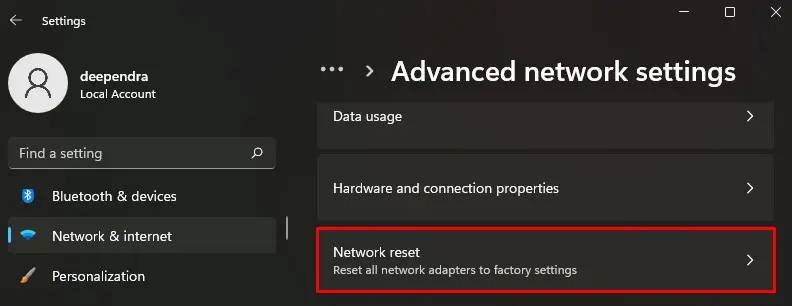
- Select Network reset.

- Click Reset now button.

- Restart your PC.
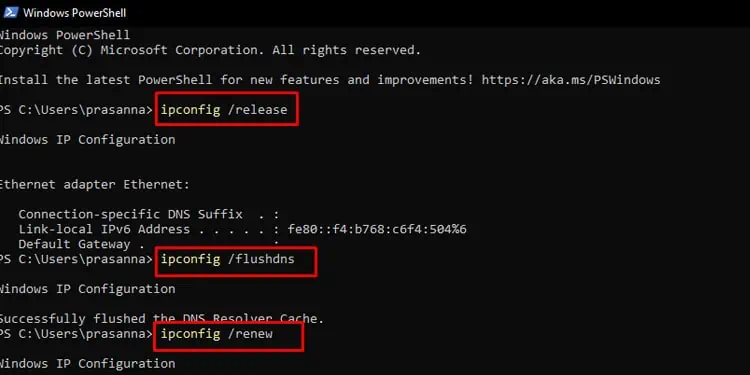
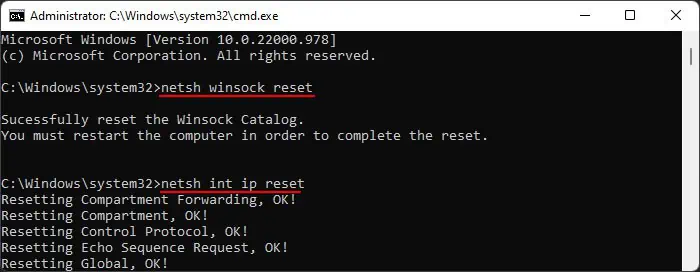
Moreover, if there is an issue with the IP address of your computer, it may not show up in the network. You can release the old IP address and renew it easily. Also, flushing the DNS will help wipe out cached DNS records and resolve connectivity issues.
- Press Windows + R and type cmd.
- Hit Ctrl + Shift + Enter at once and click Yes in the UAC popup.
- Type the following commands. Consider pressing Enter key after each command.
ipconfig /releaseipconfig /flushdnsipconfig /renew
netsh winsock resetnetsh int ip reset

