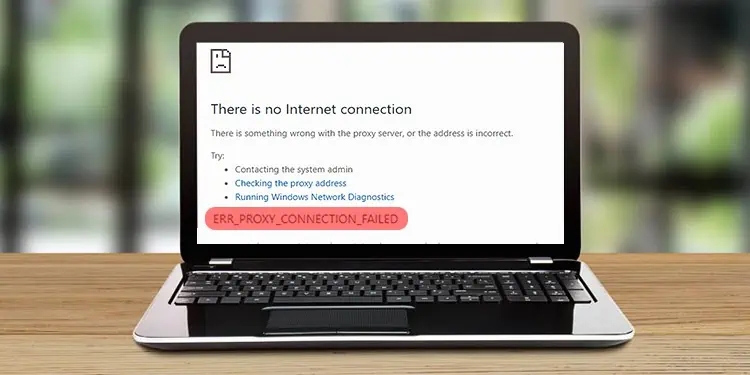
The “err_proxy_connection_failed” error on a web browser indicates a proxy setting that is not configured correctly. So, if you are a proxy user, you should know the exact proxy configuration from your service provider and learn how to set up a proxy server properly.
Meanwhile, if you are not aware of activating any proxy profile on your computer, there are a few adjustments you need to make to get rid of the error. Disabling the proxy server works most of the time. However, it may not always work, and you need to explore further.
How to Fix err_proxy_connection_failed?
Before jumping to the fixes section, please confirm that you are facing the problem only on a specific browser or every browser you use. If the issue lies within a browser only, resetting the browser can help eliminate the error quickly. Meanwhile, restarting the router can also help sometimes.
Otherwise, you can dig deep into the fixes, like changing the proxy server settings and resetting the network settings. Here, we have compiled a list of 6 fixes to help you eliminate the error without further hassles. Let’s get straight into them.
Check Browser Extensions
The first thing you need to do is check the browser extensions. If you have installed an extension that is probably malicious, it can interfere with the proxy settings of your browser. Therefore, it would be helpful to disable the extension and check if the issue persists.
The steps to disable and remove extensions are similar in most browsers. Here, we are referencing Chrome browser for elucidation purposes.
- Launch Chrome browser on your computer.
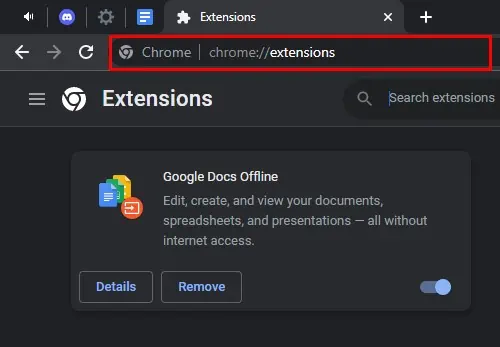
- Go to the address bar and type
chrome://extensions/
- Hit Enter key.
- It will open the Extensions page on your browser.
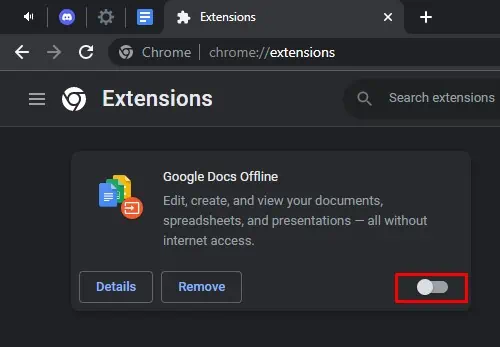
- From the list of extensions, toggle off the extensions one after another.

- Try browsing the web again. If you do not encounter a proxy error now, probably the malicious extension has been disabled.
- Now go on enabling the extension. Also, check if you are experiencing the error after allowing any extension to work.
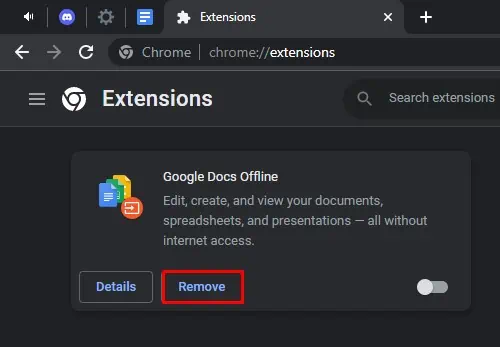
- Click the Remove button if you find the culprit extension. You will no longer face a problem.

Disable VPN
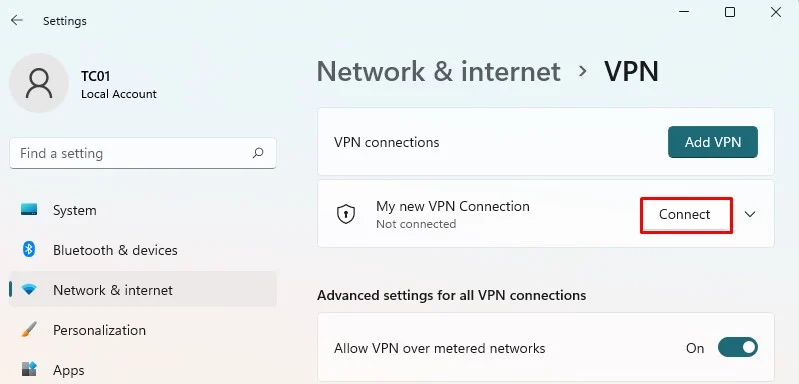
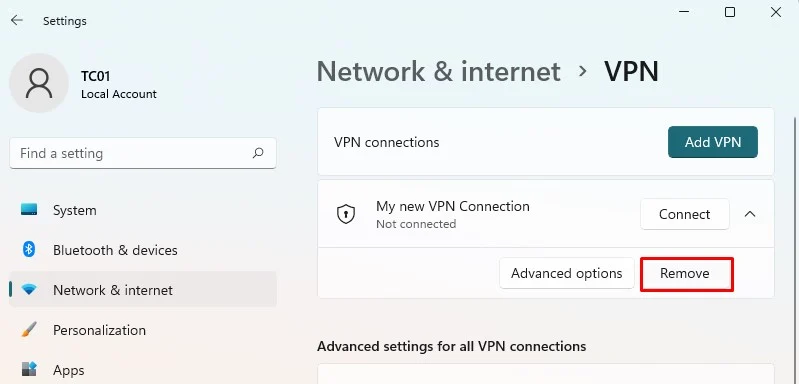
If you have activated a VPN on your PC, it can also be the reason behind the error. You probably have not set up the VPN profile correctly or are using a free VPN service that is causing the error. You can check by turning off any third-party VPN applications or deleting VPN profiles from Windows.
- Open Settings on your computer by pressing Windows + I key simultaneously.
- Go to Network & Internet menu on the left pane.
- Choose VPN on the right.
- Click the Disconnect button beside the VPN connection name.

- Click the Remove button to remove it from your computer.

Change Proxy Server Settings
Next, you need to check if the proxy server is activated in your computer’s network settings. When the proxy service is activated, the computer tries to connect to the Internet via a proxy server, which can result in an error. Here’s how to disable the proxy server:
- Hit Windows + R keys. It will open Run application.
- Type
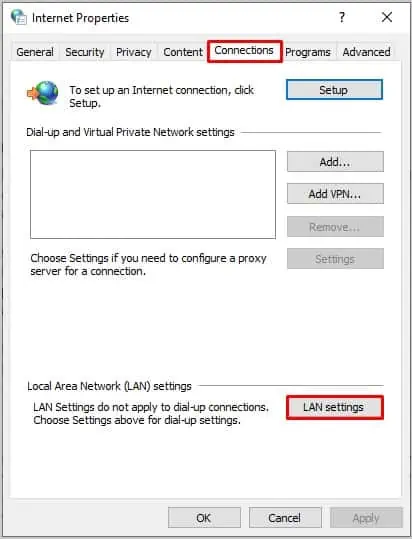
inetcpl.cpland press Enter key to open Internet Properties. - On the Internet Properties window, jump to Connections tab.
- Click LAN Settings.

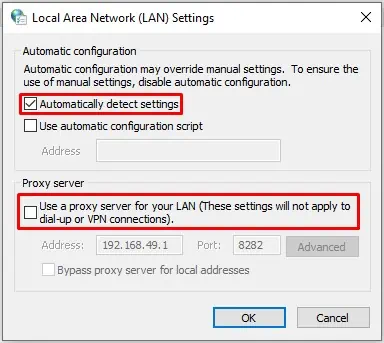
- On the LAN Settings window, uncheck Use a proxy server for your LAN option.
- Check Automatically detect settings.

- Click OK to save changes.
- Try surfing the Internet again and see if the issue persists.
Disable Proxy from Registry Editor
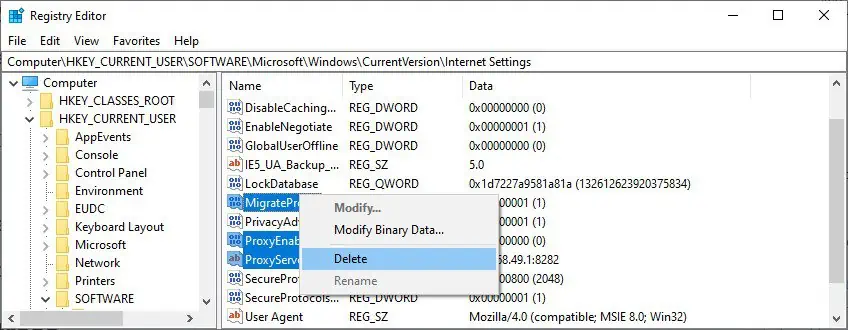
A few keys in the Registry Editor, like ProxyEnable, ProxyServer, and MigrateProxy, are concerned with configuring proxy on your computer. Therefore, deleting these keys will disable the proxy functionality and help you eliminate the error. But before you start making changes, please create a backup of your registry.
- Open Registry Editor. To open it, hit Windows + R.
- Then type
regeditand press Enter. - Copy and paste this location in the address bar:
Computer\HKEY_CURRENT_USER\SOFTWARE\Microsoft\Windows\CurrentVersion\Internet Settings - Locate and delete all 3 keys discussed above.

- Restart your computer and see if the problem is solved.
Renew IP Address and Reset TCP/IP Stack
Some websites do not allow proxy users to access their websites. So, chances are that your IP may have been blocked or flagged, and you are facing the proxy error. In such cases, it can be a good idea to release the current IP and get a new IP from the router. When you renew the IP, you are assigned a new address from the router using the DHCP network management protocol.
- Press Windows + R keys simultaneously.
- Type
cmdin the text field. - Press Ctrl + Shift +Enter at once.
- Click Yes in the popup.
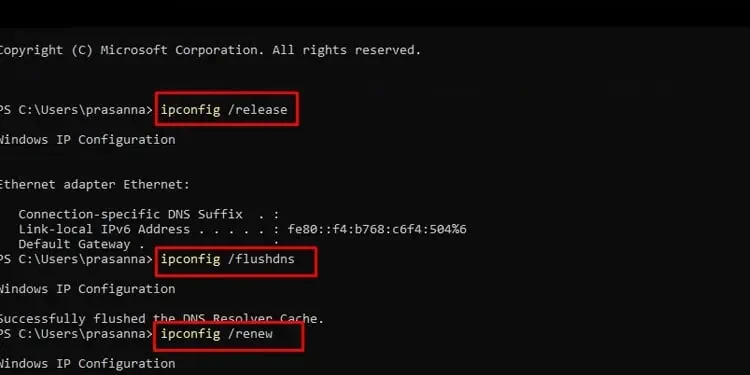
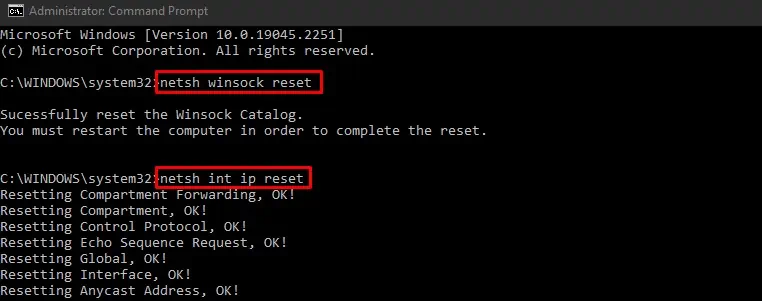
- Copy and paste these commands. Don’t forget to press Enter key after each command.
ipconfig /releaseipconfig /flushdnsipconfig /renew
netsh winsock resetnetsh int ip reset
- After all the commands execute successfully, type
exitand hit Enter key to exit from Command Prompt.
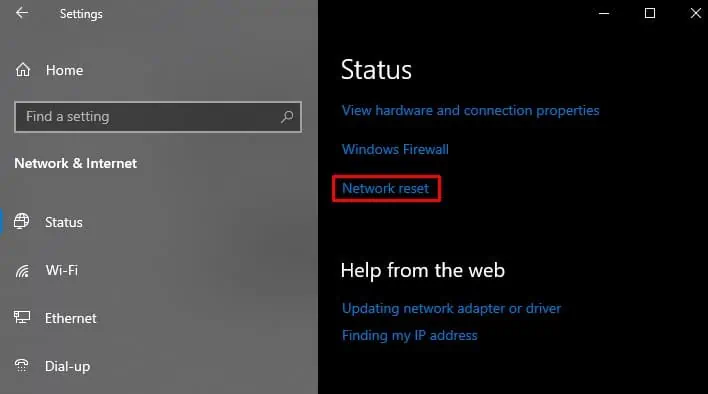
Reset Network Settings
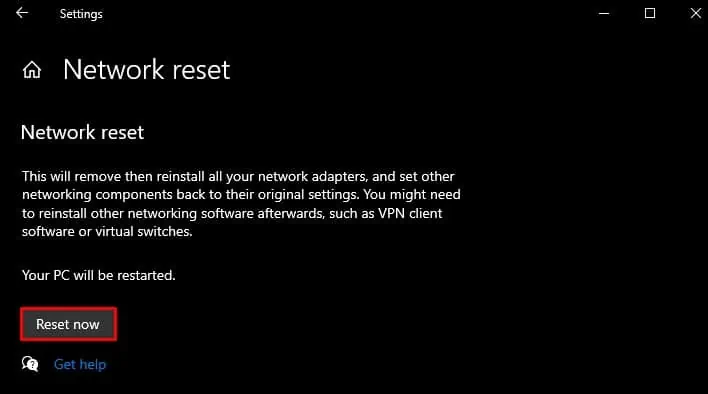
You can reset network settings as a last resort to fix the error. Resetting the network will reset all the customized network settings and revert them to factory defaults. You should not face a problem after resetting the network settings. Else, you need to contact ISP to figure out the problem.
- Open Windows Settings. You can press Windows + I key at the same time to open it.
- Choose Network & Internet from the list of menus on the left.
- Then click Advanced network settings on the right.
- Choose Network reset.

- Tap Reset now.

- Confirm reset in the popup.

