You may prefer to put your PC to sleep mode rather than shutting it down. However, when you check it later, your computer is automatically on again. This can happen now and then if your computer is trying to perform some important tasks like update or backup.
However, if it happens too frequently or for no reason, then you might have a problem at hand. This issue can be caused by things like scheduled tasks, false input from devices, and the Wake on LAN feature. However, these software problems are pretty common and easy to fix.
Troubleshoot with Event Viewer
First of all, you can diagnose this issue from Event Viewer to see what caused your PC to automatically wake up from sleep. So, here’s how you can do so.
- Open the Run dialog box.
- Type
eventvwrand press Enter to open Event Viewer.
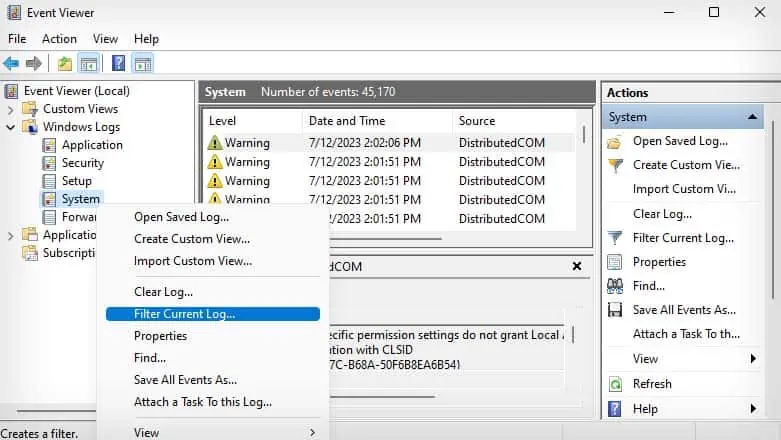
- Go to Windows Logs > System.
- Right-click System, and select Filter Current Log.

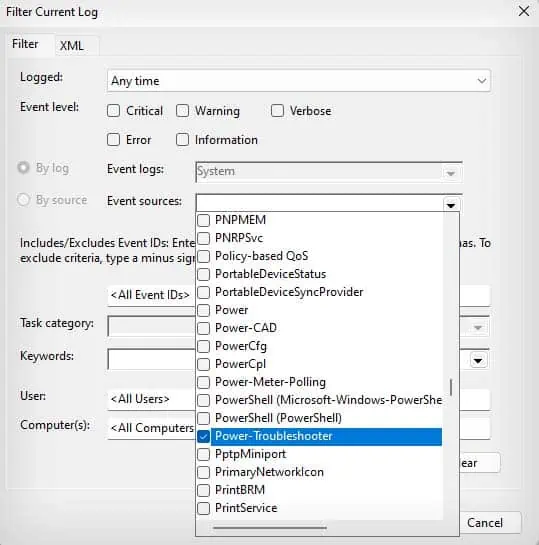
- Next to Event sources, select Power-Troubleshooter from the drop-down menu and press Enter.

- Click OK.
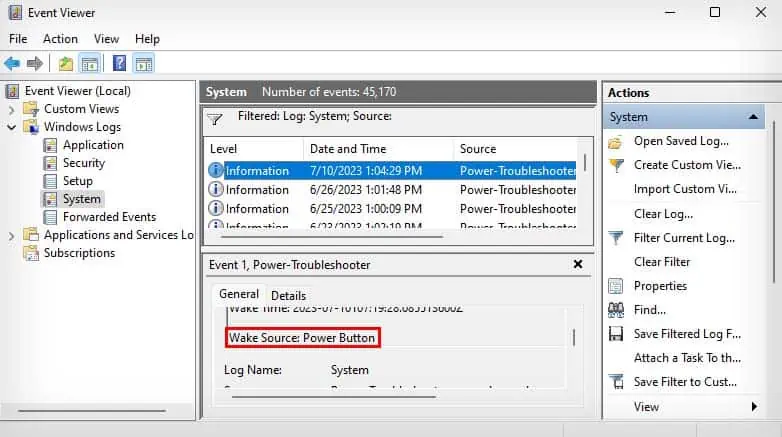
- View the recent logs of when your Computer woke up from sleep mode and what caused it to do so.

Now, you will usually get three types of sources for why your PC woke up from sleep. It might state the power button, in which case, you manually turned on your PC from sleep.
It can also show a device that wakes up your PC or a scheduled task. Read more below to see how you can fix these.
Disable Devices From Waking Up Your PC
If you see a peripheral device like a mouse or controller show up in the Event Viewer, it might be a false input that caused your PC to automatically wake up. Some faulty input devices can cause these kinds of issues. So, you can simply unplug them to stop those devices from waking up your computer.
If it is inconvenient to unplug your peripheral device or if it is an internal device like a network adapter card, I’ll show you how you can disable them from waking up your PC.
- Press Windows + R to open the Run box.
- Type
devmgmt.mscto open Device Manager.
- Locate the device that showed up in the Event Viewer. (If you can’t find the device in Device Manager, you can search it online to see which category it falls under.)
- Right-click the device and select Properties.

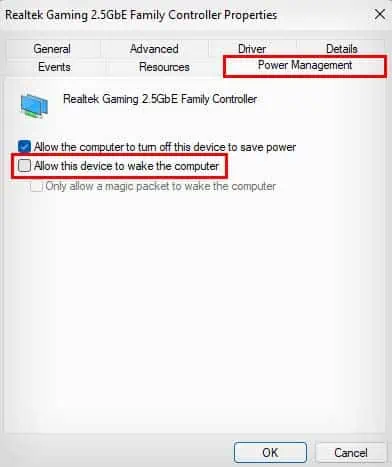
- Go to the Power Management tab.
- Deselect the Allow this device to wake the computer option.

- Click OK.
Disable Wake Timers
Wake timers are basically scheduled tasks that are allowed to wake up your PC from sleep to perform their configured action. These wake timers range from software updates to backups that get performed during your off hours.
Anyway, let’s first see all the wake timers that are currently active on your computer.
- Press Windows + R shortcut to open the Run Utility.
- Type
cmdand press Ctrl + Shift + Enter to open Elevated Command Prompt.
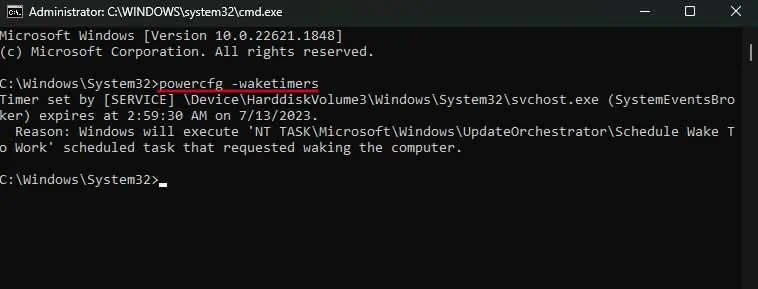
- Enter the command
powercfg -waketimers.
- This will show all of the active scheduled tasks that are allowed to wake up your computer. It will also show the location of the wake timer, so make sure to note it.
Now, you can go to Task Scheduler to manage these wake timers so that your PC doesn’t wake up automatically during sleep mode.
- Open Run Utility.
- Type
taskschd.mscand press Enter to open Task Scheduler.
- Click on Task Scheduler Library at the left sidebar.
- Now, locate one of the tasks that showed up in wake timers.
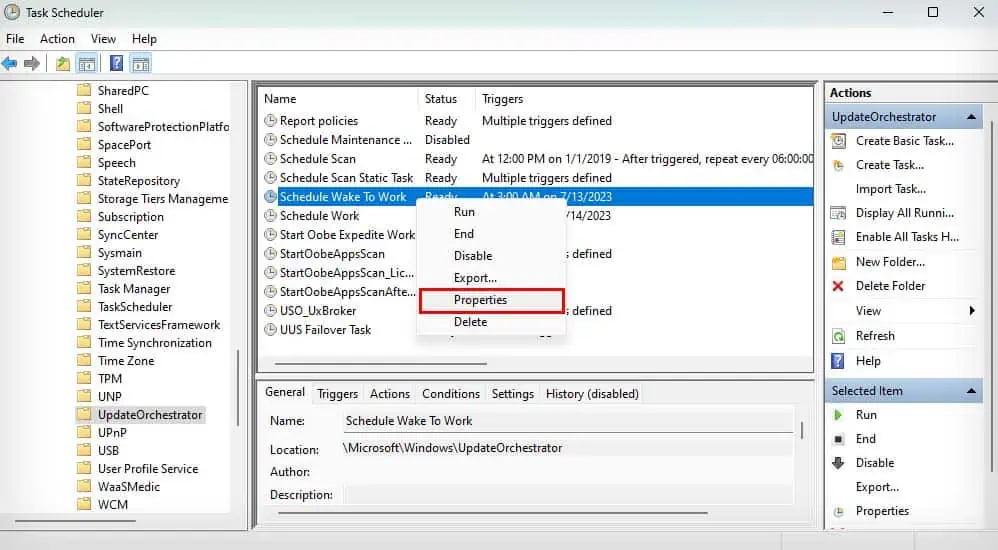
- In my case, it was the UpdateOrchestrator Scheduled Wake to Work task that was waking up my computer. So, I’ll go to Task Scheduler Library > Microsoft > Windows > UpdateOrchestrator.
- Right-click the task and click on Properties.

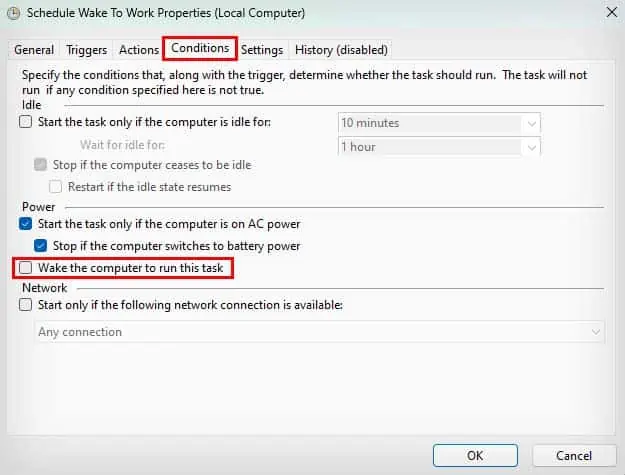
- Go to the Conditions tab, and unselect the Wake the computer to run this task option.

- Click OK.
- Do the same for all the other wake timers that you don’t want to be able to wake your PC up. If a wake timer performs an important task, you can go to the Triggers tab and change its schedule so it doesn’t conflict with your off hours.
If you don’t want to individually disable wake timers on Task Scheduler, you can directly disable the Allow Wake Timers setting. This will stop all scheduled tasks from being able to wake your PC.
- Launch Run Utility.
- Type
controland press Enter to open Control Panel.
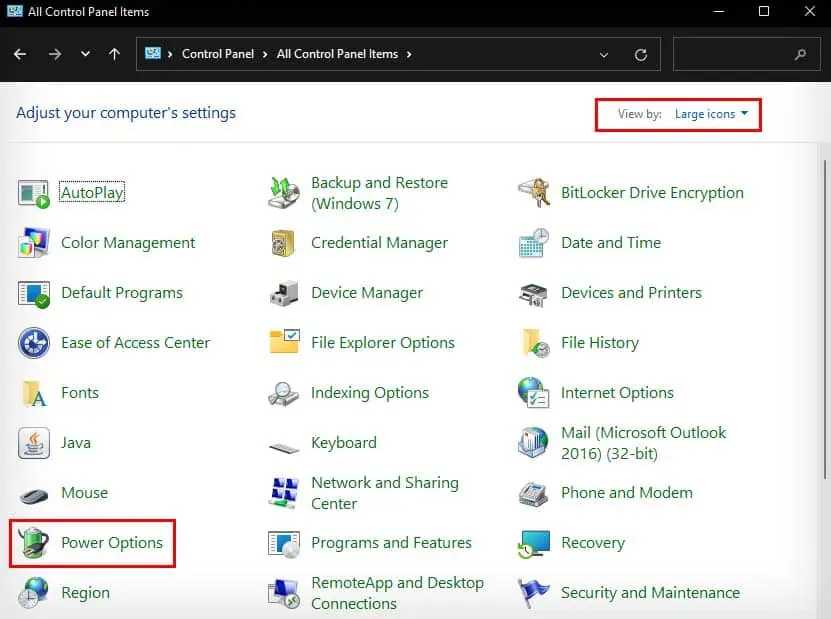
- Next to View by, make sure Large icons is selected.
- Go to Power Options.

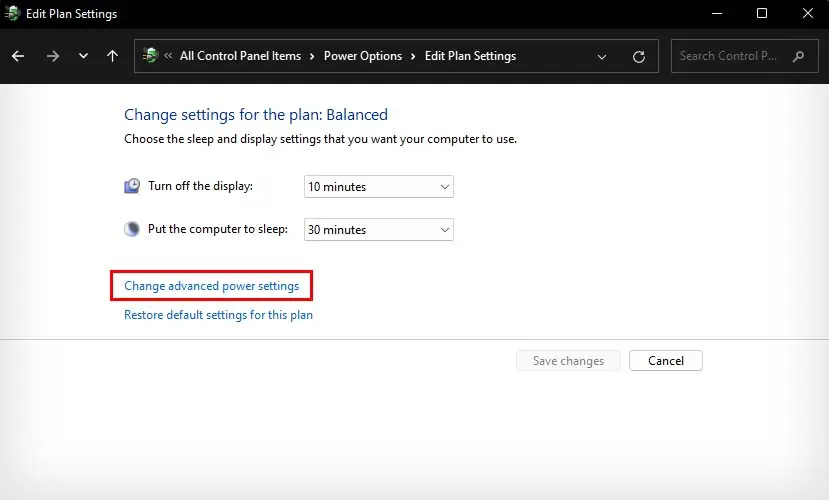
- Click on Change plan settings next to your active power plan.

- Select Change advanced power settings.

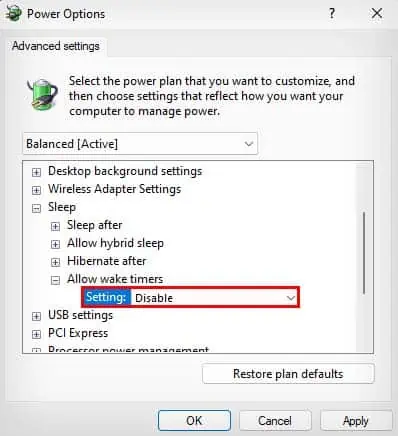
- Double-click on the Sleep tab and expand the Allow wake timers option.
- Make sure to set all the parameters under Allow wake timers to Disable using the drop-down menu.

- Click on Apply and OK.
Disable Automatic Maintenance
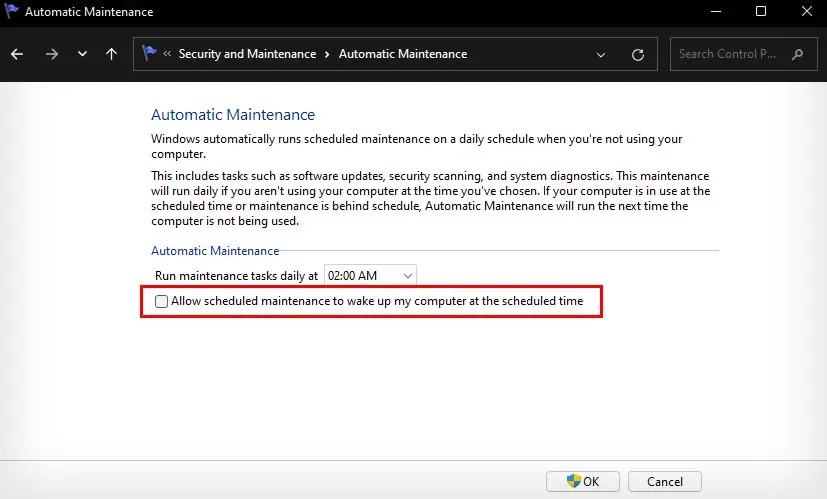
Automatic maintenance is a scheduled task for your Windows computer that does a variety of things. It will perform software updates, security scanning, and system diagnostics. While this task doesn’t have permission to wake up your PC by default, you can assign this permission to it.
So, if this was enabled by accident or by some other software on your computer, you should check to make sure it is disabled.
- Launch Run Utility.
- Type
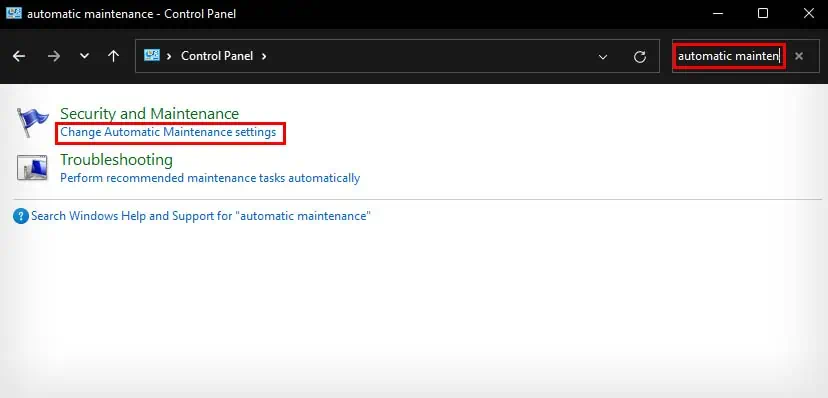
controland press Enter to open Control Panel. - In the search bar, type
automatic maintenance. - Click on Change Automatic Maintenance settings from the search result.

- Make sure the Allow scheduled maintenance to wake up my computer at the scheduled time option is unselected.

- Click OK.
Disable Wake on LAN
Wake on LAN is a feature on computers that allows them to automatically wake up from sleep mode from another device on the network. If you have enabled this feature, your computer might automatically wake up from sleep whenever a device joins your network. So, let’s see how you can disable it.
- Open the Run box using Windows + R.
- Type
devmgmt.mscand press Enter to open Device Manager. - Double-click on Network adapters.
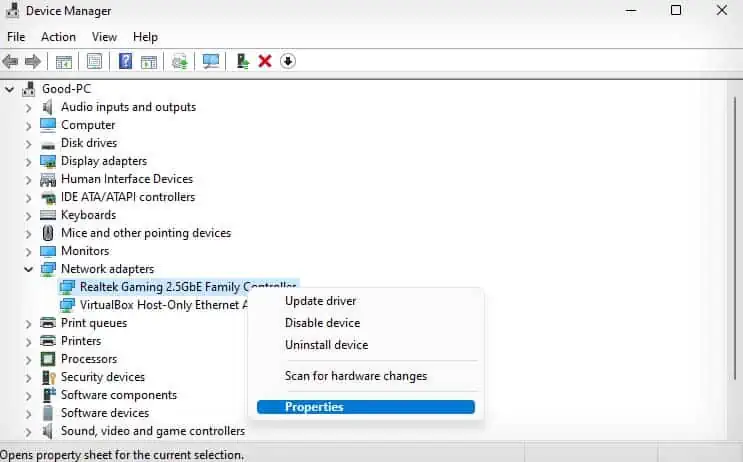
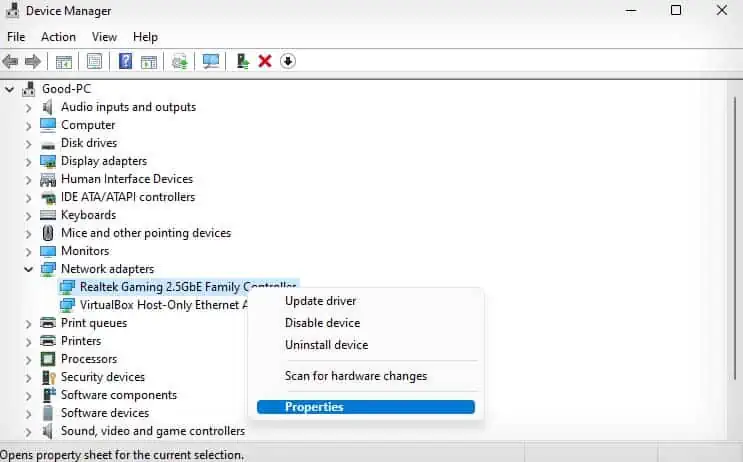
- Right-click your network adapter driver and select Properties. (If you’re connected via Ethernet, right-click your ethernet driver instead.)

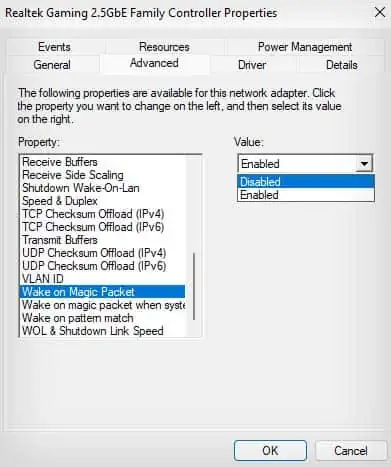
- Go to the Advanced tab and select Wake on Magic Packet.
- Under Value, select Disabled from the drop-down menu.

- Click OK.


