In today’s world, everybody wants a customizable operating system. Hence, Microsoft has also allowed its users to change the font in Windows 11.
Undoubtedly, you’re bored using the same font in Windows. Or, you probably want to have a unique interface of your own.
Thus, in this article, we have explained the easiest way of changing the font style, color, and size in Windows 11.
How Can I Change the Font Style in Windows 11?
There’s no direct method to change the font style in Windows 11. So, this will be a bit tricky if you’ve never tried customizing it.
Nonetheless, we have brought a simple guide that will assist you in changing your font in Windows 11.
Pick Your Font
The initial step is to choose a font. Well, you can pick your desired style within the computer settings. So, here’s the first method of selecting a font via the Control Panel.:
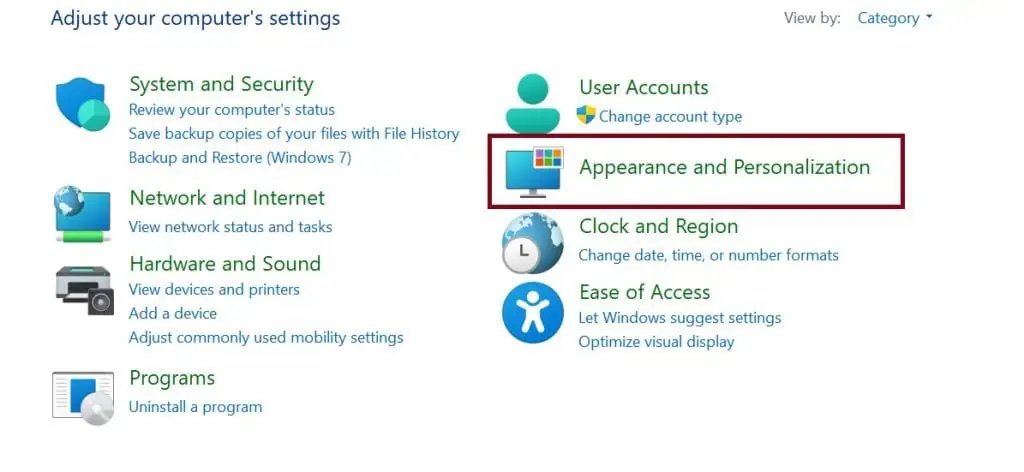
- Visit Control Panel on your PC.
- Then, choose Appearance and Personalization.

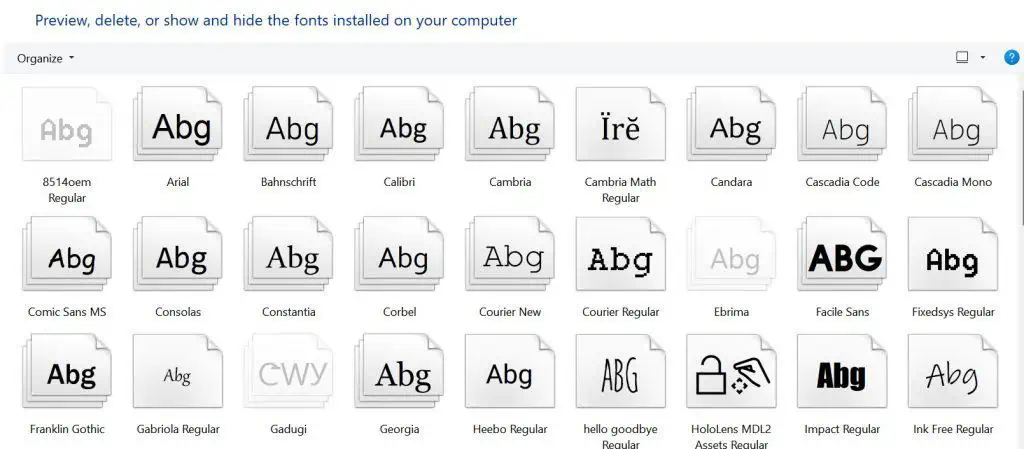
- Next, select Fonts or Preview, delete, show, and hide fonts. This will show you a list of fonts installed on your device.

- Go through the styles and pick a font family you like. Then, double-click on it. If there are font faces available, select the one you prefer.

- Now, note down or memorize the Font name. Note that you cannot copy it.

Another technique of picking a font in Windows 11 is via Windows Settings. These simple steps will help you choose the style you prefer:
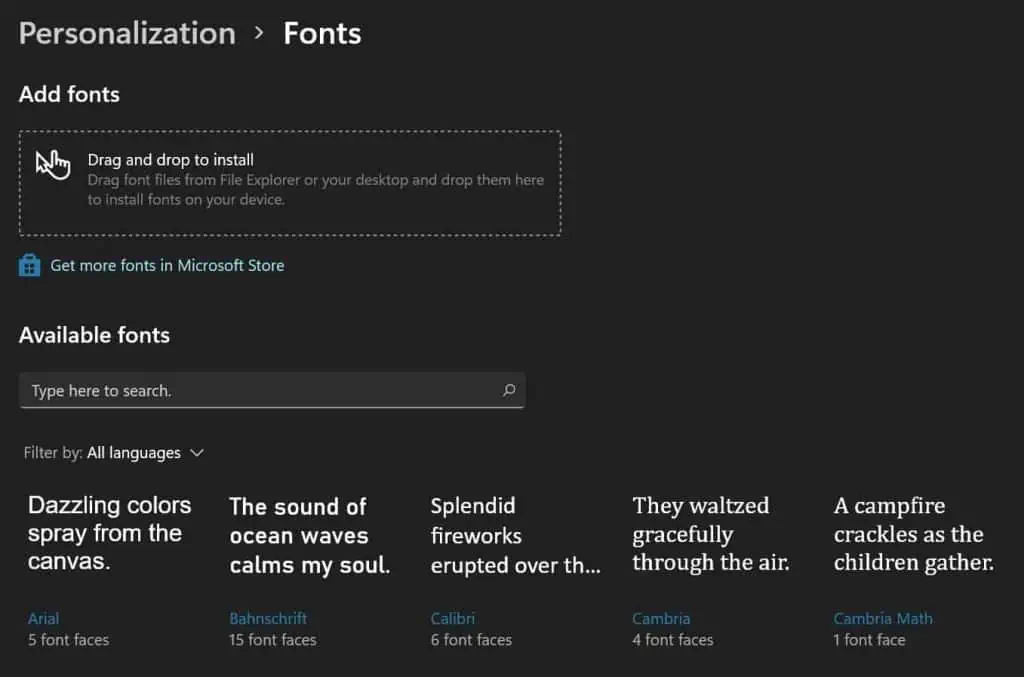
- Navigate to Settings and choose Personalization.

- Scroll down and select Fonts. This will direct you to a window with all the available fonts.

- Click on the font family that suits your PC.

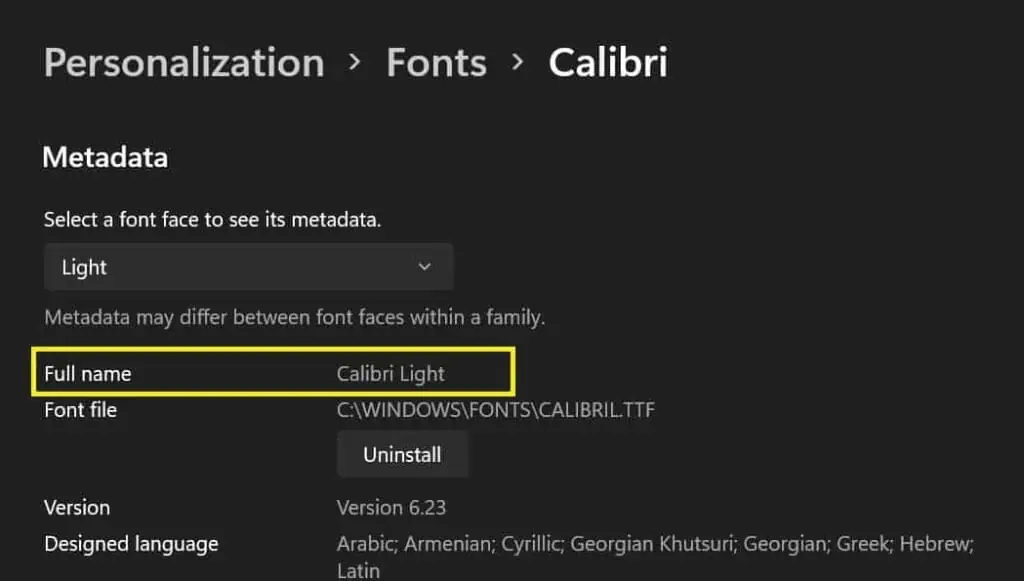
- Next, navigate to Metadata and memorize the full name. Here, you can also choose a font face to check its metadata.
If you didn’t find the style you’re looking for, Microsoft gives you an option to install fonts from their Microsoft Store. Moreover, you can even download fonts for all the languages. However, this will take up a large space on your drive.
Well, if you’re looking for a detailed guide on installing fonts on Windows 11, you can read our other article.
Create a .reg File
Just by picking a font, we can’t make any changes in the system. So, the next step is to create a .rig file that will update the font registry.
Although this sounds a bit technical, anyone can create a .rig file within a minute by following these general steps:
- From the Start menu, open Notepad.
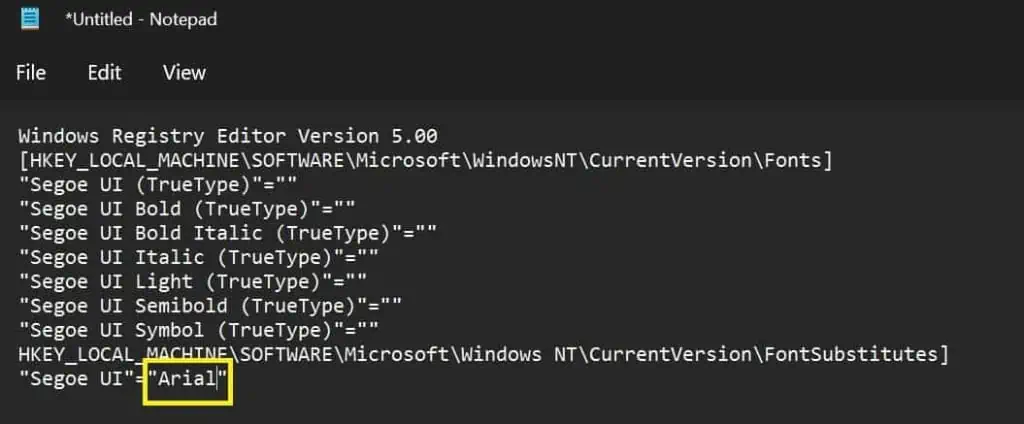
- Now, paste the following code in the text area:
Windows Registry Editor Version 5.00
[HKEY_LOCAL_MACHINE\SOFTWARE\Microsoft\Windows NT\CurrentVersion\Fonts]
"Segoe UI (TrueType)"=""
"Segoe UI Bold (TrueType)"=""
"Segoe UI Bold Italic (TrueType)"=""
"Segoe UI Italic (TrueType)"=""
"Segoe UI Light (TrueType)"=""
"Segoe UI Semibold (TrueType)"=""
"Segoe UI Symbol (TrueType)"=""
HKEY_LOCAL_MACHINE\SOFTWARE\Microsoft\Windows NT\CurrentVersion\FontSubstitutes]
"Segoe UI"="Name of the font you selected"
- Replace the Name of the font you selected with the font name you picked earlier.

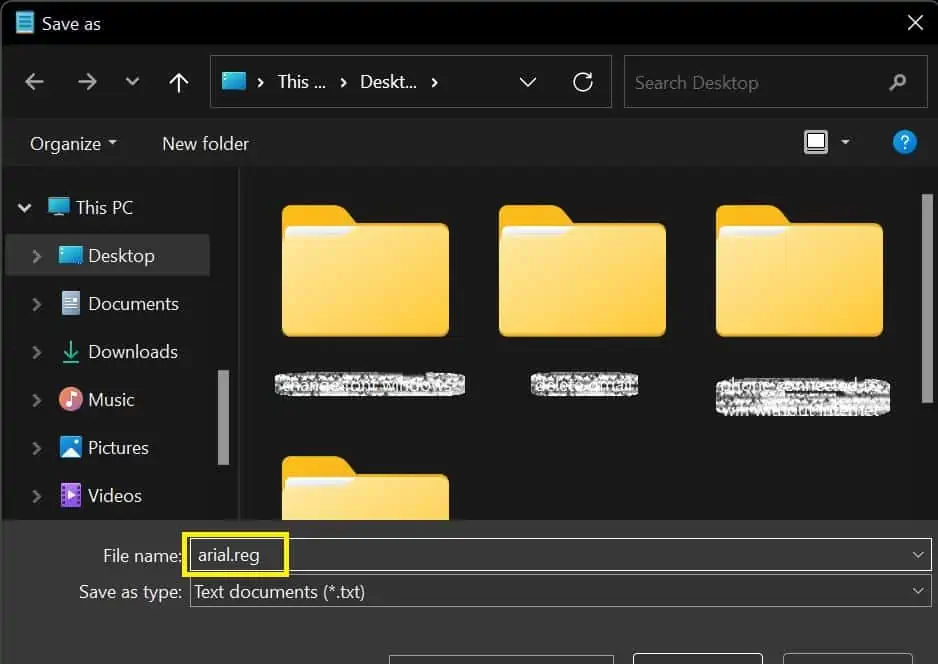
- Save the document with any preferred file name. But don’t forget to add the .reg extension.

Make Changes to the Registry
After saving the document, you have successfully created a program to change the font of Windows 11. However, this will work only after merging the content in the registry.
Go through the guide below to learn how to make changes to the registry:
- Open the saved document you just created.
- Click on Yes to add the information to the registry.

- Confirm the action. Then, you will be notified that the keys and values you generated were updated in the registry. To confirm this, press Ok.

- Now, refresh your PC and check if the font has changed. If it hasn’t, restart your PC, and your font should get updated.
How Do I Reset My Font Style to Default in Windows 11?
Well, you’re probably done playing with different fonts in Windows 11. If you want to return to your old settings, here are some techniques that might help you.
Restore Default Font Settings From Control Panel
Restoring default font settings will bring back all the previous settings on your computer. So, this method might help you reset the font style to default.
You need to follow these steps to restore default font settings on your PC:
- First of all, launch Control Panel from the Start menu.
- Open Appearance and Personalization and select Change Font Settings.

- Now, click on the Restore default font settings button.

- Then, wait for a few moments and refresh your computer.
- Finally, check if your old font is back. If it hasn’t, try restarting your PC and checking it again.
Several users have faced problems trying this technique. So, let’s jump into another method of restoring your font style to default.
Create a Default .reg File
Like you created a .reg File, we need to create another Notepad document here. Following is the source code you need to copy to make changes in your font settings:
- Open Notepad and paste the code above.
- Save the file with any name and add a .reg extension.
- Close the Notepad window and launch the .reg item.
- Click on Yes and select Ok. This updates the font registry.
- Now, try refreshing and restarting your PC. This should bring back your old font.
Windows Registry Editor Version 5.00[HKEY_LOCAL_MACHINE\SOFTWARE\Microsoft\Windows NT\CurrentVersion\Fonts]
"Segoe UI (TrueType)"="segoeui.ttf"
"Segoe UI Black (TrueType)"="seguibl.ttf"
"Segoe UI Black Italic (TrueType)"="seguibli.ttf"
"Segoe UI Bold (TrueType)"="segoeuib.ttf"
"Segoe UI Bold Italic (TrueType)"="segoeuiz.ttf"
"Segoe UI Emoji (TrueType)"="seguiemj.ttf"
"Segoe UI Historic (TrueType)"="seguihis.ttf"
"Segoe UI Italic (TrueType)"="segoeuii.ttf"
"Segoe UI Light (TrueType)"="segoeuil.ttf"
"Segoe UI Light Italic (TrueType)"="seguili.ttf"
"Segoe UI Semibold (TrueType)"="seguisb.ttf"
"Segoe UI Semibold Italic (TrueType)"="seguisbi.ttf"
"Segoe UI Semilight (TrueType)"="segoeuisl.ttf"
"Segoe UI Semilight Italic (TrueType)"="seguisli.ttf"
"Segoe UI Symbol (TrueType)"="seguisym.ttf"
"Segoe MDL2 Assets (TrueType)"="segmdl2.ttf"
"Segoe Print (TrueType)"="segoepr.ttf"
"Segoe Print Bold (TrueType)"="segoeprb.ttf"
"Segoe Script (TrueType)"="segoesc.ttf"
"Segoe Script Bold (TrueType)"="segoescb.ttf"
[HKEY_LOCAL_MACHINE\SOFTWARE\Microsoft\WindowsNT\CurrentVersion\FontSubstitutes]
"Segoe UI"=-
Create a Manual .reg File
Reportedly, Windows 11 uses Segoe UI Variable as its default font. So if the default .reg file doesn’t work, you can create another document setting the font name to Segoe UI Variable.
However, for some reason, few computers have a different default font than others. In such a case, you need to know the custom default font used on your PC.
How Can You Change Font Size in Windows 11?
It becomes difficult to focus on the screen if your interface has a small font size. So, increasing the font helps to make Windows content look more readable.
Furthermore, people suffering from short-sightedness and long-sightedness always face vision issues. Therefore, Windows has made a feature available to customize the font size from its settings.
Read and apply these steps to change the font size in Windows 11:
- Open Settings and navigate to Accessibility.
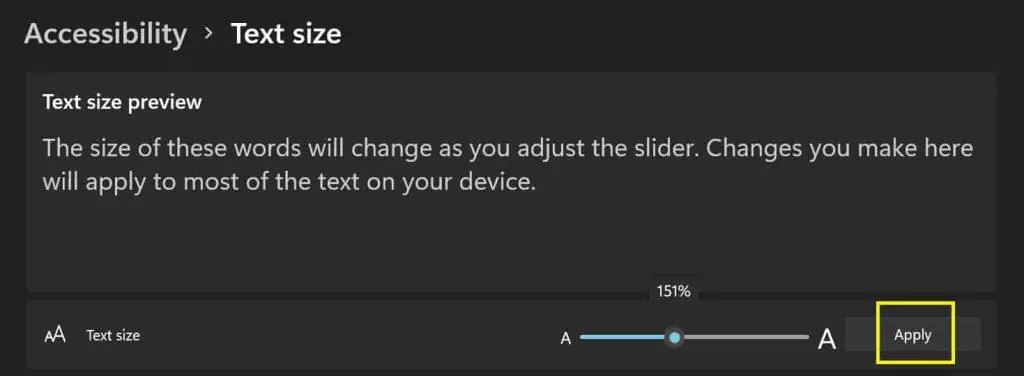
- Under Vision, choose Text Size.

- Now, increase the font size by dragging the slider to the right. If you wish to decrease font size, drag it to the left. And, if you want the default setting, set the text size to 100%.
- Once done, click on the Apply button.
- Now, wait about a minute for the settings to change.
If you also have a mac and want to change it’s fonts size, read this article.
How to Change Font Color in Windows 11
Very few know that changing font color is possible in Windows 11. To learn more, follow these basic steps:
- Navigate to Settings and select Personalization.

- Select Themes and go to Contrast Themes.

- Now, select one of the themes provided in the drop-down.
- Then, click on the Edit button.
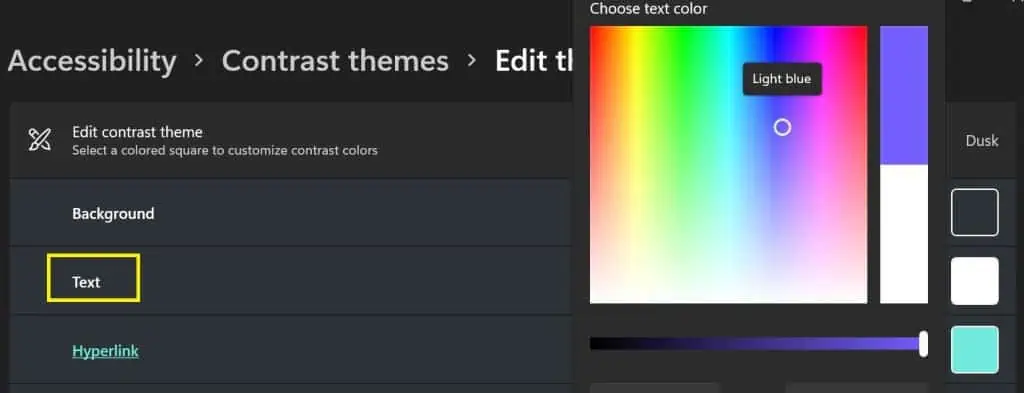
- Next, choose the color box beside the field Text.

- Input the hex code or select a color from the palette.
- Finally, click on Save As and set the theme name.
- Now, wait a few seconds for the system to change the font color on your screen.

