Cloning a hard drive is the best way to transfer the full contents of one hard drive to an SSD, especially if the drive contains the operating system.
It is particularly useful when upgrading your computer with SSD.
It is possible to use a hard disk duplicator or even a simple command– dd on Linux. However, if you don’t have access to such a device or operating system, your only option is to rely on third-party cloning software.
Many free and open-source applications are also available on the internet for this purpose. You can use any application you want after verifying its reliability and checking user reviews.
Here, I’ll be using an open-source application, Clonezilla Live USB to show you the steps of the cloning process.
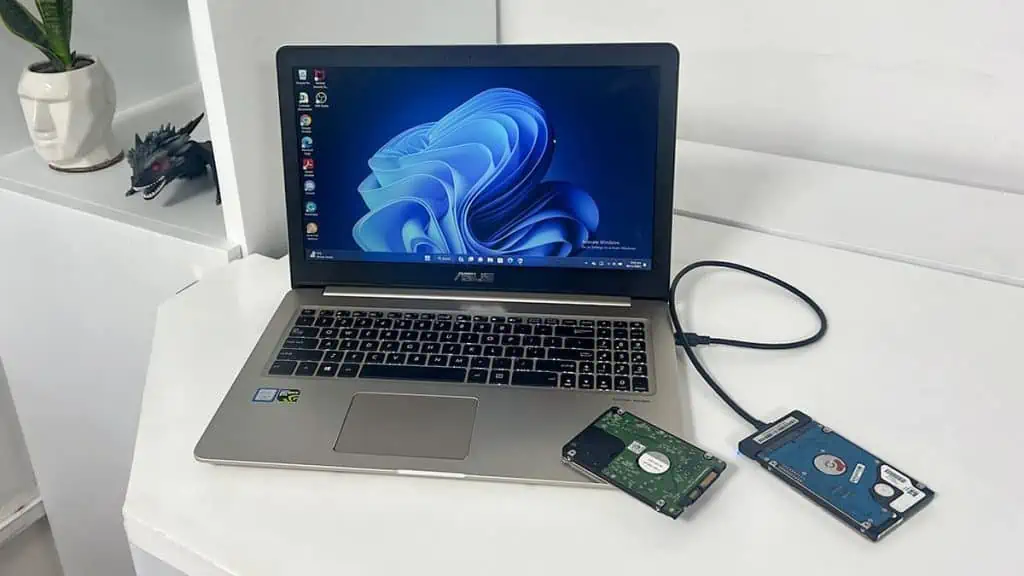
Prepare and Check Storage Drives
Trying to clone your hard drive to a corrupt SSD or one with a smaller size may abruptly stop the process. So, it’s best to check both the hard disk and the SSD before starting the cloning process.
Here is the list of a few other things that you need to keep in mind,
- Make sure that the SSD drive that you are cloning to, has the same or higher capacity than the original hard drive. Most applications won’t allow cloning to a smaller drive.
- Back up all necessary data from the SSD. The cloning process will re-write the entire contents of the drive.
- Before proceeding with the cloning, check the health of the SSD and the hard drive and make sure they are functioning properly.
- If you wish to clone an encrypted drive, ensure that the software you are choosing can clone that drive.
- Make sure to connect both HDD and SSD into your computer. You can also use USB adapters to connect one or both of the devices.
Download and Prepare Clonezilla Live USB
If you want to use any other application rather than Clonezilla, make sure to download it from its official website or source.
Also, read the instructions carefully on how to download and run it based on your system.
For Clonezilla, the process is to prepare a live USB and clone the hard disk from an offline environment. To prepare the live USB flash drive,
- Go to the official Clonezilla download webpage. Click on the Debian or Ubuntu-based stable version. I used the Debian version for this guide.

- Set CPU architecture to amd64 and file type to zip. Click Download.
- Insert a USB flash drive into your PC and format it to a FAT32 file system. Make sure to back up all important data beforehand.
- Extract all the contents of the ZIP file you downloaded into the USB flash drive.


Boot Using Clonezilla Live USB
After preparing the live USB, boot into this USB to run the Clonezilla utility. The easiest way is to change the boot priority option on the BIOS. But you can also use other methods if you want.
- Restart your PC and get inside its BIOS without removing the USB flash drive.
- Change the boot priority order to set the USB drive containing Clonezilla live as the highest priority boot device.
- Save the changes and exit the BIOS.
- After booting into the USB drive, select Clonezilla live (default option).


Carry Out the Cloning Process
Then, select the proper options to clone one local disk drive to another on the Clonezilla interface.
Make sure to read the instructions on the screen while following the steps below:
- Pick your language and keyboard preferences.
- Highlight Start_Clonezilla and press Enter.
- Choose device-device and press Enter.
- Select Beginner mode.
- Then, select disk_to_local_disk.
- Pick the hard drive as the source disk. It will usually be sda or sdb. Check the name as well.
- Then, pick the SSD as the target disk.
- Select -sfsck, -k0 and then -p on the three successive tabs.
- Follow the on-screen prompts, where you need to press Enter or type
yand press Enter. - Wait for the cloning process to complete.


