There are a variety of ways you can create backup files on your computer. Windows also provides many ways to automatically back up your files in set periods. However, if you let it run long enough, your backup files can soon hog up your drive space.
While backing up files is an important feature of Windows OS, unmanaged file backups can slow down your PC, fill up your drive space, and affect the overall performance of your PC. So, it is a good idea to periodically delete redundant backup files or disable them altogether if you do not need backups.
Clear Windows Backup And Restore
The Windows Backup and Restore utility in the Control Panel can be configured to automatically backup files chosen by the system in set periods.
You can also do this manually and choose files to back up yourself. However, if you let it run on automatic with short intervals, it takes up a significant amount of your storage space. So, you should remove old backup versions that are no longer useful.
- Search Control Panel in the search box and click on it
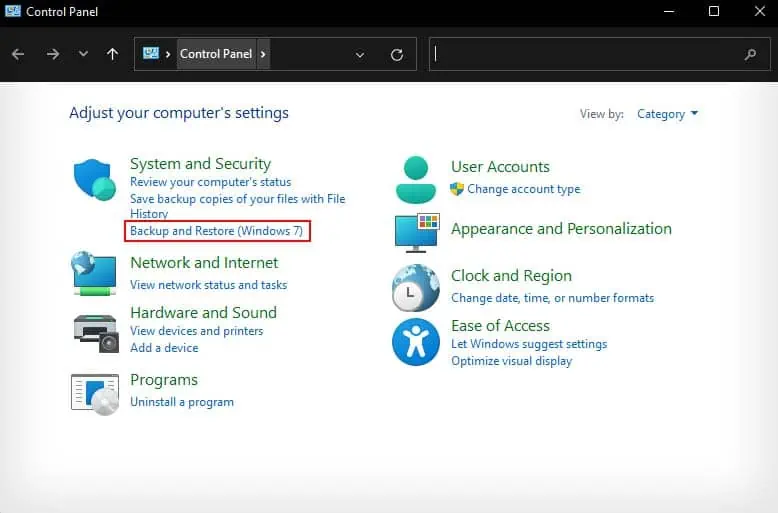
- Select Backup and Restore under System and Security.

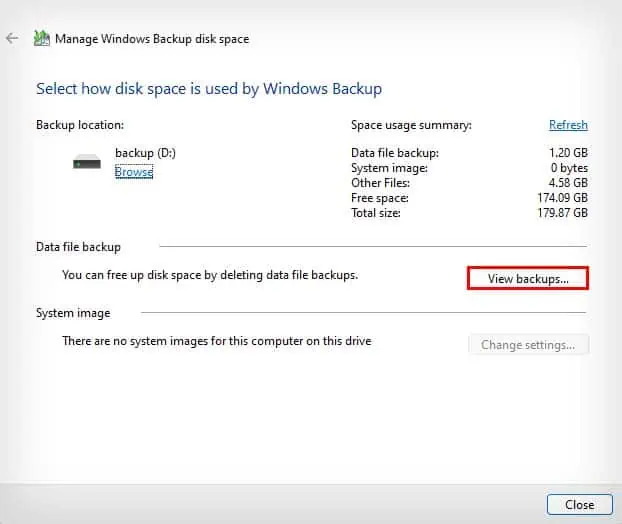
- Click on Manage Space and select View backups.

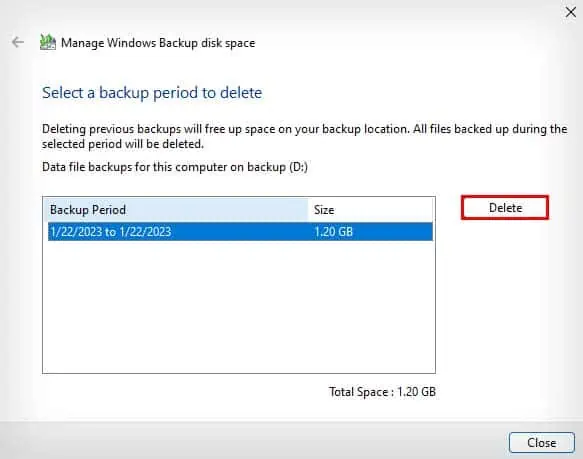
- Select the backup versions you want to delete and click on Delete.

- Confirm Delete again.
- After the process completes, click on the Close button.
If you want to disable automatic backup, you can simply click on Turn off schedule from Backup and Restore in the Control Panel.
Cleanup Your File History
If you’ve enabled file history backup in your computer, it periodically saves copies of your files to a set drive. You can also configure it to store the saved files for only a limited time. However, if you frequently add, edit, or remove files, your drive will constantly get cluttered with backup copies.
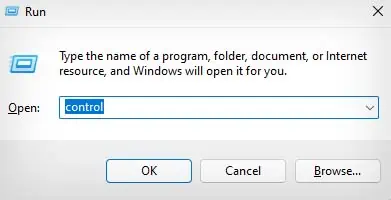
- Launch the Run dialog box by pressing Windows + R hotkey.
- Type and Enter
controlto open the Control Panel.
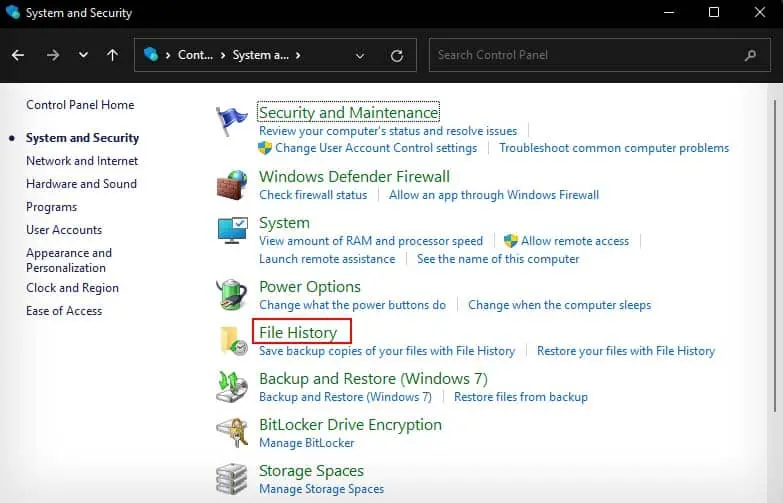
- Go to System and Security and click on File History.

- In the left sidebar, select Advanced settings.
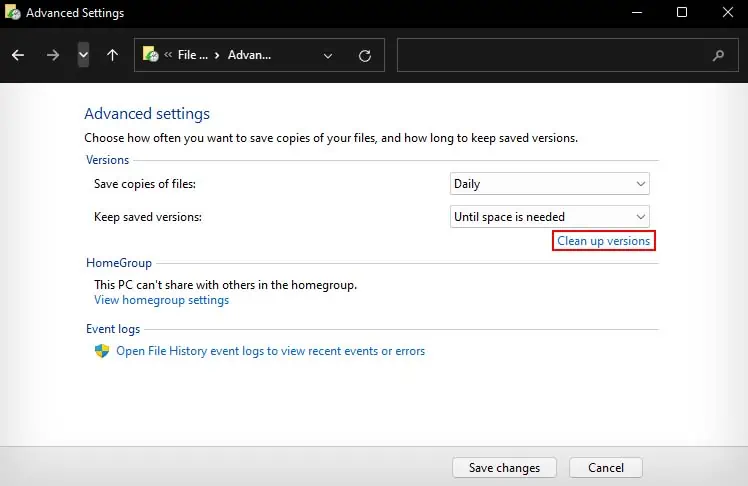
- In Advanced settings, select Clean up versions.

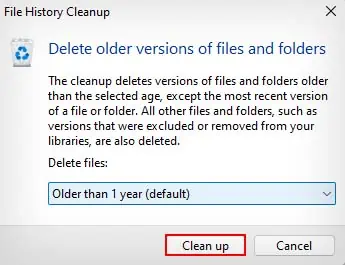
- Select how far back you want to delete your backups from the dropdown menu.

- Click Clean up.
If you want to disable your file history backup, simply click on the Turn off button in the File History window.
Remove System Restore Points
A system restore point is like the backup for your Windows OS files, drivers, and settings. It gets automatically created every time you update your Windows, perform significant changes on your computer, or every seven days if no restore point was created for the former reasons.
So, if you’ve enabled system restore, it can accumulate quite a few Windows OS backups, and occupy significant storage space.
- Press Windows + R to open the Run box.
- Type
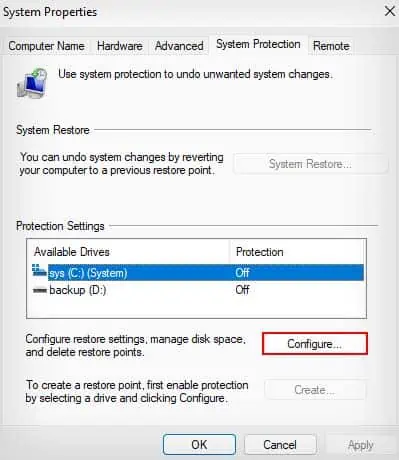
SystemPropertiesProtectionand press Enter to open System Properties. - In the System Protection tab, select your system restore drive. (It should state On under Protection.)

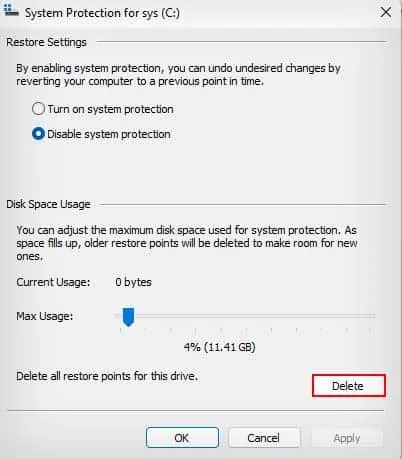
- Click on Configure and select Delete in the new window.

- Select Continue to confirm and click on Close.
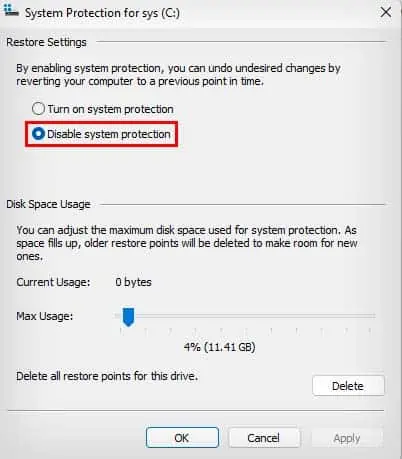
If you want your system to no longer automatically create system restore points, you can disable it directly from System Properties.
- In System properties, click on the System Protection tab.
- Select Configure.
- Choose Disable system protection in the new window.

- Click Apply and select Yes.
- Click on Ok to close the window.
Perform Disk Cleanup
The Disk Cleanup is an excellent utility to clear temporary files, cache files, and unnecessary software. It can also be used to clean up backup files and redundant system restore points to make up space in your drive.
If you had backup files from a previous installation of Windows, you can use the Disk Cleanup tool to remove it as well.
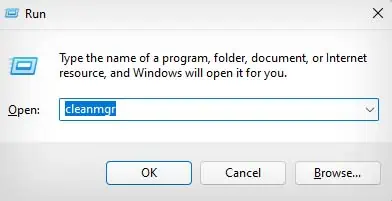
- Launch Run Utility.
- Type
cleanmgrand press Enter.
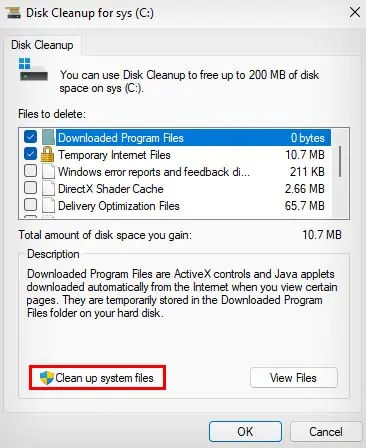
- Select any drive and click OK.
- Click on Clean up system files.

- Select your OS drive and click OK.
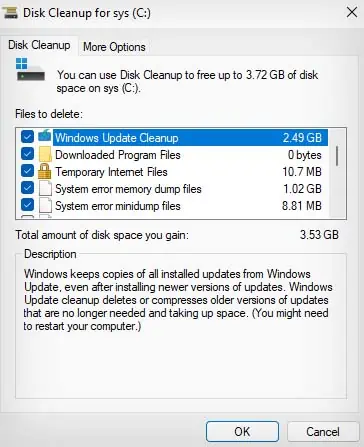
- Choose the type of files you want to delete. Selecting a file will describe it.
- Some of the unnecessary files that hog up storage are:
- Windows Update Cleanup
- Temporary Windows installation files
- System error memory dump files
- Thumbnails

- If you had a previous installation of Windows, it should also be listed in Disk Cleanup. If you have recovered all the important files from the previous Windows installation’s backup, you can delete it as well.
- After selecting all the files you want to delete, select Ok.
- Click on Delete Files in the prompt.
- Restart your PC.

